Page 2 - INDEX; ABOUT THE BBQ
INDEX ABOUT THE BBQ Features Technical Information Test Point Pressure Gas Consumption Weight Accessories Information IMPORTANT INFORMATION AND SAFETY What happens if Gas Leaking What happens if Fire Flare-Up Control Setting up the Drip Tray Warning Labels & Stickers Fire Prevention BARBECUE POS...
Page 3 - ABOUT THE BARBECUE; Features
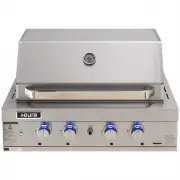
ABOUT THE BARBECUE Features 304 grade stainless steel double skin hood 304 grade stainless steel cooking chassis 304 grade stainless steel fire box with insulation 304 grade stainless steel tube burners 304 grade stainless steel flame tamers 4 burner unit 2 halogen lights Large cooking area 660mm wi...
Page 4 - Natural gas conversion kit is (to be sold separately)
For outdoor use only. Please read the instructions carefully and be sure your barbecue is correctly installed and assembled. Failure to follow these instructions may result in serious injury or damage! Please retain the manual for future reference. Conversion to natural gas should only be carried ou...
Page 5 - IMPORTANT INFORMATION AND SAFETY; doubts, call the retailer or visit the Euro Appliances website.; Gas Leaking; Turn the Gas Cylinder off.; For more information see the Gas Leak Test Procedure; If the fire is at the barbecue, turn the gas off at the cylinder.
IMPORTANT INFORMATION AND SAFETY It is important that you READ THE MANUFACTURER'S INSTRUCTIONS thoroughly. If you have any questions or doubts, call the retailer or visit the Euro Appliances website. http://www.euroappliances.com.au/ What happens if? Gas Leaking 1. Turn the Gas Cylinder off. 2. Vent...
Page 7 - BARBECUE POSITIONING; At least 25% of the total wall area is completely open and
BARBECUE POSITIONING This appliance shall only be used in an above ground open-air situation with natural ventilation, without stagnant areas, where gas leakage and products of combustion are rapidly dispersed by wind and natural convection. Any outdoor enclosure in which the appliance is used shall...
Page 8 - GAS CYLINDER INFORMATION; Important
GAS CYLINDER INFORMATION 1. This appliance is designed to be used with a gas cylinder not exceeding (Australia 9KG) 2. The gas cylinder supply valve must be turned off when the appliance is not in use. 3. Gas cylinders must be stored outdoors, out of reach of children and must not be stored in a bui...
Page 9 - Gas Leak Test Procedure; every time you reconnect your regulator to the BBQ gas bottle.
Gas Leak Test Procedure The BBQ gas bottle, regulator & hose assembly should be checked for leaks, using the soapy water leak test, every time you reconnect your regulator to the BBQ gas bottle. You should also test after any long period of non-use, such as at the beginning of BBQ season In a sm...
Page 10 - LIGHTING YOUR BARBECUE
LIGHTING YOUR BARBECUE This barbecue is designed for use outdoors, away from any flammable materials. It is important that there are no overhead obstructions and that there is a minimum distance of 50mm from the side or rear of the appliance. The barbecue must be used on a level, stable, non-flammab...
Page 11 - unnecessarily as heat is lost every time the hood is opened.
Flat Plate / Flat-Ribbed Plate The burners heat the griddle plate directly, which then cooks the food on contact. These allow for the cooking of smaller items, such as seafood, which could fall through the spaces of a grill. They are also suitable for cooking items that require high-temperature/ sho...
Page 12 - CLEANING AND CARE; Cleaning the burner assembly
CLEANING AND CARE All cleaning and maintenance should be carried out when the barbecue is cool and with the fuel supply turned OFF at the gas cylinder after each use. DO NOT mistake brown or black accumulation of grease and smoke for paint. Interiors of gas grills are not painted at the factory (and...
Page 13 - Abnormal Operation
Spider and Insect Spiders and insects can nest in the burners of the grill and cause the gas to flow from the front of the burner. This is a very dangerous condition, which can cause a fire to occur, thereby damaging the grill and making it unsafe to operate. When to look for Spiders and Insects You...
Page 14 - cooktops and grills. Spray, wait, wipe and easy to use, proves our high; AKTIVO Easy Off Oven + BBQ Cleaner; a clean surface with a fresh mint fragrance.; AKTIVO Stainless Steel Polish
Recommended Cleaning Product AKTIVO Easy Off Oven + BBQ Cleaner AKTIVO Easy Off Oven + BBQ Cleaner removes grease, oil and carbon build-up. With a powerful, non-caustic, low fuming formulation, the active ingredients will lift away the grease, grime, fat and burnt food from your oven, microwaves, co...
Page 15 - RECOMMENDATIONS
RECOMMENDATIONS Have propane (Aus)/ULPG (NZ) cylinder (LP units) filled by an authorised LPG supplier. Check all gas line connections for leaks with a soapy solution prior to lighting and tighten until bubbles disappear. Preheat the barbecue for 2 - 5 minutes before cooking. After cooking, turn knob...
Page 16 - ASSEMBLY INSTRUCTIONS; Ensure all transit protection is removed prior to assembly.
ASSEMBLY INSTRUCTIONS Ensure all transit protection is removed prior to assembly. 1. Foot Assembly 2. Flame tamer assembly 3. Cooking grid/plate assembly 4. Warming rack assembly
Page 20 - Replace the LED light; Removed the control knob.
Control Knob LED Always keep the plug in dry condition. Replace the LED light 1. Removed the control knob. 2. Unscrew the knob bezel. 3. Take off the unit and disconnect the cable. 4. Replace a new one and reassemble
Page 21 - BUILT IN INSTALLATION; DO Not block any ventilation slots of the BBQ.; Product Dimension
BUILT IN INSTALLATION The construction of the enclosure and installation of the bbq should be carried out only by authorised persons. The barbecue must also be secured to the enclosure to prevent it being pulled out and straining the gas connections. 1. Please follow these instructions for installat...
Page 24 - NATURAL GAS CONVERSION PROCEDURE; Conversions only to be done by an authorized person.; Tools required; Socket head screw driver (Included with the product); Gas Piping; operation before leaving.
NATURAL GAS CONVERSION PROCEDURE Please contact Eurostyle to request a Natural Gas Regulator Kit if the appliance is being converted to Natural Gas. Conversions only to be done by an authorized person. A restraining tether or bracket is required to be fixed to the appliance and to the wall within 50...
Page 25 - Instructions for converting the main burners; Unscrew and remove the rear panel pictured.
Instructions for converting the main burners 1. Unscrew and remove the rear panel pictured. 2. Unscrew the main burner securing screws and remove the burner, sitting it alongside. 3. With the burner removed, you will see the brass gas jet which is screwed into the end of the valve. Using the socket ...
Page 26 - WARRANTY; What Is Covered In The Warranty
4. Reassemble the burner. Note: Please make sure the gas valve is located well inside the main burner tube when re-installing the burners. 5. Repeat the above steps for the other main burners WARRANTY What Is Covered In The Warranty See our policy warranty in our website http://www.euroappliances.co...