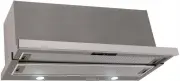
Euro Appliances EA60XR - Manuals
User Manual Euro Appliances EA60XR


Summary
Content 1 3 6 9 9 Safety Instructions Installation Start using your Cooker Hood Troubleshooting Maintenance and Cleaning Environmental Protection 13
1 SAFETY INSTRUCTIONS This manual explains the proper installation and use of your cooker hood, please read it carefully before using even if you are familiar with the product. The manual should be kept in a safe place for future reference. Never to do: • Do not try to use the cooker hood without th...
3 INSTALLATION (VENT OUTSIDE) MOUNTING OF THE V-FLAP If the cooker hood does not have an assembled V-flap 1, you should mount the half-parts to its body. The images only show an example of how to mount the V-flap, because the outlet may vary according to different models and configurations. To mount...
Euro Appliances Range Hoods Manuals
-
 Euro Appliances EA60STRS
User Manual
Euro Appliances EA60STRS
User Manual
-
 Euro Appliances EA90STRS
User Manual
Euro Appliances EA90STRS
User Manual
-
 Euro Appliances EAF600WH
User Manual
Euro Appliances EAF600WH
User Manual
-
 Euro Appliances EAGL90SX
User Manual
Euro Appliances EAGL90SX
User Manual
-
 Euro Appliances EBB900SS
User Manual
Euro Appliances EBB900SS
User Manual
-
 Euro Appliances EBB900SS2
User Manual
Euro Appliances EBB900SS2
User Manual
-
 Euro Appliances EM70UMS
User Manual
Euro Appliances EM70UMS
User Manual
-
 Euro Appliances EP52UMS2
User Manual
Euro Appliances EP52UMS2
User Manual
-
 Euro Appliances EP900ISX2
User Manual
Euro Appliances EP900ISX2
User Manual
-
 Euro Appliances EP900SWSX
User Manual
Euro Appliances EP900SWSX
User Manual
-
 Euro Appliances EP900UMS
User Manual
Euro Appliances EP900UMS
User Manual
-
 Euro Appliances ERB120SS
User Manual
Euro Appliances ERB120SS
User Manual
-
 Euro Appliances ERH85UMS
User Manual
Euro Appliances ERH85UMS
User Manual
-
 Euro Appliances ERH900HSL
User Manual
Euro Appliances ERH900HSL
User Manual
-
 Euro Appliances ERH900HSL2
User Manual
Euro Appliances ERH900HSL2
User Manual
-
 Euro Appliances ERH900SLX
User Manual
Euro Appliances ERH900SLX
User Manual
-
 Euro Appliances ERH900SLX2
User Manual
Euro Appliances ERH900SLX2
User Manual
-
 Euro Appliances ES602SS
User Manual
Euro Appliances ES602SS
User Manual
-
 Euro Appliances ES602SS2
User Manual
Euro Appliances ES602SS2
User Manual
-
 Euro Appliances EVR60FVSS
User Manual
Euro Appliances EVR60FVSS
User Manual