Page 2 - CONTENTS
0 5 0 3 CONTENTS PRODUCT OVERVIEW 6 0 2 0 4 0 6 1 0 1 SAFETY INFORMATION 3 Earthing InstructionsDisposal 3 5 INSTALLATION INSTRUCTION About Power ConnectionPosition The Appliance Water Supply And DrainConnection Of Drain Hoses 7 7 8 8 9 USING YOUR DISHWASHER Control PanelFunction Of The Rinse Aid An...
Page 3 - NOTE
28 31 NOTE : Reviewing the section on troubleshooting Tips will help you solve some common problems by yourself.If you cannot solve the problems by yourself, please ask for help from a professional technician.The manufacturer, following a policy of constant development and updating of the product, m...
Page 4 - WARNING; Earthing Instructions
3 SAFETY INFORMATION WARNING Earthing Instructions This appliance must be earthed. In the event of a malfunction or breakdown, earthing will reduce the risk of an electric shock by providing a path of least resistance of electric current. This appliance is equipped with an earthing conductor plug. W...
Page 6 - Disposal
5 The appliance needs to be connected to the main water valve using new hose sets. Old sets should not be reused.To save energy, in stand by mode , the appliance will switch off automatically while there is no any operation in 30 minutes . Disposal For disposing of package and the appliance please g...
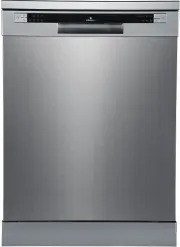
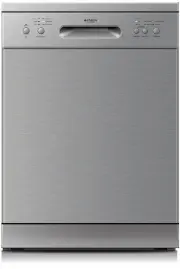
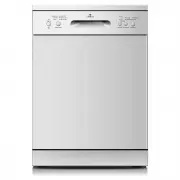
Page 7 - PRODUCT OVERVIEW
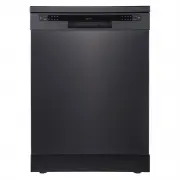
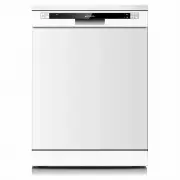
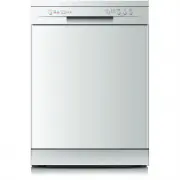
6 PRODUCT OVERVIEW To get the best performance from your dishwasher, read all operating instructions before using it for the first time. IMPORTANT: Cutlery basket Lower basket Pictures are only for reference, different models may be different. Please prevail in kind. NOTE : upper spray arm Upper bas...
Page 8 - INSTALLATION INSTRUCTION; Electrical requirements; About Power Connection
7 INSTALLATION INSTRUCTION Ensure the voltage and frequency of the power being corresponds to those on the rating plate. Only insert the plug into an electrical socket which is earthed properly. If the electrical socket to which the appliance must be connected is not appropriate for the plug, replac...
Page 9 - Water Supply And Drain; Cold water connection; Position The Appliance; Levelling the appliance
8 Water Supply And Drain Cold water connection Connect the cold water supply hose to a threaded 3/4(inch) connector and make sure that it is fastened tightly in place.If the water pipes are new or have not been used for an extended period of time, let the water run to make sure that the water is cle...
Page 10 - Connection Of Drain Hoses
Extension hose Water outlet How to drain excess water from hoses Syphon connection If the sink is 1000 higher from the floor, the excess water in hoses cannot be drained directly into the sink. It will be necessary to drain excess water from hoses into a bowl or suitable container that is held outsi...
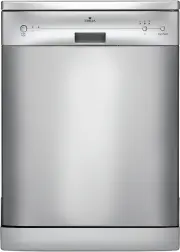
Page 11 - USING YOUR DISHWASHER; Control Panel
10 USING YOUR DISHWASHER Control Panel Operation (Button) Power Press this button to turn on your dishwasher, the screen lights up. 1 5 Program Select the appropriate washing program, the selected program indicator will be lit. 2 Delay Press the button to set the delay time, corresponding indicator ...
Page 12 - Display
11 Program end when the program is end, the indicator will be lit. Display Programindicator 7 Delay time 8 To show the delay time(2h/4h/6h/8h). Warningindicator 9 Rinse Aid If the “ ” indicator is lit, it means the dishwasher is low on dishwasher rinse aid and requires a refill. Water Faucet If the ...
Page 13 - Function Of The Rinse Aid And Detergent; When to refill the rinse aid dispenser; Function of detergent
The rinse aid is released during the final rinse to prevent water from forming droplets on your dishes, which can leave spots and streaks. It also improves drying by allowing water to roll off the dishes. Your dishwasher is designed to use liquid rinse aids. WARNING Only use branded rinse aid for di...
Page 14 - Filling The Rinse Aid Reservoir; Adjusting the rinse aid reservoir
13 3 Close the rinse aid reservoir cap by rotating it clockwise. NOTE : Clean up any spilled rinse aid with an absorbent cloth to avoid excessive foaming during the next wash. 1 2 Remove the rinse aid reservoir cap by rotating it counterclockwise. Carefully pour in the rinse-aid into its dispenser, ...
Page 15 - Filling The Detergent Dispenser
14 Filling The Detergent Dispenser 1 2 Press the release catch on the detergent dispenser to open the cover. Push latch to open A A B Add detergent into the larger cavity (A) for the main wash cycle .For more heavily soiled wash loads,also add some detergent into the smaller cavity (B) for the pre-w...
Page 16 - Adjusting the upper basket; Basket Used Tips; Folding back the cup shelves
Adjusting the upper basket The height of the upper basket can be easily adjusted to accommodate taller dishes in either the upper or lower basket.To adjust the height of the upper rack, follow these steps: 4 1 Pull out the upper basket. 2 Remove the upper basket. 3 Re-attach the upper basket to uppe...
Page 17 - Folding back the rack shelves; Preparing And Loading Dishes; For washing the following cutlery/dishes
raise upwards fold backwards Folding back the rack shelves The spikes of the lower basket are used for holding plates and a platter. They can be lowered to make more room for large items. Preparing And Loading Dishes Consider buying utensils which are identified as dishwasher-proof.For particular it...
Page 18 - Recommendations for loading the dishwasher
Items such as cups, glasses, pots, pans, etc. are faced downwards.Curved items, or ones with recesses, should be loaded aslant so that water can run off.All utensils are stacked securely and can not tip over.All utensils are placed in the way that the spray arms can rotate freely during washing.Load...
Page 19 - Loading the cutlery basket
Loading the upper basket The upper basket is designed to hold more delicate and lighter dishware such as glasses, coffee and tea cups and saucers, as well as plates, small bowls and shallow pans (as long as they are not too dirty). Position the dishes and cookware so that they will not get moved by ...
Page 20 - Loading The Baskets According To En50242
Loading The Baskets According To En50242 19 1.Upper basket: 2.Lower basket: 1 2 3 Cups Saucers Glasses Item Number 4 5 6 7 Dinner plates Soup plates Dessert dishes Cutlery basket Item Number 1 1 1 1 1 1 1 1 1 1 1 1 1 1 2 2 2 2 3 3 3 3 6 6 6 6 6 6 6 6 7 7 5 5 4 4
Page 22 - PROGRAMMING THE DISHWASHER; Wash Cycle Table
PROGRAMMING THE DISHWASHER Wash Cycle Table The table below shows which programs are best for the levels of food residue on them and how much detergent is needed. It also show various information about the programs. ( )Means: need to fill rinse into the Rinse-Aid Dispenser. Program Running Time(min)...
Page 23 - Starting A Cycle Wash; Changing The Program Mid-cycle
Starting A Cycle Wash 1. Draw out the lower and upper basket, load the dishes and push them back. It is commended to load the lower basket first, then the upper one. 2. Pour in the detergent. 3. Insert the plug into the socket. The power supply refer to last page”Product fiche”. Make sure that the w...
Page 24 - Forget To Add A Dish?
Forget To Add A Dish? After 5 sec WARNING It is dangerous to open the door mid-cycle, as hot steam may scald you. A forgotten dish can be added any time before the detergent dispenser opens. If this is the case, follow the instructions below: 1. Press the Start/Pause button to pause the washing. 2. ...
Page 25 - MAINTENANCE AND CLEANING; External Care; The door and the door seal; Internal Care; Filtering system
24 MAINTENANCE AND CLEANING External Care The door and the door seal Clean the door seals regularly with a soft damp cloth to remove food deposits.When the dishwasher is being loaded, food and drink residues may drip onto the sides of the dishwasher door. These surfaces are outside the wash cabinet ...
Page 27 - Spray arms
Spray arms Wash the arms in soapy and warm water and use a soft brush to clean the jets. Replace them after rinsing them thoroughly. It is necessary to clean the spray arms regularly for hard water chemicals will clog the spray arm jets and bearings. To clean the spray arms, follow the instructions ...
Page 28 - Caring For The Dishwasher
27 Caring For The Dishwasher Frost precaution Please take frost protection measures on the dishwasher in winter. Every time after washing cycles, please operate as follows: 1. Cut off the electrical power to the dishwasher at the supply source. 2. Turn off the water supply and disconnect the water i...
Page 29 - Before Calling For Service
28 TROUBLESHOOTING TIPS Before Calling For Service Reviewing the charts on the following pages may save you from calling for service. Problem Possible Causes What To Do Dishwasher doesn't start Fuse blown, or the circuit break tripped. Replace fuse or reset circuit breaker. Remove any other applianc...