Electrolux ENN 28600 - Manuals
Electrolux ENN 28600 Refrigerator – User Manual, Manual in PDF format online.
Manuals:
User Manual Electrolux ENN 28600


Summary
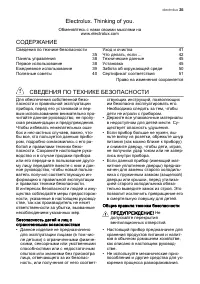
Electrolux. Thinking of you. Share more of our thinking at www.electrolux.com CONTENTS Safety information 2 Control panel 4 First use 5 Daily use 5 Helpful hints and tips 6 Care and cleaning 7 What to do if… 8 Technical data 10 Installation 10 Environmental concerns 15 Subject to change without noti...
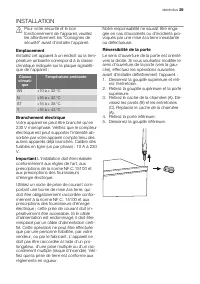
• Make sure that the mains plug is accessi- ble after the installation of the appliance. • Connect to potable water supply only. 4) Service • Any electrical work required to do the servicing of the appliance should be car-ried out by a qualified electrician or com-petent person. • This product must ...
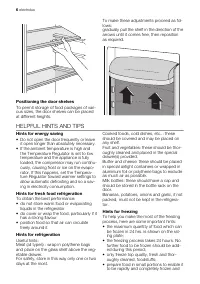
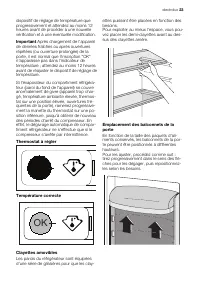
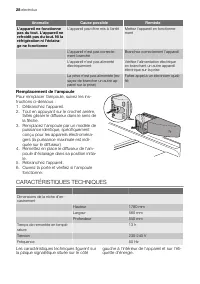
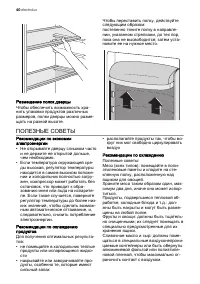
Positioning the door shelves To permit storage of food packages of vari-ous sizes, the door shelves can be placedat different heights. To make these adjustments proceed as fol-lows:gradually pull the shelf in the direction of thearrows until it comes free, then repositionas required. HELPFUL HINTS A...
Manual Electrolux ENN 28600


Summary
2 IMPORTANT SAFETY INFORMATION It is most important that this instruction book should be retained with the appliance for futurereference. Should the appliance be sold or transferred to another owner, or should you move house andleave the appliance, always ensure that the book is left with the applia...
3 CONTENTS Instructions for the User Important Safety Information 2 Operation 4 Before use 4 Control panel - Use of the freezer 4 Start your appliance 4 Temperature control 4 Quick-freezing 5 Freezing fresh food 5 Frozen food storage 5 Thawing 5 Making ice cubes 5 Use of the refrigerator-Setting the...
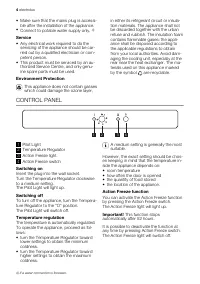
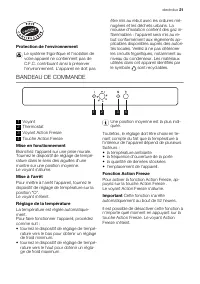
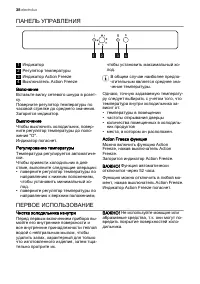
4 OPERATION Before using Remove all securing tapes. Wash inside theappliance with lukewarm water and bicarbonate ofsoda (5 ml to 0.5 litre of water). Do not use soap or detergent as the smell maylinger. Dry thoroughly. Control panel A - Pilot light - Green B - Thermostat control knob C - Fast freeze...
Electrolux Refrigerators Manuals
-
 Electrolux EAL 6140 WOU (WOW)
User Manual
Electrolux EAL 6140 WOU (WOW)
User Manual
-
 Electrolux EAL 6141 WOX
User Manual
Electrolux EAL 6141 WOX
User Manual
-
 Electrolux EAL 6142 BOX
User Manual
Electrolux EAL 6142 BOX
User Manual
-
 Electrolux EAL 6143 WOX
User Manual
Electrolux EAL 6143 WOX
User Manual
-
 Electrolux EAL 6240 AOU
User Manual
Electrolux EAL 6240 AOU
User Manual
-
 Electrolux EBE4300SDLH
User Manual
Electrolux EBE4300SDLH
User Manual
-
 Electrolux EBE4300SDRH
User Manual
Electrolux EBE4300SDRH
User Manual
-
 Electrolux EBE4307SDLH
User Manual
Electrolux EBE4307SDLH
User Manual
-
 Electrolux EBE4307SDRH
User Manual
Electrolux EBE4307SDRH
User Manual
-
 Electrolux EBE4507BB-L
User Manual
Electrolux EBE4507BB-L
User Manual
-
 Electrolux EBE4507BB-R
User Manual
Electrolux EBE4507BB-R
User Manual
-
 Electrolux EBE4507BC-L
User Manual
Electrolux EBE4507BC-L
User Manual
-
 Electrolux EBE4507BC-R
User Manual
Electrolux EBE4507BC-R
User Manual
-
 Electrolux EBE4507SA-L
User Manual
Electrolux EBE4507SA-L
User Manual
-
 Electrolux EBE4507SA-R
User Manual
Electrolux EBE4507SA-R
User Manual
-
 Electrolux EBE4507SB-L
User Manual
Electrolux EBE4507SB-L
User Manual
-
 Electrolux EBE4507SB-R
User Manual
Electrolux EBE4507SB-R
User Manual
-
 Electrolux EBE4507SC-L
User Manual
Electrolux EBE4507SC-L
User Manual
-
 Electrolux EBE4507SC-R
User Manual
Electrolux EBE4507SC-R
User Manual
-
 Electrolux EBE5100SDLH
User Manual
Electrolux EBE5100SDLH
User Manual