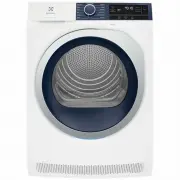
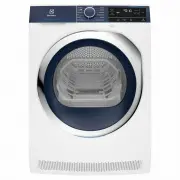
Electrolux EDV6552 - Manuals
User Manual Electrolux EDV6552


Summary
2 www.electrolux.com Visit our website to: Warning / Caution-Safety information. General information and tips Environmental information. Subject to change without notice. WE’RE THINKING OF YOU CUSTOMER CARE AND SERVICE Thank you for purchasing an Electrolux appliance. You’ve chosen a product that br...
3 IMPORTANT SAFETY INSTRUCTIONS 1. The final part of a tumble dryer cycle occurs without heat (cooling cycle) to ensure that the items are left at the temperature that ensures that the items will not be damaged. 1.1 Dryer Safety 1.2 Fire Hazards Lint must not be allowed to accumulate around the tumb...
4 www.electrolux.com Never operate your dryer without the lint filter.Do not allow lint to build around your dryer.A torn or damaged lint filter must be replaced immediately.Overloading can increase lint build-up because the airflow is reduced. 1.3 Cleaning The Lint Filter 1.4 Drying Guide 5.5 kg fo...
Electrolux Dryers Manuals
-
 Electrolux EDC2075GDW
User Manual
Electrolux EDC2075GDW
User Manual
-
 Electrolux EDC2086GDW
User Manual
Electrolux EDC2086GDW
User Manual
-
 Electrolux EDC804BEWA
User Manual
Electrolux EDC804BEWA
User Manual
-
 Electrolux EDH3284PDW
User Manual
Electrolux EDH3284PDW
User Manual
-
 Electrolux EDH3586GDW
User Manual
Electrolux EDH3586GDW
User Manual
-
 Electrolux EDH3786GDW
User Manual
Electrolux EDH3786GDW
User Manual
-
 Electrolux EDH803BEWA
User Manual
Electrolux EDH803BEWA
User Manual
-
 Electrolux EDH803CEWA
User Manual
Electrolux EDH803CEWA
User Manual
-
 Electrolux EDH803R7WB
User Manual
Electrolux EDH803R7WB
User Manual
-
 Electrolux EDH803R9WB
User Manual
Electrolux EDH803R9WB
User Manual
-
 Electrolux EDH804U5WB
User Manual
Electrolux EDH804U5WB
User Manual
-
 Electrolux EDH903BEWA
User Manual
Electrolux EDH903BEWA
User Manual
-
 Electrolux EDH903R9WB
User Manual
Electrolux EDH903R9WB
User Manual
-
 Electrolux EDV505
User Manual
Electrolux EDV505
User Manual
-
 Electrolux EDV5051
User Manual
Electrolux EDV5051
User Manual
-
 Electrolux EDV5552
User Manual
Electrolux EDV5552
User Manual
-
 Electrolux EDV6051
User Manual
Electrolux EDV6051
User Manual
-
 Electrolux EDV605H3WB
User Manual
Electrolux EDV605H3WB
User Manual
-
 Electrolux EDV605HQWA
User Manual
Electrolux EDV605HQWA
User Manual
-
Electrolux EDV605HQWA
Installation Manual