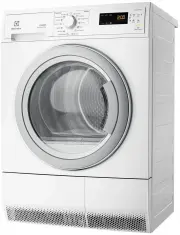
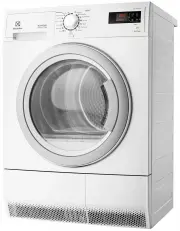
Page 3 - Welcome to the world of Electrolux
electrolux 3 Welcome to the world of Electrolux Thank you for choosing a first class product from Electrolux, which hopefully will provide you with lots of pleasure in the future. The Electrolux ambition is to offer a wide variety of quality products that make your life more comfortable. You will fi...
Page 4 - Contents
4 electrolux contents Contents Operating Instructions 5 Safety 5 Disposal 7 Environmental tips 7 Appliance description 8 Control panel 9 Prior to using for the first time 10 Sorting and preparing laundry 10 Starting up for the first time 12 Iron Aid TM - Steam-System 12 Overview of Iron Aid TM progr...
Page 5 - Only operate the Iron Aid; Safety; Prior to using for the first time
safety electrolux 5 Important: Only operate the Iron Aid programmes with distilled water! Mains water causes damage to the appliance. Safety Prior to using for the first time • Note the ” Installation and connec- tion instructions ” • Important The appliance may only be transported in an upright pos...
Page 6 - Clean the heat exchanger regularly.
6 electrolux safety • Only fill the water tank with distilled water. Do not use tap water or addi-tives! You can also use the con-densed water from this machine, as long as you filter it first (e.g. using a coffee filter). • Clean the heat exchanger regularly. • With stacked washer and dryer: Do not...
Page 7 - Disposal; Old appliance
disposal electrolux 7 Disposal Packaging materialThe packaging materials are envi-ronmentally friendly and can be re-cycled. The plastic components are identified by markings, e.g. >PE<, >PS<, etc. Please dispose of the packaging materials in the appro-priate container at your local wast...
Page 8 - Environmental tips; Drying cycle
8 electrolux environmental tips Environmental tips • In the drying cycle the laundry be-comes fluffy and soft. Fabric soften-ers are not therefore needed when washing. • Filtered condensed water can be used for Iron Aid programmes. • The appliance works most economi-cally in the drying programmes if...
Page 9 - Appliance description
appliance description electrolux 9 Appliance description Drawer withcondensed water container Screwed feet(with height adjust-ment) Loading door(interchangeable stop) Control panel Drainage hose for water tank Steam nozzle Type plate Micro-fine filter (lint filter) Fine strainer (lint filter) Lamp f...
Page 10 - Control panel; What is shown in the display
10 electrolux control panel Control panel What is shown in the display Programme knob and On/Off switch Display Function buttons STAR T/PAUSE button Maintenance displays- HEAT EXCHANGER- FILTER - CONTAINER DELAY TIMER button Degree of drynessDisplay DELICATE LOAD DRYNESS BUZZER Start timepreselectio...
Page 11 - Steam System; from wet and dry laundry and the
function overview: iron aidtm steam system electrolux 11 Function overview: Iron Aid TM Steam System This appliance can be used both as a dryer and to condition clothes (Iron Aid) to treat garments using steam. When it is operating as a dryer, there are 9 available programmes.When it is operating as...
Page 12 - Turn the programme knob to; Sorting laundry – general; Sorting by fabric type:
12 electrolux prior to using for the first time Prior to using for the first time In order to remove any residues which may have been produced during pro-duction, wipe the dryer drum with a damp cloth or carry out a brief drying cy-cle (30 MIN) with damp cloths in the ma-chine. 1. Turn the programme...
Page 13 - Preparing laundry - general; Special notes about Iron Aid; Starting up for the first time
starting up for the first time electrolux 13 Special notes about Iron Aid • The following textiles cannot be treated using an Iron Aid pro-gramme:woollen knitwear, leather, textiles with large metal, wooden or plastic parts, textiles with rusting metal parts, oilskins or wax cotton gar-ments. • To s...
Page 14 - Iron Aid; Fill water tank; water tank indicator on the
14 electrolux iron aid TM - steam-system Iron Aid TM - Steam-System Fill water tank You must fill up the water tank before using an Iron Aid programme for the first time. Use the distilled water provided if there is not yet any condensed water from previous drying programmes (see chapter on ‘Cleanin...
Page 16 - Overview of Iron Aid; programmes; iven the wide range of different
16 electrolux overview of iron aidtm programmes Overview of Iron Aid TM programmes All information on applications is for guidance only. Smoothing results may vary depending on the selected programme and especially the fit-tings and material properties of the textile. The results can be improved if ...
Page 17 - REFRESH programme is a
overview of iron aidtm programmes electrolux 17 All information provided on select-ing the steam level and correspond-ing load are suggestions only. In some cases, using a higher steam level or smaller load may give better results.The REFRESH programme is a gentle Iron Aid programme for non-washable...
Page 18 - Selecting the programme; All Iron Aid programmes, apart from the
18 electrolux overview of iron aidtm programmes Selecting the programme Use the programme selector to set the programme you require. The estimated programme duration (in minutes) ap-pears in the multi-display. Select steam level (LOAD) To achieve the best results, differ- ent steam levels are requir...
Page 19 - Selecting additional functions; BUZZER
overview of iron aidtm programmes electrolux 19 Important: If in doubt, always select a lower steam level first until you have more experience with load vol-umes, fabric types and the corre-sponding optimum steam level.If too high a steam level is selected, garments may lose their shape. If too low ...
Page 20 - if the programme is to be
20 electrolux overview of iron aidtm programmes Delay timer With the DELAY button, you can de-lay the start of a programme by be-tween 30 minutes ( 30 ') and a maximum of 20 hours ( 20h ). 1. Select the programme and addition-al functions. 2. Press the DELAY button as many times as necessary until t...
Page 21 - Starting an Iron Aid; gramme; Changing a programme; Err
starting an iron aidtm programme electrolux 21 Starting an Iron Aid TM pro- gramme Press the START/PAUSE button. The programme is started.First, the drying phase indicator appears in the display. The display will also show the pro-gramme duration for the selected Iron Aid programme, not including th...
Page 23 - Drying; Programmes
drying electrolux 23 Drying Overview of drying programmes Programmes Max. load (W e ig h t wh e n d ry ) Additional- functions Application/properties Care sym- bols BU ZZ E R DELICA T E DR YNESS CO TTO N EXTRA 6 kg • • • Thorough drying of thick or multi-layered fabrics, e.g. terry towelling items, ...
Page 24 - TIME programme
24 electrolux overview of drying programmes Selecting the programme Use the programme selector to set the programme you require. The probable programme run time is displayed (in minutes) on the multi-display. Selecting additional functions You can choose from the additional functions DRYNESS, DELICA...
Page 25 - DELICATE
overview of drying programmes electrolux 25 Caution: Make sure that by select-ing the DRYNESS function, you do not over-dry your wool or silk. DELICATE For especially gentle drying of sensitive fabrics with the l care label and for temperature-sensitive textiles (e.g. acrylic, viscose). Programme is...
Page 26 - TIME
26 electrolux overview of drying programmes TIME To select the programme duration after setting the TIME programme. You can select a programme duration from 10 mins to 3 hrs in 10-minute steps. 1. Turn the programme knob to the TIME programme. The display will show 0.10 (corresponding to the COOLING...
Page 27 - Starting a drying programme
starting a drying programme electrolux 27 Starting a drying programme Press the START/PAUSE button. The programme is started.The programme progress display shows drying progress. The symbols for DRYING and COOLING appear in the display one after the other. The number of droplets in the dryness indi-...
Page 28 - Cleaning and maintenance; Cleaning lint filters
28 electrolux cleaning and maintenance Cleaning and maintenance Cleaning lint filters To ensure that the appliance works per-fectly, the lint filters in the door and in front of the drum must be cleaned after every Iron Aid or drying cycle. Important Never operate the dryer without the lint filter o...
Page 29 - Cleaning the filter area
cleaning and maintenance electrolux 29 Cleaning the filter area The filter area does not have to be cleaned after every drying cycle, but should be checked regularly and cleaned of fluff, if necessary. You will need to undertake the following (to clean the filter area: 1. Remove lint filter (see cha...
Page 32 - Cleaning heat exchanger; Open loading door
32 electrolux cleaning and maintenance Cleaning heat exchanger If the HEAT EXCHANGER display is illu-minated, the heat exchanger needs to be cleaned. Caution! Operating when the heat exchanger is clogged with lint can damage the appliance. This also in-creases energy consumption. 1. Open loading doo...
Page 33 - Cleaning the drum; The bulb for the interior
cleaning and maintenance electrolux 33 Caution! Do not use sharp objects to clean the heat exchanger. You could damage it and cause leaks. 7. Clean heat exchanger. It is best to use a brush or to rinse thoroughly with a shower head. 8. Replace heat exchanger and lock into place (turn both lock washe...
Page 34 - What to do if...; Remedying small malfunctions; plus number or letter) appears on the
34 electrolux what to do if… What to do if… Remedying small malfunctions If, during operation, the error code ( E plus number or letter) appears on the multi-display: Switch the appliance off and on again. Reset programme. Press the START/PAUSE button. If the error appears again, please con-tact the...
Page 35 - Problem
what to do if… electrolux 35 Drying results unsatisfac-tory. Wrong programme selected. Select a different programme the next time you dry (see section “Overview of programmes”). Lint filter blocked. Clean lint filter. Heat exchanger blocked with fluff. Clean heat exchanger. Incorrect amount of washi...
Page 36 - Technical data
36 electrolux technical data Technical data 5 This appliance conforms with the following EU Directives: – 73/23/EEC dated 19.02.1973 Low Voltage Directive – 89/336/EEC dated 03.05.1989 EMC Directive inclusive of Amending Di-rective 92/31/EEC – 93/68/EEC dated 22.07.1993 CE Marking Directive Consumpt...
Page 37 - Important
installation safety instructions electrolux 37 Installation safety instruc-tions • Important The appliance must only be transported in an upright position. • Before first starting up, all parts of the transport safety equipment must be removed. The machine may oth-erwise be damaged. • The appliance ...
Page 39 - Electrical connection; or coloured green
electrical connection electrolux 39 Electrical connection Any electrical work required to install this appliance should be carried out by a qualified electrician or competent per-son. WARNING – THIS APPLIANCE MUST BE EARTHED.The manufacturer declines any lia-bility should these safety measures not b...
Page 40 - Permanent Connection
40 electrolux electrical connection • The wire coloured brown must be connected to the terminal marked “L“ or coloured red. • Upon completion there must be no cut, or stray strands of wire present and the cord clamp must be secure over the outer sheath. WARNING! A cut off plug inserted into a 13 amp...
Page 41 - Levelling the appliance; Changing door stop; without stacker plate
levelling the appliance electrolux 41 Levelling the appliance The four feet of the appliance are pre-adjusted. Large degrees of unevenness can be compensated for by individually adjust-ing the height adjustable screw feet. To do this lift the appliance and turn the adjustable feet in or out. Importa...
Page 42 - Standard guarantee conditions
42 electrolux guarantee/customer service Guarantee/Customer Serv-ice Standard guarantee conditions We, Electrolux, undertake that if within 12 months of the date of the purchase this Electrolux appliance or any part thereof is proved to be defective by rea-son only of faulty workmanship or mate-rial...
Page 43 - European Guarantee
guarantee/customer service electrolux 43 European Guarantee www.electrolux.com This appliance is guaranteed by Electrolux in each of the countries listed at the back of this user manual, for the period specified in the appli-ance guarantee or otherwise by law. If you move from one of these countries...
Page 45 - Service and Spare Parts; Customer Care
service and spare parts electrolux 45 Service and Spare Parts If the event of your appliance requiring service, or if you wish to purchase spare parts, please contact Service Force by telephoning: Your telephone call will be automatically routed to the Service Force Centre cov-ering your post code a...
Page 46 - please contact us at the address be-
46 electrolux service and spare parts (*) Calls may be recorded for training purposes Customer Care DepartmentMajor AppliancesElectroluxAddington WayLutonBedfordshire, LU4 9QQTel: 08705 350350 (*) For Customer Service in the Republic of Ireland please contact us at the address be- low:AEG/ Electrolu...