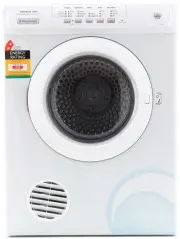
Page 2 - Visit our website for:; CUSTOMER CARE AND SERVICE; Always use original spare parts.
CONTENTS 1. SAFETY INFORMATION....................................................................................3 2. CONDITIONS OF USE....................................................................................... 6 3. SAFETY INSTRUCTIONS.......................................................
Page 3 - The information can be found on the rating plate.; SAFETY INFORMATION
The information can be found on the rating plate. Warning / Caution-Safety information General information and tips Environmental information Subject to change without notice. 1. SAFETY INFORMATION Before the installation and use of the appliance, carefully read the supplied instructions. The manufa...
Page 6 - SAFETY INSTRUCTIONS
cannot escape, the items can become hot enough to catch fire. Piling, stacking or storing oil-affected items can prevent heat from escaping and create a fire hazard. • If it is unavoidable that fabrics that contain vegetable or cooking oil or have been contaminated by hair care products be placed in...
Page 8 - PRODUCT DESCRIPTION
3.6 Compressor WARNING! Risk of damage to the appliance. • The compressor and its system in the tumble dryer is filled with a special agent which is free from fluoro-chloro- hydrocarbons. This system must stay tight. The damage of the system can cause a leakage. 3.7 Service • To repair the appliance...
Page 9 - Symbol on the display
5. CONTROL PANEL 1 11 12 10 9 8 5 7 6 4 3 2 1 Program knob 2 Extra Anticrease touch button 3 Dryness Level touch button 4 Display 5 Time Dry touch button 6 Start/Pause touch button 7 Delay Start touch button 8 Remote touch button 9 End Alert touch button 10 Reverse Plus touch button 11 Extra Silent ...
Page 11 - Installing Electrolux Life; Go to the App Store on your smart; Configuring the dryer; wireless connection; Select a program by turning the
Minimum requirements: Operating system compatibility iOS 9.3/Android 5.1 and above. Install the Electrolux Life app, create an account and accept the Terms and Conditions and Electrolux's Privacy Policy to use the connected features. Stable Internet and good Wi- Fi connection with 2.4GHz or 5 GHz wi...
Page 12 - Activate Remote Start; Press the Remote button.; Deactivate Remote Start; Press the Remote touch button.
6.3 Remote Start Electrolux Life allows you to control your laundry through a mobile device. It contains a large number of programs, useful features and product information tailored perfectly to the appliance. Through the app you can select the programs already available from the appliance control p...
Page 14 - TIME DRYING RECOMMENDATION
Program Load 1) Properties / Fabric type 2) Wool 1 kg The wool drying cycle of this machine has been approved by The Woolmark Company for the drying of wool garments labelled as "hand wash" provided that the garments are dried according to the instructions issued by the manufacturer of this ...
Page 15 - program
TIME DRYING RECOMMENDATION >40 min full drying of the small laun‐ dry loads up to 4 kg, well spun (>1200 rpm). 8.4 Time Dry on Wool program Option suitable for Wool program to adjust final dryness level. 8.5 Time Dry on Drying Rack program Option suitable for Drying Rack program .You can set t...
Page 16 - Child lock function; Activating the child lock option:; To memorise your; Press the on/off button to activate the; Set the program and available
Programs 1) Dryness Level Extra Anti‐ crease Extra Silent Re‐ verse Plus Time Dry Duvet ■ Wool ■ 3) Delicates ■ ■ 1) Together with the program you can set 1 or more options. To activate or deactivate them, press the related touch button. 2) See chapter OPTIONS: Time Dry on Drying Rack program 3) See...
Page 17 - To activate your memorised; Adjustment of the remaining; moisture; To accept the selected degree of; Water container indicator
To activate your memorised configuration: 1. Press the on/off button to activate the appliance. 2. Use the program knob to set Favourite position. Previously memorised configuration of program and options will be restore. 9.3 Adjustment of the remaining moisture The appliance allows you to chose bet...
Page 18 - Deactivating the water; Start a program without; delay start
Deactivating the water container indicator: 1. Press the on/off button to activate the appliance. 2. Wait approximately 8 seconds. 3. Press and hold touch buttons (A) and (C) at the same time. The display shows one of these 2 configurations: • The display shows "Off". After 5 s the display r...
Page 19 - Change a program; Press the on/off button to activate the; At the end of the program; Always clean the filter and; Preparing the laundry
You can delay the start of a program from a minimum of 30 minutes to a maximum of 20 hours. 3. Press the Start/Pause touch button. The display shows the countdown of the delay start. When the countdown is completed, the program starts. 11.3 Change a program 1. Press the on/off button to deactivate a...
Page 20 - Fabric label; CARE AND CLEANING; Cleaning the filter
• Do not put light and dark colours together. • Use suitable program for cottons, jersey and knitwear to reduce shrinkage. • Do not exceed the maximum load stated in the programs chapter or shown on the display. • Dry only the laundry that is suitable for tumble drying. Refer to the fabric label on ...
Page 21 - Emptying the water container; Cleaning the Heat Exchanger
5. 1) 6. 2 1 1) If necessary remove fluff from the filter socket and gasket. You can use a vacuum cleaner. 13.2 Emptying the water container 1. 2. 3. 4. You can use the water from the water container as an alternative to distilled water (e.g. for steam ironing). Before you use the water, remove dirt...
Page 22 - and housing
3. 4. 1 1 2 2 5. 6. 7. 8. 9. 2 1 CAUTION! Do not touch the metal surface with bare hands. Risk of injury. Wear protective gloves. Clean carefully to avoid damaging the metal surface. 13.4 Cleaning the drum WARNING! Disconnect the appliance before you clean it. Use a standard neutral soap detergent t...
Page 23 - Cleaning the airflow slots; error code and the Start/Pause button may flash continuously:
13.6 Cleaning the airflow slots Use a vacuum cleaner to remove fluff from the airflow slots. 14. TROUBLESHOOTING WARNING! Refer to Safety chapters. 14.1 Error Codes The appliance does not start or it stops during operation.First try to find a solution to the problem (refer to the table). If the prob...
Page 25 - If the drying results are not
Problem Possible solution The App frequently cannot connect to the dryer. Try to move the home router as near the dryer as possible or consider purchasing a wireless range extender. Turn the microwave off. Avoid using the microwave and the Remote Control of the dryer at the same time. The microwaves...
Page 28 - ENVIRONMENTAL CONCERNS
Important Notice Before calling for service, please ensure that the steps listed in clause 8 above have been followed. FOR SERVICE or to find the address of your nearest authorised service centre in Australia PLEASE CALL 13 13 49 For the cost of a local call (Australia only) AUSTRALIA ELECTROLUX HOM...