Page 2 - User’s Manual; Clear Ice Maker; Installation only by a licensed plumber.; Be sure to stand the ice maker upright for at least 24 hours
User’s Manual Clear Ice Maker Installation only by a licensed plumber. Be sure to stand the ice maker upright for at least 24 hours prior to plugging it in. 2
Page 4 - TABLE OF CONTENTS; Page
TABLE OF CONTENTS Page ICE MAKER SAFETY………………………………………………………………… 5 IMPORTANT SAFEGUARDS………………………………………………………. . 6-7 TECHNICAL INFORMATION…………………………………………………………..7 COMPONENT LOCATIONS ………………………………………………………… ..8 ICE MAKER INSTALLATION ……………………………………………… …… …..9 Unpacking……………………………………………………………………………. ...
Page 5 - ICE MAKER SAFETY; Your safety and the safety of others are very important
ICE MAKER SAFETY Your safety and the safety of others are very important . We have provided many important safety messages in this manual and on your appliance. Always read and obey all safety messages. This is the safety alert symbol. This symbol alerts you to potential hazards that can kill or hur...
Page 6 - IMPORTANT SAFEGUARDS
IMPORTANT SAFEGUARDS Before the ice maker is used, it must be properly positioned and installed as described in this manual, so read the manual carefully. To reduce the risk of fire, electrical shock or injury when using the ice maker, follow basic precautions, including the following: z Plug into p...
Page 8 - Note on ice storage; COMPONENT LOCATIONS
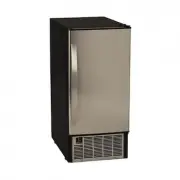
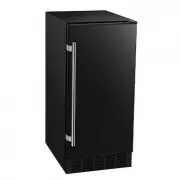
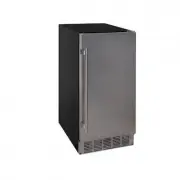
Note on ice storage This type of icemaker produces crystal-clear, gourmet cube ice. An insulated ice storage bin is built into each the icemaker. The ice bin will fill with ice and the ice maker will automatically shut off. Then the ice in the bin will slowly melt and go out the drain. Once enough o...
Page 9 - ICE MAKER INSTALLATION; Unpacking; Excessive Weight Hazard
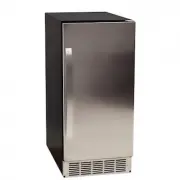
Ice scoop Figure 1 Power supply Control panel Water inlet Ice scoop Drain hose ICE MAKER INSTALLATION Unpacking Excessive Weight Hazard Use two or more people to move and install icemaker. Failure to do so can result in back or other injury. Remove packaging materials IMPORTANT: Do not remove any pe...
Page 10 - Cleaning before use; Location Requirements; This icemaker should be installed by a licensed plumber only.
z To remove any remaining tape or glue, rub the area briskly with your thumb. Tape or glue residue can also be easily removed by rubbing a small amount of liquid dish soap over the adhesive with your fingers. Wipe with warm water and dry. z Do not use sharp instruments, rubbing alcohol, flammable fl...
Page 11 - Electrical Requirements
The ambient operational temperature should be between 50 ℉ and 100 ℉ . The operating water temperature should be between 41 ℉ and 90 ℉ . Operation outside these temperatures may result in lowered production or other adverse effects. • In general, it is always a good idea to filter the water. A water...
Page 12 - Reversing the Door Swing
Before you move your icemaker into its final location, it is important to make sure you have the proper electrical connection: A standard electrical supply (115 V, 60Hz.), properly grounded in accordance with the National Electrical Code and local codes and ordinances, is required. It is recommended...
Page 13 - Water Supply Connections
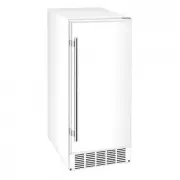
To remove door from hinges: 1. Using a Phillips screwdriver, remove the screws and take off top hinge. Keep the parts together and set them aside. 3. Lift door off bottom hinge and turn it upside down so that the handle is on the right. Set door aside. To replace door on hinges: 1. Using a flathead ...
Page 14 - Connecting the water line:; Drain; Installation Types
IMPORTANT: 1. All installations must be in accordance with local plumbing code requirements. 2. Make certain that the pipes are not pinched or kinked or damaged during installation. 3. Check for leaks after connection. Tools required: ½ in. open-end wrench, Phillips screwdriver Connecting the water ...
Page 15 - OPERATION
provided you have access to a water supply and a drain. You must follow the stated instructions for a- Electrical requirements b- Water supply and drain c- Leveling the icemaker. Recessed installation: A recessed installation will allow you to install the ice maker under a counter, or in a kitchen c...
Page 17 - Freeze
There are two distinct cycles: freeze and harvest. During the freeze cycle, water flows to the evaporator surface. In the harvest cycle, the ice is released and water enters the machine. A complete cycle can take 15 to 40 minutes, depending on temperature and operating conditions. Freeze : During th...
Page 18 - CLEANING AND MAINTENANCE; Note
z Water running from the evaporator to the water bin may make a splashing sound. z As each cycle ends, you may hear a gurgling sound due to the refrigerant flowing in your icemaker. z You may hear air being forced over the condenser by the condenser fan. z During the harvest cycle, you may hear the ...
Page 21 - Control Panel
Minerals that are removed from water during the freezing cycle will eventually form a hard scaly deposit in the water system. Cleaning the system regularly helps remove the mineral scale buildup. How often you need to clean the system depends upon how hard your water is or how effective your filtrat...
Page 22 - Descriptions of LEDs and buttons:
Descriptions of LEDs and buttons: 1. Ice Full (Red) LED: Ice Full indicator light. When this LED is lit, the ice storage bin is full of ice or there is something obstructing the ice-full probe. The unit will stop working. When ice cubes are taken out of the ice storage bin, clearing the ice-full pro...
Page 23 - Major Functions; TROUBLESHOOTING
and the ice size will be smaller in the next cycle. IMPORTANT: • It is not recommended that the ice size be adjusted unnecessarily since this could damage the machine’s controls . • Do not let water contact the control box. Major Functions 1. Completely automatic operation. 2. When the ice storage b...
Page 25 - LIMITED WARRANTY
LIMITED WARRANTY This EdgeStar product is warranted to be free from defective workmanship and materials for the first year following the date of original purchase. Replacement parts will be supplied free of charge for the first year following the date of original purchase. Labor will be performed fr...