Page 2 - IMPORTANT SAFETY INFORMATION; Electrical Safety; appliance is properly grounded.
i IMPORTANT SAFETY INFORMATION Read all instructions carefully prior to use. For your safety, the information detailed in this manual should be followed. Improper use and/or handling can cause serious damage to the appliance and/or to the user including but not limited to fire, explosion, and/or ele...
Page 3 - General Safety
ii Note : This owner’s manual is provided for reference use only. Specifications may change without prior notice. Refer to the product label on the back of your dishwasher for the latest technical information. General Safety • Installation, maintenance and repair should be performed by a qualified i...
Page 4 - iii; Table of Contents
iii Table of Contents IMPORTANT SAFETY INFORMATION ................................................................................................ I TABLE OF CONTENTS ...................................................................................................................... III FIRST TIM...
Page 5 - Visit us on the web at
1 First Time Operating Instructions Before use, make sure all packaging labels and materials are removed from the unit. Be sure to keep track of all included parts and pieces before discarding the packaging materials. It is advised that you keep the original box and packaging materials in case you e...
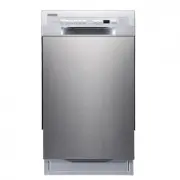
Page 6 - Parts Identification; Front View with Door Open
Page 7 - Front View with Door Closed; Unpacking the Dishwasher; e the dishwasher’s
3 Front View with Door Closed Unpacking the Dishwasher • Use at least two people to move and install the dishwasher to prevent injuries. Always lift the dishwasher to move it as sliding it can damage its base and feet, or floor surfaces. • Carefully remove the packaging materials and inspect the dis...
Page 8 - Features of Your New Dishwasher; Multiple Filter System; ’s performance with less; Smart Wash System; Operating Instructions; Pre-check the following things before using the dishwasher:
4 Features of Your New Dishwasher Multiple Filter System Your dishwasher has a Multiple Filter System. In the system there are three filters that can separate soiled water and clean water in different chambers. This Multiple Filter System improves your dishwasher ’s performance with less water and e...
Page 9 - Quick Start; will glow when selected.; Control Panel; Additional Features
5 Quick Start 1. Load the dishwasher (see Preparing and Loading Dishes section.) 2. Add detergent (see Filling the Detergent Dispenser.) 3. Add LIQUID rinse aid (see Filling the Rinse Aid Dispenser.) Rinse aid greatly improves drying and reduces water spots and film. The heated drying option will no...
Page 10 - Status Display; – If the Delay Start function is selected, the number of HOURS (H:01 –; Control Panel Lock; – To disable the Control Panel press and hold both the Options and; Cycle Progress Indicator
6 • Status Display – If the Delay Start function is selected, the number of HOURS (H:01 – H:24) remaining in the delay time is shown. After a Wash Cycle is selected, the remaining time of the cycle is shown in hours and minutes (2:45 – END or -:--.) In certain situations that are critical to the dis...
Page 11 - Cycle Chart; Wash Cycle
7 Cycle Chart Wash Cycle Description Water Use (Gal./Lit.) Cycle Time (Min.) Heavy Pre-wash 5.2 G / 19.7 L 145 - 160 Main-wash (140°F/60°C) Rinse (149°F/65°C) Rinse with Sanitize (156°F/69°C) Drying Normal Pre-wash 2.5-4.9 G / 9.5-18.5 L 135 - 155 Main-wash (131°F/55°C) Rinse (140°F/60°C) Rinse with...
Page 12 - Preparing and Loading Dishes; Dish Preparation
8 Preparing and Loading Dishes Dish Preparation Scrape away large pieces of food, bones, pits, toothpicks, etc. The continuously filtered wash system will remove the remaining food particles. Burned-on foods should be loosened before loading. Empty any liquids from glasses and cups. Foods such as mu...
Page 13 - The upper basket can be raised to allow for dishes
9 Loading the Upper Basket The upper basket is designed for glasses, mugs, cups, small plates, bowls and plastic items marked “dishwasher safe.” For best results, place the items with their soiled surfaces facing down or toward the center. Tilt slightly for better drainage. Adjusting the Upper Baske...
Page 14 - Loading the Silverware Basket; on the upper basket’s cup shelf
10 Loading the Silverware Basket The silverware basket is divided into separate compartments (illustrated below) to allow for maximum cleaning efficiency. Spoons and forks should be placed in the basket with their handles pointing downward. Knives and other sharp utensils should be placed in the bas...
Page 15 - Forgot to Add a Dish?; A dish can be added any time before the detergent dispenser opens:; Filling Detergent and Rinse Aid Dispensers; Only Use Proper Detergent
11 Forgot to Add a Dish? A dish can be added any time before the detergent dispenser opens: 1. Open the door slightly and wait several seconds for the wash cycle to stop. 2. You can open the door completely after the spray arms stop spinning. 3. Add remaining dishes. 4. Close the door. 5. Press the ...
Page 17 - Filling the Rinse Aid Dispenser; Open the rinse aid dispenser by lifting up the handle.
13 Filling the Rinse Aid Dispenser The rinse aid is released during the final rinse to remove spots, prevent new film build-up on your dishes, glasses, flatware, cookware and plastic, and to improve drying time. Your dishwasher is designed to use ONLY LIQUID rinse aids. DO NOT use powdered rinse aid...
Page 18 - Completing a Wash Cycle
14 4. Refill the rinse aid when the Status Display shows the “LSb” error code. Your dishwasher will run with low or no rinse aid, but your rinsing and drying results will suffer. Completing a Wash Cycle When the selected wash cycle has finished, the Status Display will read END, or -:-- if it has be...
Page 19 - Dishwasher Maintenance; Cleaning the Exterior; Filter Assembly Parts; The filter assembly consists of three filters:; Course Filter; the dishes during the wash cycle.; Main Filter; a special jet on the spray arm and washes them down the drain.
15 Dishwasher Maintenance Keeping your dishwasher clean improves its performance, reduces unnecessary repairs and lengthens its life. Cleaning the Exterior It is best to clean spills on the outside of your dishwasher as they occur. Use a soft, damp cloth on the control panel and door to gently wipe ...
Page 20 - Removing, Cleaning and Replacing the Filter Assembly
16 Removing, Cleaning and Replacing the Filter Assembly 1. Turn off the dishwasher. 2. Rotate the filter assembly counterclockwise to unlock it, then pull up to remove it. 3. Take apart the three filters by pulling the fine and course filters in opposite directions, then separate them from the main ...
Page 22 - Cleaning the Lower Spray Arm; so you don’t; Protecting Against Freezing
18 Cleaning the Lower Spray Arm The lower spray arm can be removed for periodic cleaning of the nozzles to prevent clogging and maintain the efficiency of your dishwasher. When removing the spray arm, exercise care so you don’t damage or break it. To remove, clean and replace the lower spray arm: 1....
Page 23 - Troubleshooting; Meaning
19 Troubleshooting Error Codes Under certain conditions warning or malfunction codes will be shown on the Status Display. Error Code Meaning Possible Causes E1 Long water inlet time The water supply may not be opened or the water pressure may be too low. The water inlet may also be restricted or kin...
Page 24 - Troubleshooting Guide; Issue
20 Troubleshooting Guide Issue Possible Cause Solution Dishwasher does not start Fuse is blown or circuit breaker is tripped Replace fuse or reset circuit breaker. Remove any other appliances sharing the same circuit with the dishwasher. Power Supply is not connected or turned on Call a certified te...
Page 26 - Specifications
22 Specifications Description of product 18” Built-In Dishwasher Model BIDW1802BL / BIDW1802SS / BIDW1802WH Color Black / Stainless Steel / White Number of Place Settings 8 Maximum Diameter of Place Settings 11" Voltage/Frequency 120V AC/60Hz Input Power Wash motor 100W, Heater 700W Delay Start ...
Page 27 - EdgeStar Limited Warranty
23 EdgeStar Limited Warranty One (1) Year Parts & Labor This product is warranted by EdgeStar and is subject to any conditions set forth as follows: WHAT IS COVERED: For a period of ONE (1) YEAR from the date of original retail purchase, EdgeStar will repair or replace any part free of char ge i...