Page 3 - Important Safety Instructions
EN 3 9. Do not operate the Appliance in an area where there are lit candles or fragile objects. 10. Do not use in extremely hot or cold environments (below 11. Keep hair, loose clothing, fingers, and all parts of body away from any openings and moving parts. 12. Do not operate the Appliance in a roo...
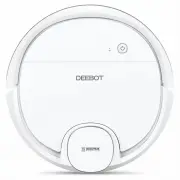
Page 6 - Package Contents and Technical Specifications
EN 6 2. Package Contents and Technical Specifications 2.1 Package Contents Robot (4) Side Brushes (2) Washable/Reusable Main Brush Option (Pre-installed) Cleaning Cloth Plate Docking Station Remote Control with Batteries Instruction Manual Model DD4G, DD4G.**(*=0-9) Working Voltage 12V DC Rated Powe...
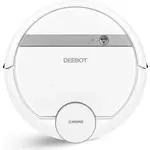
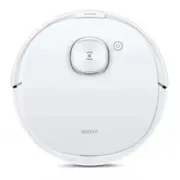
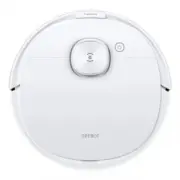
Page 7 - Robot; Dust Bin
EN 7 2.3 Product Diagram Robot 1. Cover 2. AUTO Mode Button3. Bumper with Anti- Collision Sensors 4. Reservoir Release Button5. Anti-Drop Sensors6. Charging Contacts 7. Side Brushes 8. Main Brush Option9. Driving Wheels 10. Universal Wheel11. Battery Pack 12. Water Outlets13. Reservoir 14. RESET But...
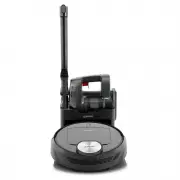
Page 8 - Advanced Mopping System; Docking Station
EN 8 2. Package Contents and Technical Specifications Advanced Mopping System 1. Water Inlet2. Reservoir3. Cleaning Cloth Plate Cleaning Cloth 5. Magnet 4 3 5 2 1 Docking Station Remote Control 1. Infrared Signal Generator2. Docking Station Pins 1. START/PAUSE Button2. Direction Control Buttons3. Re...
Page 9 - Notes Before Cleaning; Operating and Programming
EN 9 3.1 Notes Before Cleaning Before operating DEEBOT, take a few moments to survey the area to be cleaned and remove any obstacles. Please take care of DEEBOT and assist it at the cleaning area to put furniture like chairs in their proper place. Before using the product near an area rug or on a sh...
Page 11 - Install Side Brushes
EN 11 3. Operating and Programming * When DEEBOT is not cleaning, it is suggested to keep it powered ON and charging instead of powered OFF. Install Side Brushes Attach Side Brushes to the bottom of DEEBOT by pressing a brush into each slot with the matching color until it clicks. 2 Power ON Open th...
Page 12 - Charge DEEBOT
EN 12 Pause DEEBOT by pressing the AUTO Mode Button on DEEBOT or on the Remote Control. * DEEBOT can be directed to move forward, backward, left and right using the Direction Control Buttons on the Remote Control when it is Paused. * The AUTO Mode Button on the robot’s Control Panel stops glowing af...
Page 13 - Power OFF; Cleaning Pattern and Cleaning Mode Selection
EN 13 3. Operating and Programming Pause DEEBOT. Open the robot’s Top Cover. Move the Power Switch to the OFF position. Random Cleaning Pattern should be set when cleaning carpet. In Random Pattern, DEEBOT cleans in a straight line and changes directions when it meets an obstacle. Programmed Cleanin...
Page 14 - Select Cleaning Mode; AUTO Cleaning Mode
EN 14 3. Operating and Programming Double-click the AUTO Button on the robot. Cleaning Pattern is switched when DEEBOT emits two beeps. Cleaning Patterns can also be set using the ECOVACS App. DEEBOT uses the set Cleaning Pattern when cleaning in AUTO Cleaning Mode. Select Cleaning Mode When Program...
Page 15 - Edge Cleaning Mode; Programming the Robot; Spot Cleaning Mode; Optional Mopping System
EN 15 3. Operating and Programming Edge Cleaning Mode This mode is good for cleaning the edges and corners of a room. In Edge Cleaning Mode, DEEBOT cleans along a border (e.g. wall). 3 ECOVACS App. 3.4 Programming the Robot Spot Cleaning Mode (1-5 minutes) This mode is applicable for an area of high...
Page 16 - Add Water into the Reservoir.; Start
EN 16 Add Water into the Reservoir. 1 3. Operating and Programming Attach Cleaning Cloth; Install the Cleaning Cloth Plate and the Reservoir. 2 Start Select the desired Cleaning Mode. DEEBOT sweeps, lifts, vacuums and mops in the selected mode. 3
Page 17 - Choosing a Suction Option; Install the Direct Suction Option
EN 17 3. Operating and Programming The robot has 2 interchangeable suction options for your convenience. Main Brush Option: The best choice for deep cleaning with a combination of the Main Brush and strong suction. The Main Brush Option comes pre-installed in DEEBOT. Direct Suction Option: The best ...
Page 18 - Install the Main Brush Option
EN 18 3. Operating and Programming Install the Main Brush Option Turn the robot over. Push both buttons on the Direct Suction Option and remove Direct Suction Option.Insert the Main Brush into the bottom of the robot.Line up the Main Brush Cover tabs with the slots on the bottom of the robot. Press ...
Page 19 - Alarm Indicator and Sounds
EN 19 3. Operating and Programming 3.7 Alarm Indicator and Sounds Alarm Sound Indicator Light Problems Solution / Status Indicator and goes out once DEEBOT is powered ON. DEEBOT has low battery. Power ON the robot. Manually place the robot on the Docking Station and charge. One Beep Status Indicator...
Page 21 - Dust Bin and Filters
EN 21 4. Maintenance Open the robot’s Top Cover and remove the Dust Bin. Open the Dust Bin Cover and empty the Dust Bin. 4.2 Dust Bin and Filters
Page 22 - Main Brush; Main Brush, Direct Suction Option and Side Brushes; Direct Suction Option
EN 22 Rinse the Sponge Filter, Dust Bin and Filter Net under running water. reinstalling. Main Brush Turn the robot over. Push both buttons on the Main Brush Option and remove the Main Brush cover. Remove the Main Brush. Use the Multi-Function Cleaning Tool to cut off and remove any hair tangled aro...
Page 23 - Cleaning the Side Brushes
EN 23 4.4 Other Components Use the Multi-Function Cleaning Tool to cut off and remove any hair tangled around the Universal Wheel. Wipe the Bumper with the brush of the Multi- Function Cleaning Tool. Wipe the Anti-Drop Sensors with the brush of the Multi-Function Cleaning Tool to maintain their effe...
Page 24 - Regular Maintenance
EN 24 4. Maintenance Wipe the robot’s Charging Contacts and Docking Stations Pins with a dry cloth to maintain their effectiveness. 4.5 Regular Maintenance Note: ECOVACS manufactures various replacement parts and assemblies. Please contact Customer Service for more information on replacement parts. ...