Page 2 - CAUTIONS; SAVE THESE INSTRUCTIONS FOR
2 NEVER LEAVE THE HEATER UNATTENDED WHILE BURNING ! CAUTIONS - SAFETY GUIDE - WARNING !! RISK OF EXPLOSION / RISK OF FIRE ! NEVER use any fuel other than 1-K kerosene. ! NEVER use fuel such as gasoline, benzene, paint thinners or other oil compounds in this heater. ! NEVER refill heater fuel tank wh...
Page 3 - WARNINGS
NEVER LEAVE THE HEATER UNATTENDED WHILE BURNING ! 3 WARNINGS IMPORTANT : READ AND UNDERSTAND ALL WARNINGS AND OPERATING INSTRUCTIONS PRIOR TO OPERATING THIS HEATER. WARNING FAILURE TO INSTALL, MAINTAIN, AND/OR OPERATE THIS KEROSENE HEATER IN ACCORDANCE WITH THE MANUFACTURER’S WARNINGS AND OPERATING ...
Page 4 - CONTACT BURNS
NEVER LEAVE THE HEATER UNATTENDED WHILE BURNING ! 4 5. NEVER store or transport kerosene in other than a metal or plastic container that is (1) acceptable for kerosene, (2) BLUE in color, and (3) clearly marked "Kerosene". NEVER store kerosene in the living space; kerosene should be stored i...
Page 5 - ASPHYXIATION AND CARBON MONOXIDE POISONING
NEVER LEAVE THE HEATER UNATTENDED WHILE BURNING ! 5 ASPHYXIATION AND CARBON MONOXIDE POISONING WARNING. Unvented heaters consume oxygen and produce carbon monoxide. Asphyxiation may result from breathing high levels of carbon monoxide. Use only in well- ventilated areas, and adjust wick in accordanc...
Page 7 - CAUTIONS-SAFETY GUIDE; CONTENTS OF OWNER'S MANUAL
NEVER LEAVE THE HEATER UNATTENDED WHILE BURNING ! 7 CAUTIONS-SAFETY GUIDE INTRODUCTIONFEATURES UNPACKING AND ASSEMBLYKEROSENE (1-K ONLY)FUELING YOUR HEATER AUTOMATIC IGNITION SYSTEMCHECKING THE IGNITION SYSTEM ADJUSTING THE WICKWICK MAINTENANCE ITEM ITEM PAGE 277 8~9 9~10 101112 12~13 13 CARBON REMO...
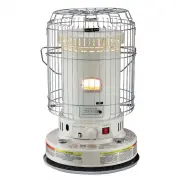
Page 8 - UNPACKING AND ASSEMBLY; A) Remove all packing materials from heater:
CAUTION: "RISK OF BURNS" DO NOT OPERATE HEATER WITHOUT INSTALLING THE PROTECTIVE GUARD OR GRILL. 1. REMOVE THE HEATER AND ALL PACKING MATERIALS FROM THE BOX. (Fig.2) NOTE : Save the shipping carton and packing materials for future storage. 8 UNPACKING AND ASSEMBLY Heater.Top guard.Handle.Top...
Page 10 - FUELING YOUR HEATER; siphon pump, make sure that youtighten (clock wise) the cap on the
NEVER LEAVE THE HEATER UNATTENDED WHILE BURNING ! 10 It is normal for a kerosene heater to give off a slight odor upon start-up and shut-down. After 5-10 minutes of operation, the heater should have reached its normal operating temperature and any odor should be very slight. NEVER store kerosene in ...
Page 11 - AUTOMATIC IGNITION SYSTEM; To use the automatic ignition system:; IGNITION VIA MATCH; The procedure is as follows:
NEVER LEAVE THE HEATER UNATTENDED WHILE BURNING ! 11 3 1 . g i F 2 1 . g i F AUTOMATIC IGNITION SYSTEM For safety and convenience, this heater features an automatic ignition system. 2 "C" cell batteries, included with the heater, provide the power for the igniter which lights the wick once i...
Page 12 - CHECKING THE IGNITION SYSTEM; perform the following checks:; ADJUSTING THE WICK; CORRECT FLAME; IMPORTANT NOTE : NEVER LEAVE THE HEATER UNATTENDED WHILE BURNING.; FLAME TOO HIGH
NEVER LEAVE THE HEATER UNATTENDED WHILE BURNING ! 12 CHECKING THE IGNITION SYSTEM If the automatic ignition system fails to operate properly, perform the following checks: BATTERIES -2 "C" cell batteries are located at the rear of the heater. Replace with new batteries. IGNITER PLUG - If the...
Page 13 - WICK MAINTENANCE / HOW TO CHECK THE CONDITION OF YOUR WICK
NOTE : During start-up, small adjustments to the flame can be performed by using the burner knob on the front of the burner and MOVING THE BURNER FROM SIDE TO SIDE until the flame at the top of burner is as even as possible. DO NOT TOUCH THE BURNER KNOB ONCE THE HEATER HAS REACHED NORMAL OPERATING T...
Page 14 - WICK REPLACEMENT; Use only a genuine replacement wick.
WICK ASSEMBLY- Check at least once a month!! The burner assembly sits on top of the wick guide. Over time, tar deposits can accumulate on the wick guide, and this can prevent the burner assembly from seating properly. This can result in poor combustion, smoke, odor, etc.. To prevent this from happen...
Page 15 - NOTE : DO NOT DISASSEMBLE THE STAINLESS STEEL WICK HOLDER.
NEVER LEAVE THE HEATER UNATTENDED WHILE BURNING ! 15 7/32 in. (5.5mm) All around WICK 25/64 IN. (10 mm) RIM OF WICK ADJUSTER (holder) Wick Cover Hole Pin 7 . Remove the four wing nuts which hold the wick assembly to the heater and carefully lift the wick assembly from the heater. 8 . Replace the wic...
Page 17 - EXTINGUISHING THE HEATER; allow at least 10 minutes before reigniting the heater.; AUTOMATIC SAFETY SHUT-OFF DEVICE
NEVER LEAVE THE HEATER UNATTENDED WHILE BURNING ! 17 EXTINGUISHING THE HEATER To extinguish the heater, push down on the manual shut-off knob (Fig.18) with one hand while holding the wick adjuster knob in the other hand. You will feel the pressure of spring action attempting to turn the wick adjuste...
Page 18 - the safety shut-off device to be sure that it is operating properly.; WITH THE HEATER TURNED OFF,; raise the wick; LONG TERM STORAGE OF YOUR HEATER; NEVER; mix water with the; MANUAL
NEVER LEAVE THE HEATER UNATTENDED WHILE BURNING ! 18 TESTING THE SAFETY SHUT-OFF DEVICE : At least once a week during the heating season, it is important to test the safety shut-off device to be sure that it is operating properly. WITH THE HEATER TURNED OFF, raise the wick using the wick adjuster kn...
Page 19 - TROUBLE SHOOTING GUIDE
19 NEVER LEAVE THE HEATER UNATTENDED WHILE BURNING ! TROUBLE SHOOTING GUIDE N O I T C A E V I T C E R R O C E L B U O R T 1. Fill tank with 1-K kerosene. 2. Drain tank. Remove wick assembly & replace wick. Reinstall wick assembly. Fill tank with 1-K kerosene. 3. Replace batteries. Replace ignite...
Page 20 - PARTS LIST
NEVER LEAVE THE HEATER UNATTENDED WHILE BURNING ! 20 DRAWING NUMBER TOP GRILL CARRYING HANDLETOP PLATEBURNER ASS'Y WICK COVER REAR GRILLCABINET BASEWIND COVER WICK ADJUSTER ASS'Y (COMPLETE) WICK WICK ADJUSTER GASKET SAFETY SHUT OFF DEVICE DRIP TRAY ASS'Y FUEL CAP GASKET FUEL CAP ASS'Y WICK ADJUSTER ...
Page 21 - DuraHeat; PORTATIL
Antes del primer uso de este calentador, por favor lea este MANUAL del DUEÑO muy cuidadosamente. Este MANUAL del DUEÑO se ha diseñado para instruirlo acerca de la manera correcta de armar el calentador, mantener el calentador, guardar el calentador, y de más importancia, cómo usar el calentador en u...
Page 23 - EXPLOSION DE FUEGO; CUATELA; ¡GUARDE ESTAS INSTRUCCIONES PARA la REFERENCIA FUTURA!!
3 ¡ADVIRTIENDO!! RIESGO DE EXPLOSION DE FUEGO ! NUNCA use cualquier combustible en lugar de 1-K querosén. ! NUNCA use combustible como gasolina, benceno, aguarrás de la pintura u otros compuestos de aceite en este calentador. ! NUNCA alimenta el tanque del calentador con combustible cuando el calent...
Page 27 - VOLUMENES DEL MANUAL del DUEÑO; Ilustración 1; RASGOS; INTRODUCCION
7 ARTICULO PAGINA Las CUATELAS GUIA PARA LA SEGURIDAD 3 7 N O I C C U D O R T N I - 1 7 S O G S A R - 2 3 - DESEMPACAMIENTO Y MONTAJE 9 - 8 A E L B M A S A 4 - QUEROSÉN (SOLO 1-K) 9-10 5 - ALIMENTAR SU CALENTADOR 10 6 - SISTEMA de IGNICIÓN AUTOMÁTICO 11 7 - CONTROLAR EL SISTEMA DE IGNICIÓN 12 3 1 - ...
Page 28 - DESEMPACAMIENTO Y MONTAJE; Ilustración 2; Ilustración 5B
8 DESEMPACAMIENTO Y MONTAJE ADVERTENCIA: "RIESGO DE QUEMADURAS." NO USE EL CALENTADOR SIN INSTALAR LA CERCA PROTECTORA (LA VERJA) 1. SAQUE EL CALENTADOR Y TODOS LOS MATERIALES DE EMBALAJE DE LA CAJA. (Ilu. 2) NOTA: Guarde el cartón del envío y los materiales de embalaje para el almacenamient...
Page 30 - ALIMENTAR SU CALENTADOR; Ilustración 10
10 Es normal para un calentador de querosén emitir un olor ligero al encender y apagar. Después de 5-10 minutos de funcionamiento, el calentador debe de haber alcanzado su temperatura de funcionar normal y cualquier olor debe ser muy poco. NUNCA guarde el querosén en luz del sol directa o cerca de u...
Page 31 - SISTEMA DE IGNICION AUTOMATICO; Ilustración 14
11 SISTEMA DE IGNICION AUTOMATICO Para la seguridad y comodidad, este calentador ofrece un sistema de ignición automático, 2 pilas "C", incluidas con el calenta- dor, mantienen el poder del mechero que enciende la mecha cuando ésta se ha subido a su altura máxima. Para usar el sistema de ign...
Page 32 - Ilustración 15
12 CONTROLAR EL SISTEMA DE IGNICION Si la ignición automática no funciona correctamente, realice las pruebas siguientes: - PILAS - 2 "C" las pilas se localizan atrás en el calentador. Reemplace con pilas nuevas. - EL TAPÓN DEL MECHERO - Si el sistema de la ignición automático todavía no func...
Page 33 - MANTENIMIENTO DE LA MECHA; Ilustración 17
13 NOTA : Cuando primero encienda al calentador, pequeños ajustes a la llama pueden ser realizados por usar el bulto del quemador en el frente del quemador y MOVER EL QUEMADOR DE UN LADO AL OTRO hasta que la llama encima del quemador está igualado tanto como posible. No TOQUE EL BULTO del QUEMADOR U...
Page 34 - Ilustración A
14 ¡MONTAJE DE LA MECHA - Inspeccione por lo menos una vez al mes!! El montaje del quemador se sienta encima de la guía de la mecha. Con el tiempo, los depósitos de alquitrán pueden acumularse en la guía de la mecha, y esto puede impedir que el montaje del quemador se siente correctamente. Esto pued...
Page 36 - fully raised
16 15 . Ponga el montaje de la mecha al revés para re poner la tapa de la mecha. 16 . Alinee las etiquetas en de la tapa de la mecha con los cuatro agujeros de tornillo en el fondo del montaje, como se muestra, presionela en su lugar. Asegurese que hay contacto firme en todos los puntos. 17 . (1)Gir...
Page 37 - Ilustración 18
17 EXTINGUIR EL CALENTADOR Para extinguir el calentador, apriete hacia abajo en el bulto del interruptor manual (Ilu. 18) con una mano mientras detengas el bulto de ajustador de mecha en la otra mano. Usted sentirá la presión en su mano de la acción del resorte que intentará girar el bulto del ajust...
Page 38 - GUARDAR SU CALENTADOR A LATGO PLAZO; Ilustración 19
18 PROBAR EL INTERRUPTOR AUTOMÁTICO DE SEGURIDAD: por lo menos una vez a la semana durante la estación de usar el calentador, es importante probar el interruptor automático de seguridad para estar seguro que está funcionando correctamente. CON EL CALENTADOR APAGADO, suba la mecha que con el bulto de...
Page 39 - GUIA DE PROBLEMAS COMUNES
19 GUIA DE PROBLEMAS COMUNES 16 O V I T C E R R O C N O I C C A S A M E L B O R P Calentador No Se Enciende: 1. El tanque de combustible está vacío 1. Llene el tanque de 1-K querosén. & a h c e m a l e d e j a t n o m l e e ti u q , e u q n a t l e a tr e i V . 2 n é s o r e u q l e n e a u g a ...
Page 40 - NOTA: ESPECIFIQUE EL NUMERO DEL MODELO Y; ESPECIFICACIONES
20 20 LA LISTA DE LAS PARTES DIBUJO EXPANDIDO DE LAS PARTES NOTA: ESPECIFIQUE EL NUMERO DEL MODELO Y EL NUMERO DE LA PARTE AL PEDIR PARTES. ESPECIFICACIONES O R E M U N O R E M U N EN EL DIBUJO DESCRIPCION DE PARTE 17 18 19 No. de Modelo DH2304 n ó ic c e v n o C / n ó is i m s n a r T r o d a t n e...