Dr. Infrared Heater DR-238 - Manuals
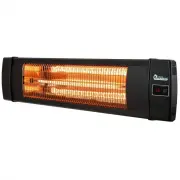
User Manual Dr. Infrared Heater DR-238


Summary
1 | P a g e Warning THESE INSTRUCTIONS SHOULD BE READ CAREFULLY AND RETAINED FOR FUTURE REFERENCE, We cannot be liable for any damages caused by failure to observe these instructions. IMPORTANT SAFETY INSTRUCTIONS READ CAREFULLY-The infrared heater is designed for safe operation. Nevertheless, insta...
2 | P a g e safety. Children and vulnerable people should be supervised to ensure they do not play with the appliance. 18. If the supply cord is damaged in any way, it must be replaced by the manufacturer or its service agent or a similarly qualified person in order to avoid a hazard. 19. To prevent...
3 | P a g e INSTALLATION Tools Needed: * Pencil *Hammer *Level *Screw Driver *Power Drill and drill bits A mounting bracket is provide d with the heater which has been specifically designed to allow this product to be fitted to ceiling or wall before drilling the holders for the ceiling/wall is soli...
Dr. Infrared Heater Heaters Manuals
-
 Dr. Infrared Heater DR-222
User Manual
Dr. Infrared Heater DR-222
User Manual
-
 Dr. Infrared Heater DR-239
User Manual
Dr. Infrared Heater DR-239
User Manual
-
 Dr. Infrared Heater DR968
User Manual
Dr. Infrared Heater DR968
User Manual
-
 Dr. Infrared Heater DR-968
User Manual
Dr. Infrared Heater DR-968
User Manual
-
 Dr. Infrared Heater DR-975
User Manual
Dr. Infrared Heater DR-975
User Manual
-
 Dr. Infrared Heater DR-978
User Manual
Dr. Infrared Heater DR-978
User Manual
-
 Dr. Infrared Heater DR-988
User Manual
Dr. Infrared Heater DR-988
User Manual
-
 Dr. Infrared Heater DR998
User Manual
Dr. Infrared Heater DR998
User Manual
-
 Dr. Infrared Heater DR-998
User Manual
Dr. Infrared Heater DR-998
User Manual