Dimplex DCWF50MB - Manuals
User Manual Dimplex DCWF50MB


Summary
IMPORTANT THESE INSTRUCTIONS SHOULD BE READ CAREFULLY AND RETAINED FOR FUTURE REFERENCE. Note also the information presented on the appliance CAUTION: FAILURE TO FOLLOW THESE INSTRUCTIONS MAY CAUSE INJURY AND/ OR DAMAGE AND MAY INVALIDATE YOUR WARRANTY Please read the operating instructions carefull...
• Children should be supervised to ensure they do not play with the appliance. • WARNING : To avoid danger of suffocation please remove all packaging materials particularly plastic and EPS and keep these away from vulnerable people, children and babies. • NEVER drop or insert any object or fingers i...
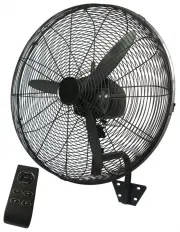
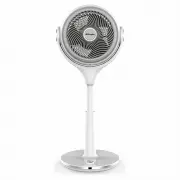
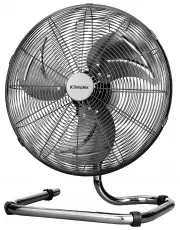
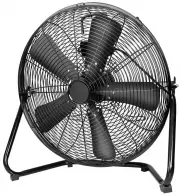
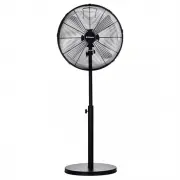
Model no. DCWF50MB Colour Matte Black Power supply 220-240V~, 50/60Hz Rated power 135W Speed settings 19 Modes - Timer 1/2/4/8hr Tilt adjustable head Y Horizontal oscillation Y Noise level 73dB(A) Weight (net) 8.5kg Dimensions (w x d x h) 580 x 380 x 730mm Specification • For greater precision, plea...
Dimplex Fans Manuals
-
 Dimplex DCACE20
User Manual
Dimplex DCACE20
User Manual
-
 Dimplex DCACE20R
User Manual
Dimplex DCACE20R
User Manual
-
 Dimplex DCACM20
User Manual
Dimplex DCACM20
User Manual
-
 Dimplex DCACP30DC
User Manual
Dimplex DCACP30DC
User Manual
-
 Dimplex DCBOX30W
User Manual
Dimplex DCBOX30W
User Manual
-
 Dimplex DCBOX50MB
User Manual
Dimplex DCBOX50MB
User Manual
-
 Dimplex DCEVP13
User Manual
Dimplex DCEVP13
User Manual
-
 Dimplex DCFF40B
User Manual
Dimplex DCFF40B
User Manual
-
 Dimplex DCFF40GBLK
User Manual
Dimplex DCFF40GBLK
User Manual
-
 Dimplex DCFF40MB
User Manual
Dimplex DCFF40MB
User Manual
-
 Dimplex DCFF40MBK
User Manual
Dimplex DCFF40MBK
User Manual
-
 Dimplex DCFF46B
User Manual
Dimplex DCFF46B
User Manual
-
 Dimplex DCFF50BLK
User Manual
Dimplex DCFF50BLK
User Manual
-
 Dimplex DCMIST25
User Manual
Dimplex DCMIST25
User Manual
-
 Dimplex DCPF3IN1
User Manual
Dimplex DCPF3IN1
User Manual
-
 Dimplex DCPF40C
User Manual
Dimplex DCPF40C
User Manual
-
 Dimplex DCPF40MB
User Manual
Dimplex DCPF40MB
User Manual
-
 Dimplex DCPF40MBK
User Manual
Dimplex DCPF40MBK
User Manual
-
 Dimplex DCPF46
User Manual
Dimplex DCPF46
User Manual
-
 Dimplex DCPF50
User Manual
Dimplex DCPF50
User Manual