Page 2 - How to contact us about a warranty claim
Contents Page 31 Page 2 Parts and Features . . . . . . . . . . . . . . . . . . . . . . . . . . . . . . . . . . 03 De’Longhi Safety Precautions. . . . . . . . . . . . . . . . . . . . . . . . . . . 04 Dishwasher Safety Precautions . . . . . . . . . . . . . . . . . . . . . . . . . 05 Installation Safet...
Page 3 - Dishwasher details; Before you call for service; 60° Water Spray System
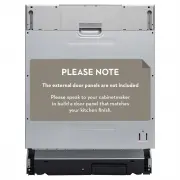
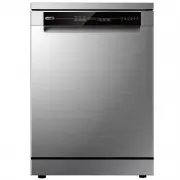
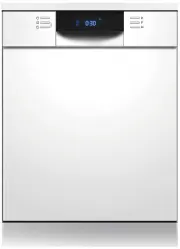
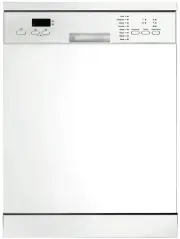
Parts and Features Page 3 Page 30 Model: DEDW6015INFI Dimensions: Height (H) 815mm Width (W) 598mm Depth (D1) 550mm (with the door closed) Depth (D2) 1150mm (with the door opened 90°) Voltage connected Load: see rating label Water pressure: 0.04-1.0MPa Power supply: see rating label Capacity: 15 pla...
Page 4 - ti; P r o bl e m; Codes
De’Longhi’s Safety Precautions De’Longhi pride themselves on their innovative range of the highest quality consumer products. De’Longhi ensures all of its products are 100% safe through quality design and manufacture. All products meet or exceed stringent laboratory-tested safety requirements. It is...
Page 5 - Dishwasher Safety Precautions; DANGER; Safety Alert Symbol; This symbol alerts you to potential hazards.; Danger; Troubleshooting; is
Dishwasher Safety Precautions DANGER WARNING CAUTION Your safety and the safety of others is very important. Safety messages are displayed in this manual and on your appliance. Read and obey these safety messages as they will alert you to potential hazards and tell you how to reduce the chance of in...
Page 6 - Grounding Instructions; WARNING; How to keep your Dishwasher in shape; When not in Use for a long time; Care and Cleaning
Dishwasher Safety Precautions Before the appliance is used, it must be properly positioned and installed as described in this manual, so read the manual carefully. To reduce the risk of fire, electrical shock or injury when using the appliance, follow basic precaution, including the following: DANGE...
Page 7 - Cleaning the Door
Installation Safety Precautions Electrical Connection This appliance should be properly grounded for Ÿ your safety. The power cord of this appliance is equipped with a three-prong plug which mates with standard three prong wall outlets to minimise the possibility of electrical shock. DO NOT UNDER AN...
Page 8 - Installation; Open
Installation Page 25 Page 8 Cabinet Preparation Choose a place near the sink to facilitate the Ÿ installation of inlet and drain hoses. Cabinet dimensions less than 5mm between the Ÿ top of dishwasher and cabinet and the outer door aligned to cabinet. 90° 90° 820mm 580mm 80 100 600mm Electrical, dra...
Page 9 - Tension adjustment of the door; Using Your Dishwasher; FORGET TO ADD A DISH?; Switch off the Dishwasher; TURNING ON THE APPLIANCE
Installation Page 9 Install the hook on the aesthetic fascia panel and Ÿ put the hook into the slot of the outer door of dishwasher (see below). After positioning of the panel, fix the panel onto the Ÿ outer door by screws and bolts (See following diagrams). R e m o v e t h e f o u r s h o r t s c r...
Page 10 - Securing the Dishwasher; Positioning the Appliance; Levelling; CONTROL PANEL; Condensation Strip
Installation Securing the Dishwasher The dishwasher must be secured in place using either of the following methods: Normal work surface - Put the installation hook into Ÿ the slot of the side panel and secure it to the work surface with the wood screws (A). Marble or granite work top - Fix through t...
Page 11 - Drain Hose Connection; Syphon Connection; Counter; Water Outlet; STARTING A WASHING PROGRAM; Wash Cycle Table
Installation Page 11 Page 22 Drain Hose Connection Insert the drain hose into a drain pipe with a Ÿ minimum diameter of 40mm (B), or let it run into the sink (A), making sure to avoid bending or crimping it. The top of the hose must be at a height less than 1000mm. The free end of the hose must not ...
Page 12 - About the Safety Inlet Hose with Aqua Stop; Cold Water Connection; How to Connect the Safety Inlet Hose with Aqua Stop; Damage to glassware and other dishes; Possible Causes; Te a s p o o n s
Installation About the Safety Inlet Hose with Aqua Stop The Safety Inlet Hose with Aqua Stop consists of double walls. The hose's system guarantees its intervention by blocking the flow of water in case of the inlet hose breaking and when the air space between the inlet hose itself and the outer cor...
Page 13 - QUICK START GUIDE; Loading the Lower Basket; I N; Folding the spikes in the Lower Basket
Using Your Dishwasher QUICK START GUIDE For detailed operating method read the corresponding content on the instruction manual. Compartment A: For each wash cycle. Compartment B: For programmes with pre-wash only. (Follow the !) User Manual Mechanical indicator C. or digital indicator on control pan...
Page 14 - BEFORE STARTING THE DISHWASHER; Full; IN; L owe r p o s i t i o n
Page 14 Using Your Dishwasher BEFORE STARTING THE DISHWASHER The following things should be checked before starting the dishwasher: 1. That the dishwasher is level and fixed properly. 2. That the inlet valve is open . 3. There is no leakage at the connections of the conducts. 4. The wires are tightl...
Page 15 - How to fill the Rinse Aid Dispenser; LOADING THE DISHWASHER BASKET; Recommendation
Page 15 Using Your Dishwasher How to fill the Rinse Aid Dispenser 1. Remove the rinse aid reservoir cap by lifting up the handle. 2. Pour the rinse aid into the dispenser, being careful not to overfill. 3. Close the cap once reservoir is full. Be careful not to overfill the dispenser, because this c...