Page 2 - CONTENTS; Safety and warnings
CONTENTS Safety and warnings 3 Installation instructions 5 Operating instructions 13 Cleaning and maintenance 14 Parts and accessories 16 Service & Warranty 17
Page 3 - SAFETY AND WARNINGS; Weight Hazard; IMPORTANT SAFETY INSTRUCTIONS
3 SAFETY AND WARNINGS ! 6.5 kg (DE6LUM) 8.8 kg Weight Hazard ! Electric Shock HazardAlways disconnect the appliance from the mains power supply before carrying out any maintenance or repairs. Alterations to the domestic wiring system must only be made by a qualified electrician. Failure to follow th...
Page 5 - INSTALLATION INSTRUCTIONS; Parts Supplied; 50 mm ducting adapter; Other Parts Required
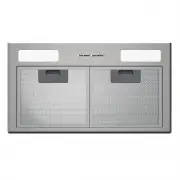
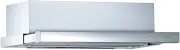
5 INSTALLATION INSTRUCTIONS Parts Supplied (2) User guide (1) Rangehood (1) 150 mm ducting adapter (1) Other Parts Required Ducting – 150mm diameter, rigid or semi-rigid (not supplied) B U I LT- I N I N T E G R AT E D R A N G E H O O D DE6LUM, DE9LUM N Z AU
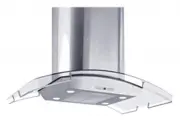
Page 6 - Product and cabinetry cutout dimensions
INSTALLATION INSTRUCTIONS 6 Product and cabinetry cutout dimensions
Page 7 - PRODUCT DIMENSIONS
INSTALLATION INSTRUCTIONS 7 DE6LUM DE9LUM PRODUCT DIMENSIONS mm mm A Overall height of product (with ducting adapter) 285 (330) 315 (360) B Overall width of product 492 792 C Overall depth of product 277 277 D Thickness of flange 2.5 2.5 E Width of chassis 454 744 F Depth of chassis 255 255 G Height...
Page 8 - Height of rangehood; Height top of cooktop to base of product
INSTALLATION INSTRUCTIONS 8 Height of rangehood P MINIMUM CLEARANCES mm P Height top of cooktop to base of product min. 600 – max. recommended 750 This rangehood must be installed no lower than the minimum height indicated in the table above. Minimum installation height may be greater if required by...
Page 9 - Induction cooking considerations
INSTALLATION INSTRUCTIONS 9 Induction cooking considerations Induction cooktops use energy efficient technology that only heats the contents of a cooking pot.Unlike gas or traditional electric cooktops, the surrounding air does not get heated when using an induction cooktop. As a result, rangehood f...
Page 10 - Recirculating; To recirculate your perimeter insert range hoods:; Wear gloves to protect against sharp edges.
INSTALLATION INSTRUCTIONS 10 Recirculate with carbon filters Recirculating Check with local codes and regulations if recirculation is allowed inyour area. IMPORTANT! Venting directly into the cabinet with no ducting and louvered vent is not permitted. To recirculate your perimeter insert range hoods...
Page 11 - Prepare for installation.; Remove the filter from the rangehood.
INSTALLATION INSTRUCTIONS 11 1 Prepare for installation. INSTALLATION Before installing your rangehood: Please read the instructions carefully.Unpack the rangehood and check that all functions are working.Ensure that the voltage (V) and the frequency (Hz) indicated on the serial platematch the volta...
Page 12 - Connect duct and plug rangehood in.
INSTALLATION INSTRUCTIONS 12 5 Connect duct and plug rangehood in. 6 Lift the rangehood and fit through the opening of the cupboard till the spring loaded brackets / clips hold the product in place. 7 Secure rangehood while tightening the brackets / clips .
Page 13 - OPERATING INSTRUCTIONS; Control panel; Lights
13 OPERATING INSTRUCTIONS Control panel CONTROL PANEL FEATURES Lights Turn the lights on or off. When press and hold the speed button or , the fan operates for 15 minutes at the current speed and then turn off. Timer i Turn the rangehood fan on or adjust the fan speed levels from 1 – 3 with 1 being ...
Page 14 - CLEANING AND MAINTENANCE; Maintenance; Note: some discolouration of the frames may occur.; Removing the aluminium filters:; Reverse these instructions when refitting the filters.; Carbon filters – for use in recirculation mode
14 CLEANING AND MAINTENANCE WARNING! Unplug or disconnect the appliance from the power supply before servicingor cleaning. IMPORTANT! Never use abrasive or oil based cleaners.Wear gloves to protect against sharp edges. Maintenance The rangehood should be cleaned regularly using a mild, liquid deterg...
Page 15 - Fitting the carbon filters:; Ensure the range hood is switched off.; Light bulb replacement
15 IMPORTANT! Carbon filters are disposable items and must be replaced at least every three months. Saturated carbon filters can become a barrier to air movement, therefore limiting your range hoods performance. In the event of a fire, grease laden filters could be flammable. Fitting the carbon filt...
Page 16 - PARTS AND ACCESSORIES; ITEM; Recirculation carbon filter x2
16 PARTS AND ACCESSORIES ITEM REFERENCE NUMBER Aluminium filter (DE6LUM) 02800924 Aluminium filter (DE9LUM) 02800996 Recirculation carbon filter x2 02859398
Page 17 - Power outages or surges.
17 SERVICE & WARRANTY Manufacturer’s Warranty Please read this warranty card carefully. Attach your purchase receipt to this warranty card and keep in a safe place. You must produce both warranty card and proof of purchase in the event of a warranty repair being required. When you purchase any n...
Page 18 - Pick up and delivery.; For Australian customers:
18 SERVICE & WARRANTY G Pick up and delivery. H Transportation or travelling costs involved in the repair when the product is installed outside the AUTHORISED CUSTOMER SERVICE CENTRE’S normal service area. This product has been designed for use in a normal domestic environment. It is not intende...
Page 19 - Customer Care; Your appliance is correctly installed.; Product Detials; Date of Purchase Purchaser
19 SERVICE & WARRANTY Customer Care Check the things you can do yourself. Refer to your User Guide and check: 1. Your appliance is correctly installed. 2. You are familiar with its normal operation. 3. You have read the problem solving section in your User Guide. If after checking these points y...