Page 2 - CAUTION
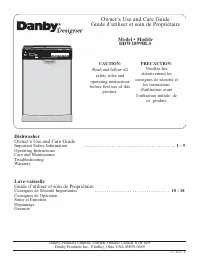
FROST FREE REFRIGERATOR Owner’s Use and Care Guide............................................... • Safety Instructions• Installation Instructions• Operation Instructions• Care and Maintenance• Troubleshooting• Warranty REFRIGERATEUR SANS GIVREGuide d’utiliser et soin de propriètaire...................
Page 3 - READ ALL SAFETY INFORMATION BEFORE USING; IMPORTANT SAFETY INFORMATION; GROUNDING INSTRUCTIONS; BEFORE FIRST USE; SAVE THESE INSTRUCTIONS!
Improper use of the grounding plug can result in a risk of electric shock. Consult a qualified electrician orserviceman if the grounding instructions are not completely understood or if doubt exists as to whetherthe appliance is properly grounded. READ ALL SAFETY INFORMATION BEFORE USING IMPORTANT S...
Page 4 - SAFETY PRECAUTIONS
IMPORTANT SAFETY INFORMATION 2 READ ALL SAFETY INFORMATION BEFORE USING SAVE THESE INSTRUCTIONS! When throwing away an old fridge equipped with a door lockthat cannot be opened from the inside, make sure that thelock is removed, disabled or destroyed before discarding.This will make it impossible fo...
Page 5 - INSTALLATION INSTRUCTIONS; CHOOSING THE RIGHT LOCATION
INSTALLATION INSTRUCTIONS 3 Remove exterior and interior packagings, wipe the outside thoroughly with a soft dry cloth and the inside with a wet, lukewarmcloth. Avoid placing the unit in a narrow recess or near any heat source, direct sunlight, or moisture. Let air circulate freelyaround the unit. K...
Page 6 - FEATURES; OPERATING INSTRUCTIONS; TEMPERATURE SELECTION
FEATURES 4 Freezer wireshelf Refrigeratorglass shelves Lower door bin Refrigerator door bin Refrigerator door Freezer door Cover Thermostatcontrol Levelling legs OPERATING INSTRUCTIONS TEMPERATURE SELECTION The first time you turn the unit on, set the temperature control to “7,” the coolest • settin...
Page 7 - INTERIOR LIGHT; FREEZING FRESH FOODS
OPERATING INSTRUCTIONS 5 INTERIOR LIGHT When you open the door the light will be ON automatically. When you close the door the light will turn OFF automatically. DEFROSTING YOUR APPLIANCE When? For the most efficient operation and minimum energy consumption, defrost the freezer compartment when the ...
Page 8 - DOOR REVERSAL INSTRUCTIONS
DOOR REVERSAL INSTRUCTIONS Tilt the unit slightly towards the rear and prop it securely. Two 1 people are required to tilt the unit during the door reversalprocess. On the top of the unit, remove the 4 screw covers, then undo 2 the screws underneath. 180° unscrew Unscrew Lift the top cover away from...
Page 10 - CARE AND MAINTENANCE; CLEANING THE APPLIANCE
CARE AND MAINTENANCE CLEANING THE APPLIANCE Turn the temperature control to "0", unplug the unit, and remove the food and baskets. • Wash the inside with a warm water and baking soda solution. The solution should be about 2 tablespoons of baking • soda to a quart of water.Wash the baskets wi...
Page 11 - TROUBLESHOOTING; PROBLEM
TROUBLESHOOTING Occasionally, a problem is minor and a service call may not be necessary - use this troubleshooting guide for a possiblesolution. If the unit continues to operate improperly, call an authorized service depot or Danby’s Toll Free Number 1-800-263-2629 for assistance. 9 PROBLEM SOLUTIO...
Page 12 - LIMITED IN-HOME APPLIANCE WARRANTY
LIMITED IN-HOME APPLIANCE WARRANTY This quality product is warranted to be free from manufacturer’s defects in material and workmanship, provided that the unit is used under the normal operating conditions intended by the manufacturer.This warranty is available only to the person to whom the unit wa...
Page 13 - INFORMATION DE SÉCURITÉ IMPORTANTE; MISE À LA TERRE; AVANT LA PREMIÈRE UTILISATION; CONSERVEZ CES INSTRUCTIONS!; AVERTISSEMENT IMPORTANT!
PRENDRE CONNAISSANCE DE TOUTES LES INFORMATIONS RELATIVES À LA SÉCURITÉ AVANT D'UTILISER LE PRODUIT INFORMATION DE SÉCURITÉ IMPORTANTE MISE À LA TERRE Cet appareil doit être mis à la terre. En cas decourt-circuit, lamise à la terre réduit les risquesde décharge électrique en four-nissant un échap-pa...
Page 14 - PRENDRE CONNAISSANCE DE TOUTES LES INFORMATIONS RELATIVES À LA; CONSERVEZ CES
INFORMATION DE SÉCURITÉ IMPORTANTE PRENDRE CONNAISSANCE DE TOUTES LES INFORMATIONS RELATIVES À LA SÉCURITÉ AVANT D'UTILISER LE PRODUIT 12 Veuillez vous assurer que les pièces de rechange sont remplacées par des pièces similaires, et que l’entretiensoit effectué par un technicien agréé par l’usine, a...
Page 15 - CONSIGNES DE INSTALLATION; INSTALLATION
CONSIGNES DE INSTALLATION 13 Enlevez les emballages extérieurs et intérieurs. Essuyez complètement l’extérieur avec un linge doux sec et l’intérieur avec un lingehumide tiède. Il ne faut jamais situer l'appareil dans un reocin étroit, proche d'une source d'air chaud. L'air doit circuler à l'entour d...
Page 16 - CARACTÉRISTIQUES; CONSIGNES D’UTILISATION; SÉLECTION DE LA TEMPÉRATURE
CARACTÉRISTIQUES 14 Clayette métalliquedu congélateur Clayettes en verredu réfrigérateur Casier de rangement inférieur Casier de rangement dans la porte du réfrigérateur Porte du réfrigérateur Porte du congélateur Couvercle en verre Cadran du thermostat Pieds de nivellement Compartiment à fruits et ...
Page 17 - LAMPE INTÉRIEURE
CONSIGNES D’UTILISATION CONGÉLATION DESDENRÉES FRAÎCHES 15 LAMPE INTÉRIEURE Lorsque vous ouvrez la porte, la lumière s'allume automatiquement. Lorsque vous fermez la porte, la lumière s'éteint automa-tiquement. DÉGIVRER VOTRE APPAREIL Quand? Pour un fonctionnement efficace et une consommation d’éner...
Page 18 - CHANGEMENT DU SENS D’OUVERTURE DE LA PORTE
CHANGEMENT DU SENS D’OUVERTURE DE LA PORTE Penchez l'unité légèrement vers l'arrière et calez-la de manière sécuri- 1 taire. Il est nécessaire d'utiliser deux personnes pour pencher l'unité lorsdu processus de renversement de la porte. Du haut de l’appareil, retirez les 4 couvercles de vis, puis ret...
Page 20 - SOINS ET ENTRETIEN; NETTOYAGE DE L'APPAREIL; PÉRIODE DE VACANCES; PANNE D’ÉLECTRICITÉ
SOINS ET ENTRETIEN NETTOYAGE DE L'APPAREIL Tournez le thermostat à « 0 », débranchez l'appareil et retirez les accessoires intérieurs. • Lavez l'intérieur au bicarbonate de soude dilué dans de l'eau chaude. La solution doit contenir 2 cuillerées à soupe de • bicarbonate de soude pour un litre d'eau....
Page 21 - DÉPANNAGE; PROBLÈME
DÉPANNAGE Il peut arriver qu'un problème mineur se produise qui ne nécessite pas d'appel de service : consultez ce guide de dépan-nage pour trouver une solution possible. Si l'appareil continue de malfonctionner, appelez un atelier de réparationautorisé ou composez le numéro sans frais de Danby 1-80...
Page 22 - GARANTIE LIMITÉE SUR
LIMITED IN-HOME APPLIANCE WARRANTY This quality product is warranted to be free from manufacturer’s defects in material and workmanship, provided that the unit is used under the normal operating conditions intended by the manufacturer.This warranty is available only to the person to whom the unit wa...
Page 23 - INSTRUCCIONES DE SEGURIDAD IMPORTANTES; LA CONEXIÓN A TIERRA; ¡GUARDE ESTAS INSTRUCCIONES!; ¡ADVERTENCIA IMPORTANTE!
LEA TODA LA INFORMACIÓN SOBRE SEGURIDAD ANTES DE UTILIZAR EL EQUIPO INSTRUCCIONES DE SEGURIDAD IMPORTANTES LA CONEXIÓN A TIERRA Este artefacto debe ser conectado a tierra. En caso de un cortocircuito eléctrico, la conexión a tierra reduce el riesgo de unadescarga eléctrica proporcionando uncable de ...
Page 25 - INSTRUCCIONES DE INSTALACIÓN; INSTALACIÓN
INSTRUCCIONES DE INSTALACIÓN 23 Saque los embalajes exteriores e interiores, limpie el exterior bien con un paño suave seco y el interior con un paño húmedo y tibio.Evite colocar la caja en un hueco estrecho o cerca de una fuente de calor, luz de sol directa, o lugar húmedo. Deje que el aire cir-cul...
Page 26 - CARACTERÍSTICAS; INSTRUCCIONES OPERADORAS; SELECCIÓN DE TEMPERATURA
CARACTERÍSTICAS 24 Estante de alambredel congelador Estantes de vidriodel refrigerador Contenedor inferior Contenedor de la puertadel refrigerador Puerta de refrigerador Puerta del congelador Cubierta de vidrio Control detemperatura Patas niveladoras Cajón para frutas y verduras con cubierta de vidr...
Page 27 - LUZ INTERIOR
INSTRUCCIONES OPERADORAS 25 LUZ INTERIOR Cuando abre la puerta, la luz encenderá automáticamente. Cuando la cierre, la luz apagaré automáticamente. CÓMO DESCONGELAR ELELECTRODOMÉSTICO ¿Cuándo? Para lograr el funcionamiento más eficiente y el mínimo consumo de energía, descongele el compartimento del...
Page 28 - CAMBIO DEL SENTIDO DEL MOVIMIENTO DE LA PUERTA
CAMBIO DEL SENTIDO DEL MOVIMIENTO DE LA PUERTA Incline levemente la unidad hacia atrás y déjela caer de forma segura. 1 Se necesitan dos personas para inclinar la unidad durante el procesode inversión de la puerta. De la parte superior de la unidad, remueva las 4 tapas de los tornillos y 2 saque los...
Page 30 - CUIDADO Y MANTENIMIENTO; LIMPIEZA DEL ARTEFACTO; VACACIONES
CUIDADO Y MANTENIMIENTO LIMPIEZA DEL ARTEFACTO Gire el control de temperatura a la posición “0,” desenchufe la unidad y saque los accesorios del interior. • Limpie el interior con una solución de agua tibia y bicarbonato de sodio. La solución debe contener cerca de 2 • cucharadas de bicarbonato de s...
Page 31 - SOLUCIÓN SUGERIDA; PROBLEMA
SOLUCIÓN SUGERIDA A veces, cuando se trata de un problema de poca importancia, no es necesario llamar para pedir asistencia. Busque enla siguiente guía una posible solución. Si la unidad sigue funcionando mal, llame a un centro de servicio técnico autor-izado o al número gratuito de Danby 1-800-263-...
Page 32 - GARANTÍA LIMITADA PARA
LIMITED IN-HOME APPLIANCE WARRANTY This quality product is warranted to be free from manufacturer’s defects in material and workmanship, provided that the unit is used under the normal operating conditions intended by the manufacturer.This warranty is available only to the person to whom the unit wa...
Page 33 - Model • Modèle • Modelo
All repair parts are available for purchase or special order when you visit your nearest service depot. To request service and/or the location of the service depot nearest you, call the TOLL FREE number. When requesting service or ordering parts, always pro-vide the following information: • Product ...