Page 2 - Model • Modèle • Modelo; Microwave Oven; Danby Products Limited, Guelph, Ontario Canada N1H 6Z9
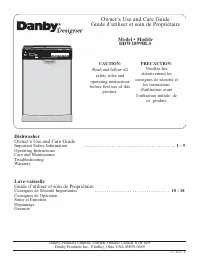
OWNER’S MANUAL MANUEL D'UTILISATION MANUAL DEL USUARIO Model • Modèle • Modelo CAUTION: Read and Follow All Safety Rules andOperating Instructions Before FirstUse of This Product. PRÉCAUTION: Veuillez lire attentivement les consignes de sécurité et lesinstructions d'utilisation avantl'utilisation in...
Page 3 - INSTRUCTION MANUAL AND COOKING GUIDE; MICROWAVE OVEN; TABLE OF CONTENTS; SAFETY
1 INSTRUCTION MANUAL AND COOKING GUIDE MICROWAVE OVEN MODEL: DMW1400W TABLE OF CONTENTS SAFETY ........................................... Pages 2-5 • Precautions to Avoid Possible Exposure to Excessive Microwave Energy • F.C.C.Statement • Important Safety Instructions • Proper and Safe Use of Your ...
Page 4 - IMPORTANT SAFETY INSTRUCTIONS
2 PRECAUTIONS TO AVOID POSSIBLE EXPOSURE TO EXCESSIVE MICROWAVE ENERGY (a) Do not attempt to operate this oven with the door open since open-door operation can result in harmful exposure to microwave energy. It is important not to defeat or tamper with the safety interlocks. (b) Do not place any obj...
Page 6 - SAVE THESE INSTRUCTIONS.; SAFE AND PROPER USE OF YOUR OVEN
3 11. Do not cover or block any ventilation openings on the oven.12. Do not store or use this appliance outdoors.13. Do not use this oven near water, near a kitchen sink, in a wet basement or near a swimming pool.14. Do not immerse cord or plug in water.15. Keep cord away from heated surfaces.16. Do...
Page 7 - GROUNDING INSTRUCTIONS; DANGER; WARNING; Electric Shock Hazard; CAUTION; Personal Injury Hazard.
4 GROUNDING INSTRUCTIONS DANGER Electric Shock Hazard • Touching some of the internal components can cause serious personal injury or death.Do not disassemble this appliance. WARNING Electric Shock Hazard • Improper use of the grounding plug can result in electric shock .Do not plug the appliance in...
Page 8 - Materials you can use in microwave oven
5 Utensils Remarks Dinnerware Microwave-safe only. Follow manufacturer's instructions.Do not use cracked or chipped dishes. Glass Jars Always remove lid. Use only to heat food until just warm. Most glass jars are not heat resistant and may break. Glassware Heat-resistant oven glassware only. Make su...
Page 9 - Countertop Installation; MICROWAVE OVEN PARTS AND ACCESSORIES
6 Countertop Installation 1. Select a level surface that provides enough open space for air intake and/or outlet vents. • A minimum clearance of 7.5 cm (3") is required between the oven and any adjacent wall. One side must be open. • Leave a minimum clearance of 30 cm (12") above the oven.• ...
Page 10 - TURNTABLE INSTALLATION; Place the roller rest on the cavity bottom.
7 TURNTABLE INSTALLATION 1. Place the roller rest on the cavity bottom. 2. Make sure the turntable shaft is installed inside the hole in the (center) cavity bottom. 3. Place the turntable on top of the roller rest as shown in the diagram. Make sure the turntable hub is properly positioned on the tur...
Page 11 - COOKING GUIDE
8 COOKING GUIDE COOKING PRINCIPLES AND TECHNIQUES The advantages of microwave cooking are speed and efficiency. For warming, heating, and defrosting, nothing compares. Here are a few tips that will make microwavecooking easier and more enjoyable. Microwave Cooking Principles: Because microwave cooki...
Page 12 - TROUBLESHOOTING
9 TROUBLESHOOTING Some problems are minor in nature and can be easily rectified. Compare the problem you are having againstthe chart below and try the "possible remedy" to resolve the problem. If the microwave oven still does not workproperly, contact the nearest authorized service center. (...
Page 13 - CARE AND MAINTENANCE; • Exterior
10 CARE AND MAINTENANCE • Exterior The outside surface (cabinet) is painted. Clean the outer cabinet with mild soap and water. Rinse and dry witha soft cloth. Do not use any type of household or abrasive cleaner.Wipe the oven window on both sides with a damp cloth to remove any spills or spatters. W...
Page 14 - Control Panel and Features:
11 Control Panel and Features: 1. Display Window: counts down cooking time in seconds during cooking programs. Also displays time of day clockwhen oven is not in use. 2. Program Indicators: Stage 1 & Stage 2: indicates current cooking stage.Defrost Weight: shows the selected weight of defrost fo...
Page 20 - Cooking Time Chart for 1 Touch Recipes; Slice
17 Cooking Time Chart for 1 Touch Recipes Model No. DMW1400W Item Display Approx. Approx. Cooking Weight Cooking Power Serving Time Level Popcorn 1.75oz. 1.75oz. (50g) 1:50 100% 3.5oz 3.5oz. (100g) 2:30 100% Soup 1 6 oz. (170g) 1:30 100% 2 9 oz. (255g) 2:30 100% 3 12 oz. (340g) 3:10 100% Muffin 1 6 ...
Page 22 - Danby
Model • Modèle • Modelo For service, contact your nearest service depot or call: 1-800-26- Danby (1-800-263-2629) to recommend a depot in your area. Pour obtenir le service, consultez votre succursale régionale de service ou téléphonez: 1-800-26- Danby (1-800-263-2629) qui vous recommandera un centr...
Page 24 - MANUEL D’INSTRUCTIONS ET GUIDE DE CUISSON; TABLE DES MATIÈRES
MANUEL D’INSTRUCTIONS ET GUIDE DE CUISSON FOUR À MICRO-ONDES MODEL: DMW1400W TABLE DES MATIÈRES SÉCURITÉ......................Pages 19-23 • Énoncé de la FCC • Mises en garde contre l’exposition possible à une énergie micro-onde excessive • Consignes de sécurité importantes • Utilisation appropriée e...
Page 26 - morceau; Tableau de cuisson pour les recettes 1 touche
Modèle DMW1400W Type Affichage Poids Temps de N i v e a u d’aliment approx. de cuisson d ’ i n t e n s i t é la portion approx. Maïs soufflé 1.75 oz. 1,75 oz. 1:50 100 % 3.5 oz. 3,5 oz. 2:30 100 % Soupe 1 6 oz 1:30 100 % 2 9 oz 2:30 100 % 3 12 oz 3:10 100 % Muffin 1 6 oz 0:20 100 % 2 9 oz 0:35 100 %...
Page 27 - CONSIGNES DE SÉCURITÉ IMPORTANTES
MISES EN GARDE CONTRE L’EXPOSITION POSSIBLE À UNE ÉNERGIE MICRO-ONDE EXCESSIVE (a) Ne tentez pas d’utiliser ce four lorsque la porte est ouverte, car vous pourriez être exposé à une énergie micro-onde dangereuse. Il est important de ne pas tenter de modifier ou d’éliminer les verrous de sécurité. (b...
Page 28 - CONSERVEZ CES INSTRUCTIONS.; UTILISATION APPROPRIÉE ET SÉCURITAIRE
11. Ne recouvrez et ne bloquez pas les ouvertures de ventilation sur l’appareil. 12. Ne rangez et n’utilisez pas cet appareil à l’extérieur. 13. N’utilisez pas ce four près d’une source d’eau, d’un évier, d’une piscine ou dans un sous-sol humide. 14. N’immergez pas le cordon d’alimentation ou la pri...
Page 31 - INSTRUCTIONS DE MISE À LA TERRE; MISE EN GARDE; Risque de chocs électriques; ATTENTION
INSTRUCTIONS DE MISE À LA TERRE DANGER Risque de chocs électriques • Le fait de toucher certaines composantes internes peut causer des blessures personnelles graves, voire la mort. Ne désassemblez pas cet appareil. MISE EN GARDE Risque de chocs électriques • L’utilisation inappropriée de la prise de...
Page 32 - Matériaux pouvant être utilisés dans un four à micro-ondes
Ustensiles Remarques Vaisselle N’utilisez que de la vaisselle allant au micro-ondes. Respectez les instructionsdu fabricant. N’utilisez pas de la vaisselle ébréchée ou craquelée. Contenants en verre Enlevez toujours le couvercle. N’utilisez que pour légèrement chauffer. La plupart des contenants en ...
Page 35 - Installation sur le comptoir; ACCESSOIRES INCLUS AVEC LE FOUR À MICRO-ONDES
Installation sur le comptoir 1. Choisissez une surface de niveau et assurez-vous qu’il y a assez d’espace pour l’entrée et les sorties d’air. • Un jeu minimal de 3 po (7,5 cm) est requis entre le four et tout mur adjacent. Un des côtés doit être ouvert (sans obstruction). • Un jeu minimal de 12 po (...
Page 36 - INSTALLATION DU PLATEAU TOURNANT; Placez le support à l’intérieur du four.; Porte
INSTALLATION DU PLATEAU TOURNANT 1. Placez le support à l’intérieur du four. 2. Assurez-vous que la tige du plateau tournant est installée à l’intérieur du trou (au centre). 3. Placez le plateau tournant sur le support, tel qu’il est montré dans le diagramme. Assurez- vous que le pivot du plateau to...
Page 38 - Panneau de commande et caractéristiques; INSTRUCTIONS DE FONCTIONNEMENT
Panneau de commande et caractéristiques 1. Fenêtre d’affichage : affiche le compte à rebours en secondes du du temps de cuisson pendant un programme ; affiche aussi l’heure lorsque vous n’utilisez pas le four. 2. Indicateurs de programme : « Étape 1 » et « Étape 2 » : indiquent le niveau de cuisson ...
Page 39 - GUIDE DE CUISSON; PRINCIPES ET TECHNIQUES DE CUISSON; Conversion des recettes :
GUIDE DE CUISSON PRINCIPES ET TECHNIQUES DE CUISSON La rapidité et l’efficacité sont quelques-uns des avantages de la cuisson par micro-ondes. Il n’y a rien decomparable pour faire chauffer, cuire et décongeler. Voici quelques trucs qui rendront votre expérience plusagréable et vous faciliteront la ...
Page 40 - DÉPANNAGE
27 DÉPANNAGE Certains problèmes sont de moindre importance et peuvent aisément être corrigés. Consultez le tableau ci-dessous et voyez si la « solution possible » permet de résoudre le problème. Si le four à micro-ondes continue de fonctionner de façon inappropriée, communiquez avec le centre de ser...
Page 41 - ENTRETIEN; • Extérieur
ENTRETIEN • Extérieur La surface extérieure (coffrage) est peinte. Nettoyez l’extérieur du coffrage avec un savon doux et de l’eau,rincez puis séchez au moyen d’un chiffon doux. N’utilisez pas un nettoyant ménager ou un abrasif. Nettoyez l’écran de la porte des deux côtés au moyen d’un chiffon humid...