Page 7 - Features of your Express Crock
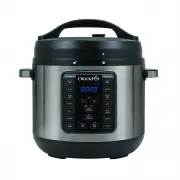
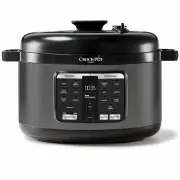
4 Features of your Express Crock A. Power Cord Removable power cord for added flexibility and ease of storage. B. Lid Lock Pin Acts as safety feature to ensure lid is secured properly before pressure starts to build during cooking. C. Lid Handle Comfortable and easy to grip handle allows removal of ...
Page 8 - Before First Use of the Express Crock
5 Step 1. Remove Packaging Ensure all packaging has been removed. Step 2. Position Machine Place the Heating Base facing you on a dry, level surface. Step 3. Wash Parts Wash the Cooking Pot, Lids and Condensation Collector in warm water using a mild detergent. Dry each part thoroughly before use. St...
Page 9 - Things to know about your Express Crock
6 The Express Crock Multi-Cooker has been designed with safety in mind and has various safety measures. • Pressure will not build if the Lid is not shut correctly and has not sealed. • Ensure Lid is in the completely locked position and the is aligned with . • Pressure will not build if the Steam Re...
Page 10 - Using your Express Crock
7 • Add desired ingredients to Cooking Pot. Place Lid on top of Multi-Cooker and align with . To lock, twist counterclockwise, aligning with . • Plug provided Power Cord into the Power Cord Port of the Multi-Cooker. • Plug other end of the Power Cord into a wall power outlet. • Select the cooking fu...
Page 11 - Time Delay Function
8 Time Delay Function This Multi-Cooker allows you to delay the start of your cooking so that cooking finishes when you need it. • Adjust the Multi-Cooker settings using the instructions on pages 9-19. • After setting the cooking time, press the DELAY TIMER button. The DELAY TIMER and START/STOP but...
Page 13 - Using Pressure Cooking functions
10 Place the Multi-Cooker on a flat, level surface.Place Cooking Pot inside Heating Base. Plug the Multi-Cooker into a wall outlet. The Multi- Cooker will beep, and the Display Screen will illuminate with four dashes (- - - -).• Place your food and liquid inside the removable Cooking Pot. • Place th...
Page 14 - Releasing Pressure at the End of Cooking
11 Natural Pressure Release Method: After cooking cycle is complete, let Multi- Cooker naturally release pressure through the Bobber Valve. Unit will gradually cool down on its own. Wait at least 10 minutes after cooking has completed. If using a higher volume of food and liquid, this can take up to...
Page 15 - USING THE GLASS LID
12 Using the Lid and Steam Release Valve Bobber Valve USING THE GLASS LID The optional Glass Lid accessory can be used instead of the standard Express Crock Lid on all non-pressure cooking functions such as SLOW COOK, BROWN/SEAR, SAUTÉ, BOIL, SIMMER, YOGURT, and KEEP WARM. FUNCTION PRESSURE COOK LID...
Page 17 - Cooking Guide
14 Cooking Guide Cooking Function Default Setting Pressure Adjustments Temperature Adjustments Cook Time Range MANUAL PRESSURE High Pressure / 30 minutes Low-High N/A 1 minute - 4 hours SLOW COOK High temp / 4 hours N/A Low-High 30 minutes – 20 hours STEAM High pressure / 10 minutes Low-High N/A 1 m...
Page 19 - Steaming Chart
16 Food Amount Amount of water Pre-prep Cooking Time, minutes Asparagus 250g 400ml trim woody ends 2 Broccoli 300g 400ml trim stalks 2 Brussel Sprouts 400g 400ml peel outer leaves, leave whole 4 Butternut Squash 1 whole, 900g-1kg 400ml cut in half, remove seeds, slice into 6 7 Carrots 500g 400ml sli...
Page 20 - SAUTE; Using the BROWN/SEAR and SAUTÉ Functions
17 The settings BROWN/SEAR and SAUTÉ do not cook under pressure. They works similarly to standard cooking, requiring dry heat, and therefore do not need the Lid. Place the Multi-Cooker on a flat, level surface.Place Cooking Pot inside Heating Base. Plug the Multi-Cooker into a wall outlet. The Multi...
Page 21 - Using the RICE/GRAINS Function
18 Place the Multi-Cooker on a flat, level surface.Place Cooking Pot inside Heating Base. Plug the Multi-Cooker into a wall outlet. The Multi- Cooker will beep, and the Display Screen will illuminate with four dashes (- - - -).• Measure the desired quantity of rice. • Place the measured rice in a st...
Page 22 - Using the BOIL and SIMMER Functions
19 The BOIL and SIMMER settings do not cook under pressure. they work similarly to standard cooking, requiring dry heat, and therefore do not require a lid. Place the Multi-Cooker on a flat, level surface.Place Cooking Pot inside Heating Base. Plug the Multi-Cooker into the wall outlet. The Multi-Co...
Page 23 - To Change a Setting
20 It’s easy to switch functions during cooking.Press the START/STOP button and then select the new desired cooking function. A new timer will flash on the Display Screen, and the selected function will also flash. Select the desired time, pressure, and/or temperature. Press the START/STOP button an...
Page 26 - Troubleshooting
23 Subject Question Solution Power My Multi-Cooker will not turn on Make sure outlet is functioning properlyCheck that the Multi-Cooker is plugged inCall Customer Service on 1300 881 861 (Aus), 0800 786 232 (NZ) Doneness of food My food was undercooked Make sure you selected the proper cooking setti...
Page 27 - Notification Codes
24 Error Solution “CLOSE LID” blinking light Ensure that the Lid is closed completely and in the LOCKED position, aligning with . Display “E1” The Multi-Cooker will stop the cooking cycle. Unplug Multi-Cooker and contact service center. Display “E2” The Multi-Cooker will stop the cooking cycle. Unpl...
Page 28 - Hints & Tips For Slow Cooking
25 With your Express Crock you can create a large variety of delicious meals, snacks and desserts. Various foods take different times to cook perfectly, so sometimes it may take some trial and error to get the cooking times right for you.• Please refer to your Express Crock user guide when using you...
Page 29 - Notes
Page 32 - Need help with your appliance?; Contact our Customer Care Team or; AUSTRALIA
Sunbeam Corporation PTY LTD | ACN 000 006 771 Crock-Pot and Sunbeam are registered trade marks. Due to continued product improvements, product illustrations and photographs in this User Guide may differ slightly from the actual product. CPE300_19EM1 GCDS-CRP010319-JC Need help with your appliance? C...