Costway FP10343US-WH - Manuals
User Manual Costway FP10343US-WH


Summary
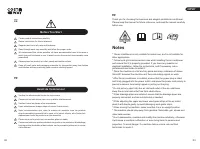
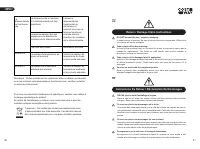
EN Before You Start Please read all instructions carefully.Retain instructions for future reference.Separate and count all parts and hardware.Read through each step carefully and follow the proper order.We recommend that, where possible, all items are assembled near to the area in which they will be...
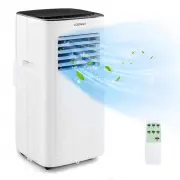
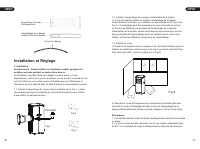
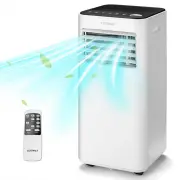
Exhaust Pipe Assembly Drain Hose Installation and Adjustment 1. Installation: Warning: before using the mobile air conditioner, keep it upright for at least two hours. The air conditioner can be easily moved in the room. In the moving process, ensure that the air conditioner is in the upright positi...
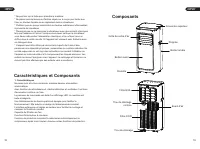
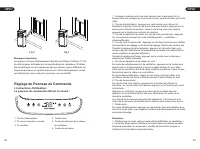
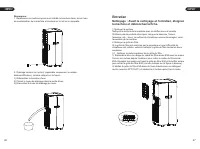
Control Panel Setting Important Notice 1. Power Key 2. Mode Selection Key . Down Key . Up Key .Fan Speed Selection Key . Timer Key I. Operating instructions:LED Control Panel is as follows: Fig.5 Fig.6 The length of the exhaust hose shall be 280mm-1500mm/ 11”-59”, and this length is based on the spe...
Costway Air Conditioners Manuals
-
 Costway EP22783
User Manual
Costway EP22783
User Manual
-
 Costway EP23048
User Manual
Costway EP23048
User Manual
-
 Costway EP23049
User Manual
Costway EP23049
User Manual
-
 Costway EP24618US
User Manual
Costway EP24618US
User Manual
-
 Costway EP24619US
User Manual
Costway EP24619US
User Manual
-
 Costway ES10113US-WH
User Manual
Costway ES10113US-WH
User Manual
-
 Costway ES10114US-WH
User Manual
Costway ES10114US-WH
User Manual
-
 Costway FP10110US-BK
User Manual
Costway FP10110US-BK
User Manual
-
 Costway FP10110US-WH
User Manual
Costway FP10110US-WH
User Manual
-
 Costway FP10111US-GR
User Manual
Costway FP10111US-GR
User Manual
-
 Costway FP10116US-WH
User Manual
Costway FP10116US-WH
User Manual
-
 Costway FP10120US-GR
User Manual
Costway FP10120US-GR
User Manual
-
 Costway FP10234US-WH
User Manual
Costway FP10234US-WH
User Manual
-
 Costway FP10261US-BK
User Manual
Costway FP10261US-BK
User Manual
-
 Costway FP10263US-BK
User Manual
Costway FP10263US-BK
User Manual
-
 Costway FP10265US-BK
User Manual
Costway FP10265US-BK
User Manual
-
 Costway FP10267US-WH
User Manual
Costway FP10267US-WH
User Manual
-
 Costway FP10268US-WH
User Manual
Costway FP10268US-WH
User Manual
-
 Costway FP10347US-NY
User Manual
Costway FP10347US-NY
User Manual
-
 Costway GHM0542
User Manual
Costway GHM0542
User Manual