Page 2 - Before You Start; Avant de Commencer; PRODUCT DESCRIPTION; warning
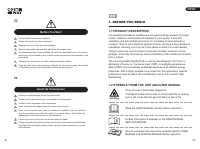
EN Before You Start Please read all instructions carefully.Retain instructions for future reference.Separate and count all parts and hardware.Read through each step carefully and follow the proper order.We recommend that, where possible, all items are assembled near to the area in which they will be...
Page 3 - FAILURE TO ABIDE BY THIS WARNING COULD RESULT IN AN; ● The unit is designed only for use with R-32(propane) gas as the; Your safety is the most important thing we concerned!; WARNING
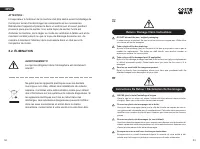
THE FOLLOWING SHOULD ALWAYS BE OBSERVED FOR SAFETY FAILURE TO ABIDE BY THIS WARNING COULD RESULT IN AN EXPLOSION, DEATH, INJURY AND PROPERTY DAMAGE. ● This appliance is intended to be used by expert or trained users in shops, in light industry and on farms, or for commercial use by lay persons. ● Th...
Page 4 - SAFETY PRECAUTIONS ON SERVICING; Checking for presence of refrigerant; ■ Do not operate the unit if it is dropped, damaged or showing signs of
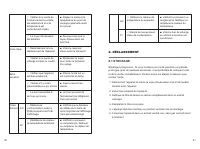
2.2 SAFETY PRECAUTIONS ON SERVICING Please follow these warnings when servicing an appliance with R32. 2.2.1 Checks to the area Prior to beginning work on systems containing flammable refrigerants, safety checks are necessary to ensure that the risk of ignition is minimized. For repair to the refrig...
Page 5 - Checks to the refrigeration equipment
2.2.6 No ignition sources No person carrying out work in relation to a refrigeration system which involves exposing any pipe work that contains or has contained flammable refrigerant shall use any sources of ignition in such a manner that it may lead to the risk of fire or explosion. All possible ig...
Page 6 - for detailed information.
3. PRODUCT OVERVIEW 3.1 PRODUCT DIAGRAM Note: The appearance is only for reference. Please see the real product for detailed information. 3.2 FEATURES √ High capacity in a compact size with fan, cooling and dehumidifying function. √ Temperature setting and display√ LED Digital display √ Electronic c...
Page 7 - Choose your location; ● If tipped more than 45°, allow the unit to set; ATTACH THE EXHAUST HOSE
4.2 Choose your location ★ Heat sources such as radiators, heat registers, stoves or other products that produce heat. ★ Direct sunlight ★ Mechanical vibration or shock ★ Excessive dust ★ Lack of ventilation, such as cabinet or bookcase ★ Uneven surface WARNING! Install the unit in rooms which excee...
Page 8 - CONTROL PANEL AND DISPLAY; Increase the desired temperature(16
Step 4: Close your window to secure the kit in place. It needs to hold the windows kit firmly in place, secure the window kit with duct tape if required. It is recommended that the gap between the adapter and the sides of the window should be sealed off for maximum efficiency. Step 5: Attach the hos...
Page 9 - B. Ventilating your room
5.2 REMOTE CONTROL High Up Cool Low Fan Timer Power Down Dry Sleep ℃/℉ 5.3 SETTINGS 5.3.1 Start-up and Shutdown Press POWER to turn the unit on. Press MODE button to select the desired operation mode. Press POWER again to turn off the power. 5.3.2 Operation mode The unit has four operation modes: Fa...
Page 10 - Timer; ). When the compressor stops operating for 10 minutes or
The timer has two ways of operation: C. Drying your room Press MODE button on the control panel or remote control, the dry indicator lights up. The fan speed is unable to select. User should connect the hose to the drain outlet at the bottom of the unit. Note: In this mode, the fan speed switches ov...
Page 11 - Continuous drainage; Keep the water plug properly.; To avoid water spillage:; ● Straighten the hose to avoid a trap existing in the hose.
Continuous drainage The self-evaporating system uses the collected water to cool the condenser coils for better efficient performance. There is no need to empty the drainage tank in cooling operation, except in drying operation and high humidity conditions. The condensate water evaporates at the con...
Page 14 - Avertissement
FR 1. AVANT DE COMMENCER 1.1 DESCRIPTION DU PRODUIT Nos puissants climatiseurs portables sont d'excellentes solutions de refroidissement pour les pièces individuelles, créant une atmosphère confortable dans votre espace. Ils disposent également d'une fonction de ventilation et de déshumidification p...
Page 15 - POUR DES RAISONS DE SÉCURITÉ, IL FAUT TOUJOURS; ● L'appareil est conçu uniquement pour être utilisé avec du gaz R-32; POUR VOTRE SÉCURITÉ; ou de blessure aux personnes ou aux biens :
LE NON-RESPECT DE CET AVERTISSEMENT PEUT ENTRAÎNER UNE EXPLOSION, LA MORT, DES BLESSURES ET DES DOMMAGES MATÉRIELS. ● Si une fuite est détectée, évacuez immédiatement toutes les personnes du magasin, ventilez la pièce et contactez le service d'incendie local pour les informer qu'une fuite de propane...
Page 17 - PRÉCAUTIONS DE SÉCURITÉ LORS DE L'ENTRETIEN; zone sont sûres en contrôlant les matériaux inflammables.; Vérification de la présence de réfrigérant; qu'il est correctement scellé ou qu'il est intrinsèquement sûr.
2.2 PRÉCAUTIONS DE SÉCURITÉ LORS DE L'ENTRETIEN Veuillez suivre ces avertissements lors de l'entretien d'un appareil avec R32. 2.2.1 Contrôles de la zone Avant de commencer à travailler sur des systèmes contenant des réfrigérants inflammables, des contrôles de sécurité sont nécessaires pour s'assure...
Page 18 - SCHÉMA DU PRODUIT; produit réel pour obtenir des informations détaillées.
3. APERÇU DU PRODUIT 3.1 SCHÉMA DU PRODUIT Remarque : L'apparence n'est qu'une référence. Veuillez consulter le produit réel pour obtenir des informations détaillées. 1 234 Panneau de contrôle Sortie d'air avec persienne réglable Poignée 567 Roulette Trou de drainage Sortie d'air Entrée d'air avec f...
Page 19 - Choisissez votre emplacement; ● Si l'appareil est incliné de plus de 45°,
3.2 CARACTÉRISTIQUES √ Grande capacité dans un format compact avec fonction de ventilation, de refroidissement et de déshumidification. √ Réglage et affichage de la température√ Affichage numérique à LED √ Contrôle électronique avec minuterie intégrée, mode veille√ Système d'auto-évaporation pour un...
Page 21 - PANNEAU DE COMMANDE ET AFFICHAGE
5.2 TÉLÉCOMMANDE High Up Cool Low Fan Timer Power Down Dry Sleep ℃/℉ 5. FONCTIONNEMENT 5.1 PANNEAU DE COMMANDE ET AFFICHAGE PUISSANCE Appuyez sur cette touche pour allumer ou éteindre la machine 1 MODE Appuyez sur cette touche pour basculer le mode de fonctionnement entre ventilateur, refroidissemen...
Page 22 - Appuyez sur la touche POWER pour mettre l'appareil en marche.; A. Rafraîchir votre pièce; à l'écran. La température peut être réglée entre 16; B. Ventilation de la pièce; Le mode sommeil peut être activé en mode froid.
5.3 RÉGLAGES 5.3.1 Mise en marche et arrêt Appuyez sur la touche POWER pour mettre l'appareil en marche. Appuyez sur la touche MODE pour sélectionner le mode de fonctionnement souhaité. Appuyez à nouveau sur la touche POWER pour mettre l'appareil hors tension. 5.3.2 Mode de fonctionnement L'appareil...
Page 24 - Drainage continu; NETTOYAGE ET ENTRETIEN; ● La pression négative du bac de récupération des condensats étant
Remarques : 1. Conservez la fiche d'eau correctement. 2. Pendant le drainage, le corps peut être légèrement incliné vers l'arrière. 3. Si le réservoir d'eau ne peut pas contenir toute l'eau, avant que le réservoir d'eau ne soit plein, bourrez la sortie d'eau avec le bouchon d'eau dès que possible po...
Page 27 - Instructions De Retour / Réclamation De Dommages; Return / Damage Claim Instructions; Le rejet de réfrigérant dans l'atmosphère est strictement
Instructions De Retour / Réclamation De Dommages Dans le cas où un retour est requis, l'article doit être retourné dans sa boîte d'origine. Sans cela, votre retour ne sera pas accepté. NE PAS jeter la boîte/l'emballage d'origine. Prenez une photo des marquages de la boîte. Prenez une photo des domma...