Page 2 - Notes regarding the operating manual; Symbols; Safety
02 Notes regarding the operating manual Symbols Safety Read this manual carefully before starting or using the device.Always store the manual in the immediate vicinity of the device or its site of use! Warning of electrical voltage This symbol indicates dangers to the life and health of persons due ...
Page 3 - Warning; Read all safety warnings and all instructions.
03 Warning Read all safety warnings and all instructions. Failure to follow the warnings and instructions may result in electric shock, fire and / or serious injury. Save all warnings and instructions for future reference. This appliance can be used by children aged from 8 years and above and person...
Page 5 - Intended use
• Only transport the device in an upright position with an emptied water tank. • Empty the water tank before transport and storage. Do not drink the water. Health hazard! • Only fill the water tank with fresh drinking water, ice cubes made of fresh drinking water and / or suitable ice packs. • Ice p...
Page 6 - Residual risks; Warning of electrical voltage; Personnel qualifications
Residual risks Warning of electrical voltage Work in the electrical components must only be carried out by an authorised specialist company! Warning The liquid inside the ice packs can be harmful to health!If the liquid was swallowed, immediately seek medical attention.If the liquid came into contac...
Page 7 - Note; Information about the device
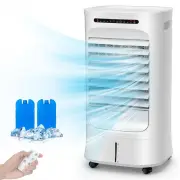
Behaviour in the event of an emergency 1. Switch off the device2. In an emergency, disconnect the device from the mains feed-in: Hold onto the mains plug while pulling the power cable out of the mains socket.3. Do not reconnect a defective device to the mains. Description of the device The air coole...
Page 8 - The fan speed can be set to three stages.; Device depiction
The fan speed can be set to three stages. The discharge direction of the cooled air can be manually adjusted via the ventil ation flaps as well as optionally selectable automatic swing mode. The device has a night mode enabling ultra-silent operation at bedtime. The device can be operated via the co...
Page 9 - Designation; Transport; Transport and storage
No. 123456789 101112131415 Designation Control panelDisplay panelVertical air outletHorizontal air outletCover for water tankFront housingWater level indicatorTop coverRear housingAir filterHoneycomb filterPower cord rewinder panelcastorsRemote controlIce packs Note If you store or transport the dev...
Page 10 - Before; transporting the device, observe the following:; Storage
Before transporting the device, observe the following: • Switch the device off.• Hold onto the mains plug while pulling the power cable out of the mains socket.• Do not use the power cable to drag the device.• Only wheel the device on a level and smooth surface.After transporting the device, observe...
Page 11 - Operation; Avoid open doors and windows.; Operation elements; Control panel
Operation • Avoid open doors and windows. Operation elements Control panel Display panel 16 17 18 19 20 21 22 23 24 25 26 27 28 29 30 31 32 33 No. 16 17 18 19 2021 Designation Meaning Switching the air cooling mode on or off Cooling button Switching the swing function on or off Oscillation button Sw...
Page 13 - stop 3s
Memory function If you switch the device back on after initial start-up, the settings selected for the operating mode are saved. Any activated timer will not be saved in the device.If the power is cut off, the memory is cleared. Setting the operating mode The device comes with the following operatin...
Page 14 - Setting wind mode; The setting sequence is as follows:
Setting wind mode Press Mode button(19) to set the wind mode• When press the On button, the default is Normal wind(no indicator)• Press once, enter the natural mode, Mode LEDs: Natural wind mode (29) will flash.• Press twice to enter the sleep mode, Mode LEDs: Sleep wind mode (28) will flash. The se...
Page 15 - Natural wind mode; • Change law of high natural wind; Info
Natural wind mode : It imitates the effect of natural wind, which can be divided into 3 fan stage (High, medium, low) with the setting of speed button. • Change law of high natural wind : H(50S) -M(50S) -L(50S) -H(50S) -M(50S) -H(50S) -M(75S) -H(50S) -L(50S) -H(25S) -L(50S) -H(50S) -M(75S) -H(75S) -...
Page 16 - √ When the air cooler in standby state, timer button(18) is the
Setting wind speed Press speed button(20) to set the wind speed. The setting sequence is as follows: Setting Reservati √ When the air cooler in standby state, timer button(18) is the reservation keyThe function can be set in all operating modes.The number of hours can be between 1 and 15 and can be ...
Page 17 - Setting the timer; The hour LEDs flash as follows:
Setting the timer √ When the air cooler is on, timer button(18) is the timing key. The function can be set in all operating modes.The number of hours can be between 1 and 15 and can be adjusted in increments of 1 h. The hour LEDs flash as follows: 1h 2h 3h 4h 5h 6h 7h 8h 9h 10h 11h 12h 13h 14h 15h √...
Page 19 - The battery cover can be removed by gently pulling it down.; Refilling water; negative
Water level indicator 4. Please keep the remote control properly to avoid collision and fall. 5. When you don't use the remote control, please take out the battery and keep it properly. 1. The battery cover can be removed by gently pulling it down. 2. Put the battery into the battery box. (Note the ...
Page 21 - Available accessories
The device does not start: • Check the power connection.• Check the power cable and mains plug for damages.• Check the on-site fusing. The device has automatically switched itself off: • Keep the air inlet clear to prevent the motor from overheating.• Check whether the overheating protection has tri...
Page 23 - The device does not respond to the infrared remote control:; Maintenance intervals
The device does not respond to the infrared remote control: • Check whether the distance between remote control and device is too large and reduce it if necessary.• Make sure there are no obstacles, such as furniture or walls between the device and the remote control. Ensure visual contact between d...
Page 24 - Activities required before starting maintenance; Visual inspection of the inside of the device for dirt; You can use vacuum cleaner to clean the dust.; Cleaning the water tank
• Switch the device off.• Hold onto the mains plug while pulling the power cable out of the mains socket. Activities required before starting maintenance Warning of electrical voltage Do not touch the mains plug with wet or damp hands. Visual inspection of the inside of the device for dirt 1. Remove...
Page 25 - Technical annex; Value
Cleaning the air filter Draw out the air filter from the rear housing, then put them together (honeycomb + filter frame) into the water for a few times, finally let it dry in the air. Note 1. Please turn off the power and unplug the power plug before filling and cleaning the water tank.2. If the scr...
Page 26 - Electrical schematic diagram; Disposal
Electrical schematic diagram 26 Disposal The icon with the crossed-out waste bin on waste electrical or electronic equipment stipulates that this equipment must not be disposed of with the household waste at the end of its life. You will find collection points for free return of waste electrical and...