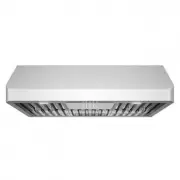
Page 2 - Please keep this manual for future use. THANK YOU; About Your New Filters; them, they end up getting caught on the metal blades and then; STAINLESS STEEL BAFFLE FILTERS; THANK YOU FOR YOUR PURCHASE
any brands andproducts to choose from and we are honored to know that you have decidedto take one of our products into your home and hope that you enjoy it. COSMO appliances are designed according to the strictest safety and performance standard for the North American market. We follow the most adva...
Page 3 - IMPORTANT SAFETY INSTRUCTIONS; TABLE OF CONTENTS
4 5 SAFETY PARTS DIAGRAM INSTALLATION REQUIREMENTS LOCATION REQUIREMENTS VENTILATION REQUIREMENTS RANGE HOOD USE LED LIGHT REPLACEMENT DUCTLESS CONVERSION OIL CUP INSTALLATION CONTROL PANEL OPERATION MAINTENANCE PERMANENT FILTERS INSTALLATION TROUBLESHOOTING WARRANTY 5 flamb é ing food. 6 7 8 9-10 1...
Page 4 - PARTS SUPPLIED; PARTS DIAGRAM; INSTALLATION REQUIREMENTS
6 7 Lower Support Frame Upper Support Frame Outer Chimney Inner Chimney Stainless Steel Baffle Filters Main Body Blower Assembly Ceiling Mount A B C D E F G H 3 0 4 4 1 2 8 13 13 8 42 6 3645 Damper Flap 2 Wall Anchor ST4x6 (A) Ceiling Mount (B) Inner Chimney (C) Outer Chimney (D) Upper Support Frame...
Page 5 - LOCATION REQUIREMENTS; INSTALLATION DIMENSIONS; to; VENTILATION REQUIREMENTS; Rear Venting
8 9 IMPORTANT: Please observe all governing codes and ordinances. It is recommended that a qualified technician install the range hood. It is the installer's responsibility to comply with installation clearances specified on the model / product rating label. Range hood's location should be away from...
Page 6 - ELECTRICAL REQUIREMENTS; COMPLETE PREPARATION; RANGE HOOD INSTALLATION
10 11 ELECTRICAL REQUIREMENTS Vent Piece 6" (15.2cm) Round 45° elbow 2.5 ft 90° elbow 5.0 ft Maximum equivalent vent length is 35 ft Example vent system The following example falls within the maximum recommended vent length of 35 ft 1 - 90° elbow = 5.0 ft 1 - wall cap = 0.0 ft 6 ft straight tube...
Page 7 - WARNING; AA; IMPORTANT: The angle bars must have an overlap
12 13 WARNING [1] 13 pcs ST4 x 30 Wood Screws + 13 Wall Anchors for Wood Mounting [2] 8 pcs M6x50 Expansion Bolts for concrete Mounting 2. Attach the Angle Bars to the Ceiling Mount (A) using (8) M5 screws. Extend the Angle Bars to the required height and secure them using (16) M5 screws with nuts &...
Page 8 - Replace with the same type and rated light.; RANGE HOOD USE; REPLACING LED BULBS
14 15 1. Switch the unit off and unplug the range hood.2. Remove the lamp cover by unscrewing the 2 screws. 3. Unscrew the LED light. 4. Replace with the same type and rated light. LED light (max, 1.5w) The range hood is designed to remove smoke, vapors and odors. For best results, start the hood be...
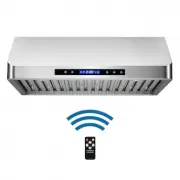
Page 9 - SCAN QR CODE; DUCTLESS CONVERSION
16 17 It is recommended that the charcoal filter be replaced every 4-6 months. Charcoalfilter replacements are available for purchase at: www.cosmoappliances.com Charcoal Filter Kit Part# CFK1-TM Step 1: Remove the ARC-FLOW Baffle Filters. Step 2: Locate the motor (pictured below) and align one of t...
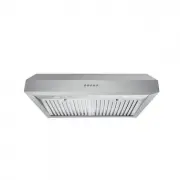
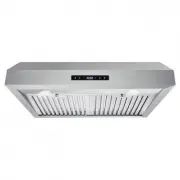
Page 10 - TIMER LIGHT SPEED SETTINGS ON/OFF; SOFT TOUCH CONTROLS
18 19 To set the clock: Touch and hold the timer settingsymbol for approximately 3 seconds. Touch (light button) to set hour. Touch (Speed button) to set minutes. Timer setting: Press once to add 1 minute delay auto shut-off. The maximum is 59 minutes. Press once for high speed, twice for middle spe...
Page 11 - PERMANENT FILTERS INSTALLATION
20 21 Push button in and down PERMANENT FILTERS INSTALLATION TROUBLESHOOTING Range Hood does not turn on A. Make sure that range hood is plugged into powered outlet. Test outlet with other de- vice if not working. B. Remove baffle filters, reach inside behind the control panel and locate the wire wi...
Page 12 - NOTES