Page 3 - SAFETY PRECAUTIONS
INSTALLATION AND OPERATING INSTRUCTIONS 1 SAFETY PRECAUTIONS Read all instructions carefully.• All components need to be installed in accordance with the user manual instructions for correct per formance of unit. • This appliance should be used in conjunction with a safety switch. • This appliance i...
Page 4 - PRODUCT FEATURES; Filter; • The Pre-fi lter traps larger par ticles such as dust, pet hair and
2 INSTALLATION AND OPERATING INSTRUCTIONS PRODUCT FEATURES Filter The 3 layer fi lter contains a Pre-fi lter, a HEPA fi lter and an activated carbon fi lter. • The Pre-fi lter traps larger par ticles such as dust, pet hair and large-sized allergens. • The HEPA fi lter (Grade H12) removes 99.5% of pa...
Page 5 - COMPONENT IDENTIFICATION; Dust and odour sensor
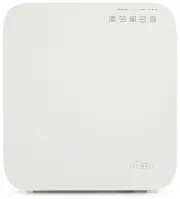
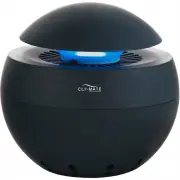
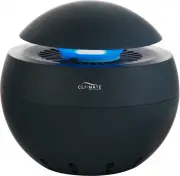
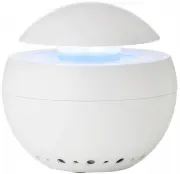
INSTALLATION AND OPERATING INSTRUCTIONS 3 COMPONENT IDENTIFICATION 1. Front Cover 2. Control buttons 3. Air Outlet 4. Pre-fi lter, HEPA and active carbon fi lter 5. Dust and odour sensor 3 5 2 5 4 1
Page 6 - CONTROL PANEL/BUTTONS; C. Fan Speed Indicator
4 INSTALLATION AND OPERATING INSTRUCTIONS CONTROL PANEL/BUTTONS 1. “POWER” BUTTON: Turns unit on or of f. 2. “AUTO” Mode: In this mode, the speed of the air fl ow/fan speed will change automatically depending on the air quality as detected by the dust and odour sensor. NOTE: The AUTO button is also ...
Page 7 - OPERATION INSTRUCTIONS; CLEANING AND MAINTENANCE; PRODUCT SPECIFICATIONS
INSTALLATION AND OPERATING INSTRUCTIONS 5 OPERATION INSTRUCTIONS Impor tant: Before fi rst use, open the front cover and unwrap the fi lter before operation. See page 6 for fi lter details. 1. Plug the unit into a power socket. Ensure unit is located on a fl at, stable and level sur face. 2. Press t...
Page 8 - CLEANING THE PRE-FILTER, HEPA AND ACTIVATED CARBON FILTER; REPLACING THE FILTER; HOW TO REPLACE THE FILTER
6 INSTALLATION AND OPERATING INSTRUCTIONS CLEANING THE PRE-FILTER, HEPA AND ACTIVATED CARBON FILTER It is recommended that the Pre-fi lter (the removable black layer) is cleaned ever y 1-2 weeks of operation, depending on the air quality of the room. To clean fi lters: 1. Turn the unit of f and disc...
Page 9 - TROUBLE SHOOTING; Problem
INSTALLATION AND OPERATING INSTRUCTIONS 7 TROUBLE SHOOTING BEFORE YOU CALL FOR SERVICE PLEASE REVIEW THE TROUBLE SHOOTING TIPS FIRST. Problem Possible Causes What To Do No Power 1. Unit is not plugged into a wall socket. 2. Front cover is not latched fi rmly in place. 3. The fi lter has not been ins...
Page 10 - Filter may be heavily soiled and due for
8 INSTALLATION AND OPERATING INSTRUCTIONS Problem Possible Causes What To Do Odour coming from the air outlet 1. Filter may be heavily soiled and due for replacement. 1. Replace fi lter. Excessive/loud noise 1. Unit is on an uneven sur face. 2. Foreign objects have fallen into the unit. 3. Faulty in...
Page 11 - Your Aquapor t Australian 1 Year Repair or Replacement Warranty
INSTALLATION AND OPERATING INSTRUCTIONS 9 Your Aquapor t Australian 1 Year Repair or Replacement Warranty Aquapor t warrants this appliance to the fi rst purchaser and subject to the stated conditions: Warranty covers any defects in material or workmanship in the manufactured product within the fi r...