Page 2 - Conditions of use; IMPORTANT – CHECK FOR ANY DAMAGES OR MARKS.; ENVIRONMENTAL TIPS; INFORMATION ON DISPOSAL FOR USERS; CONTENTS; IMPORTANT INFORMATION THAT MAY IMPACT
Important safety instructions . . . . . . . . . . . . . Description of your rangehood . . . . . . . . . . . . Components list . . . . . . . . . . . . . . . . . . Technical specifications . . . . . . . . . . . . . . . Rangehood dimensions . . . . . . . . . . . . . . . Installation. . . . . . . . . . ...
Page 3 - IMPORTANT SAFETY INSTRUCTIONS; NOTE: Some installations may require the telescopic; IMPORTANT SAFETY INSTRUCTIONS; Failure to install the screws or fixing
This manual explains the proper use of your new rangehood. Please read this manual the product. This manual should be handy reference. This canopy rangehood is a domestic appliance which has been manufactured and tested to comply with Australian and New Zealand Standard AS/NZS 60335.2.31.Meanings of...
Page 4 - DESCRIPTION OF YOUR RANGEHOOD; Components list
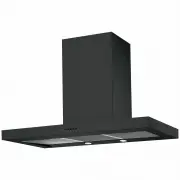
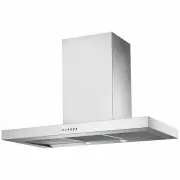
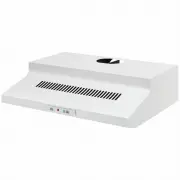
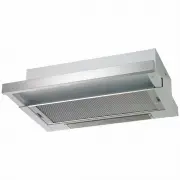
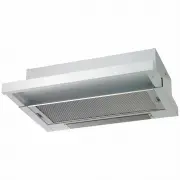
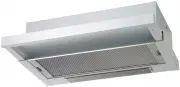
DESCRIPTION OF YOUR RANGEHOOD 1 2 Flue pipe to be sourced locally 3 4 5 6 7 Components list 1. Screws x 2 2. Telescopic flue cover set 3. Upper flue cover mounting bracket 4. Lower flue cover mounting bracket 5. Flue transition duct 6. Main body and fan housing assembly 7. Grease filters Additional ...
Page 5 - RANGEHOOD DIMENSIONS; NOTE: The fan housing flue transition duct is 150mm in diameter.
RANGEHOOD DIMENSIONS 56mm 500mm 320mm 900mm 1135mm (maximum)690mm (minimum) 290mm 538mm Fig. 4 150mm NOTE: The fan housing flue transition duct is 150mm in diameter. (See page 11 for optional ducting accessories). Fig. 5 5
Page 6 - INSTALLATION; LOCATION; INSTALLATION; INSTALLATION
PRE-INSTALLATION Before installing the cooker hood, peel off any protective plastic covering and remove polystyrene from inside behind the fan motor. See diagram below. LOCATION The underside of the hood body must be a minimum of 600mm* above an electric cooktop and 650mm* above a gas cooktop and a ...
Page 8 - Care must be taken to ensure the screws are not cross threaded when; Electrical connection
CAUTION Care must be taken to ensure the screws are not cross threaded when attaching the upper flue cover. If installed in recirculating mode, insert the optional carbon filter (included in recirculation kit AR910RK). To complete the rangehood installation, insert the three filters to the underside...
Page 9 - CONTROL PANEL; External surfaces are susceptible to scratches and abrasions, so
CONTROL PANEL • Best results are obtained by using a low speed for normal conditions and a high speed when odours are more concentrated. • Turn the hood on for a few minutes before you start cooking. • The hood should be left on for 15 minutes after cooking or until all odours have dispersed. • The ...
Page 10 - WARNING; IMPORTANT: The hood must always be disconnected from the; Changing the lamps; If the lamps need replacing, they must be replaced by; TROUBLESHOOTING GUIDE; PROBLEM; Suitable lamp for replacement
CARE & MAINTENENCE WARNING IMPORTANT: The hood must always be disconnected from the electricity supply before beginning any maintenenace work. Changing the lamps If the lamps need replacing, they must be replaced by lamps with an aluminium reflector, never dichronic lamps to avoid unnecessary ov...
Page 11 - OPTIONAL DUCTING ACCESSORIES; Part Numbers; 50mm G/Bond Roof Cowl
28/11/2012 AR150RC AR150F AR610CF AR910RK AR150WV AR610FS OPTIONAL DUCTING ACCESSORIES Part Numbers Description AR150RC 150mm G/Bond Roof Cowl AR150F 150mm G/Bond Flue 1200mm AR150WV 150mm Wall Vent & duct AR910RK Recirculating Kit (150-120mm reducer, T-piece & carbon filters AR610CF Replace...
Page 12 - notes
Page 15 - Warranty
This document sets out the terms and conditions of the product warranties for Chef Appliances. It is an important document. Please keep it with your proof of purchase documents in a safe place for future reference should there be a manufacturing defect in your Appliance. This warranty is in addition...
Page 16 - For further information on all Chef appliances, or to obtain; Australia; LIKE
Chef. We are part of the Electrolux family. Share more of our thinking at electrolux.com.au Part number: 342-1-596 Rev B © 2020 Electrolux Home Products Pty Ltd ABN 51 004 762 341 C_MAN_Feb21 For further information on all Chef appliances, or to obtain detailed dimension and installation information...