Page 3 - TABLE OF CONTENTS
TABLE OF CONTENTS Safety Warnings & Warranty............................... A-1 Assembly Instructions ..................................... B-1 Product Usage .................................................. C-1 Recipes .............................................................. D-1 Accessor...
Page 4 - IMPORTANT SAFETY WARNINGS
A-1 A propane gas cylinder is required for operation. This gas grill is not intended for commercial use. SAVE THESE INSTRUCTIONS FOR FUTURE REFERENCE. IF YOU ARE ASSEMBLING THIS UNIT FOR SOMEONE ELSE, GIVE THIS MANUAL TO HIM OR HER TO SAVE FOR FUTURE REFERENCE. For use outdoors and in well-ventilate...
Page 6 - CAUTION
A-3 • Note that parts sealed by manufacturer or its agent must not be altered. • When assembling the grill, position the connection fl exible tube so that it is protected against twisting. • Stay away from any source of ignition when changing gas container. • When assembling the grill, do not obstru...
Page 7 - DANGER
A-4 • The use of alcohol, prescription or non-prescription drugs may impair the operator’s ability to properly assemble or safely operate the grill. • Always open grill lid slowly and carefully as heat and steam trapped within the grill can burn you severely. • Always place grill on a hard, level su...
Page 9 - Do NOT Return Product to Store.; REGISTER YOUR GRILL:
A-6 (example) *** STOP! CALL FIRST! *** Do NOT Return Product to Store. This grill has been made according to the highest of quality standards. If you have any questions not addressed in this manual or if you need parts please call our Customer Service Department at 1-912-638-4724 (USA) or email Cha...
Page 10 - WARRANTY INFORMATION
A-7 WARRANTY INFORMATION A COPY OF THE DATED PROOF OF PURCHASE (RECEIPT) IS REQUIRED WHEN REGISTERING OR SUB-MITTING A WARRANTY* CLAIM. PLEASE RETAIN A COPY OF THE RECEIPT FOR YOUR RECORDS. Char-Griller will replace any defective part of its grillers/smokers, under warranty, as outlined below. PLEAS...
Page 12 - ASSEMBLY INSTRUCTIONS
1 3070_OM_A.1 CAUTION: Handles are Hot CAUTION: Handles are Hot ASSEMBLY INSTRUCTIONS B-1
Page 13 - PARTS LIST
2 3070_OM_A.1 PARTS LIST B-2 1 2 3 4 14 15 16 17 18 19 20 21 23 24 25 26 27 29 28 30 31 32 33 34 35 36 37 38 39 40 41 42 43 44 45 46 47 48 49 22 50 52 5 6 7 8 9 10 11 13 12 51
Page 15 - HARDWARE AND TOOLS NEEDED; Phillips Head Screwdriver and a 7/16” Nut Driver.; NOTE
4 3070_OM_A.1 HARDWARE AND TOOLS NEEDED Assembly: Requires 2 people. Get another person to help. Tools Needed: Pliers, Phillips Head Screwdriver and a 7/16” Nut Driver. NOTE : Do Not tighten any bolts unless instructed to do so. Tightening too soon may prohibit parts from fitting together. All Hex N...
Page 35 - Fully Assembled; Caution: Use only the regulator provided!
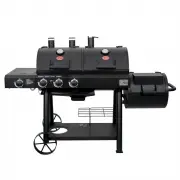
B-24 3070_OM_A.1 Fully Assembled Caution: Use only the regulator provided! If a replacement is necessary, please call our customer service department, 912- 638-4724. Do NOT use replacement parts that are not intended for this grill. Hint: The paper label that is affixed to the hood is more easily re...
Page 36 - OPERATING INSTRUCTIONS; Setting Up
C-1 OPERATING INSTRUCTIONS Setting Up Set grill up on solid, fl at surface with adequate wind shelter. Keep grill at least 0.5m from nearest wall. Protect LP cylinder from direct sunlight and keep away from heat sources (max. 122° F ). Do not move grill while hot, and do not leave unattended during ...
Page 37 - Connecting the Gas Cylinder to the Grill; Leak Test
C-2 Connecting the Gas Cylinder to the Grill This appliance is only suitable for use with low-pressure butane or propane gas or LPG mixtures, fi tted with the appropriate low-pressure regulator via a fl exible hose. The hose should be secured to the regu-lator and the appliance with hose clips. 1. E...
Page 38 - Side Burner; Shutting off Burners
C-3 Lighting Instructions Always open hood while igniting grill. If grill does not light, always wait 5 minutes for gas to clear before relighting. Failure to do either may result in an explosive fl are-up, which can cause serious bodily injury or death. Once lit, but before cooking on grill for fi ...
Page 39 - Storage of Appliance
C-4 Lighting Burner with a Match 1. Push in and rotate knob to HIGH position 2. Place match in match holder installed on side of grill housing. Once lit, place fl ame through cooking grates near burner ports, as shown. Burner should light immediately. 3. Adjust knobs to desired cooking settings. Obs...
Page 41 - CLEANING AND CARE; Recommended Cleaning Materials
C-6 CLEANING AND CARE CAUTION: All cleaning and maintenance should be done while grill is completely cool and with gas cylinder valve completely closed. DO NOT clean any grill part in a self-cleaning oven. The extreme heat will damage the fi nish. Recommended Cleaning Materials • Mild dishwashing li...
Page 42 - TROUBLESHOOTING
C-7 • Ashes left in bottom of CHARCOAL GRILL for too long hold moisture and may cause rust if not cleaned out. • GRILL is made of steel and cast iron, which WILL rust, especially without proper care. • Do not use self-starting charcoal, as it gives off an unnatural fl avor. Burn lighter fl uid off c...
Page 46 - Know Your Cuts of Meat; GRILLING RECIPES
Page 47 - Direct Heat
D-2 Direct Heat • Direct Heat is a high heat method used to cook foods that take less than 25 minutes to cook. Typically, this means foods that are relatively small or thin such as steaks, chops, boneless chicken breasts, fish fillets, hamburgers, etc. • Cooking with a MEAT THERMOMETER ensures food ...
Page 49 - Indirect Heat; SMOKING RECIPES
D-4 Indirect Heat SMOKING RECIPES SHRIMP (Peeled) & CRAYFISH: • Place on skewers. • Coat with melted butter and garlic salt. • Grill 4 minutes on each side or until pink. Cocktail sauce optional. BAKED POTATOES: • Rub with butter and wrap in foil and cook on grill with lid down for 50 minutes. •...
Page 54 - ACCESSORIES
E-1 ACCESSORIES Cover Custom Fit Weather ResistantProtects Grill FinishCover Accommodates Side Shelf or Side Fire Box Side Fire Box Turn your charcoal grill into an au-thentic Texas-Style Offset Smoker in minutes! Rotisserie Excellent for Effortless GrillingUniversal Fit for Any Grill Warming Rack I...
Page 57 - MANUAL DEL USUARIO; Texas Trio
Para efectos de Garantía, guarda tu recibo con este manual. ATENCIÓN AL CLIENTE 1-912-638-4724 [email protected] Lo contenido en este manual es Marca Registrada y Propiedad con Derechos de Autor de Char-Griller | A&J Manufacturing. Está terminantemente prohibido utilizar la información suministr...
Page 59 - PELIGRO; ADVERTENCIA
TABLE OF CONTENTS Advertencias De Seguridad.............................. A-1 Instrucciones de Ensamblado.......................... B-1 Instrucciones Operativas ................................. C-1 Recetas Para La Parrilla .................................... D-1 Accesorios ...........................
Page 60 - ADVERTENCIAS DE SEGURIDAD
A-1 ADVERTENCIAS DE SEGURIDAD ADVERTENCIA: La inapropiada instalación, ajuste, modifi cación, servicio o mantenimiento podría causar daños a la propiedad o lesiones. Lea cuidadosamente las instrucciones de instalación, operación y mantenimiento antes de armar o hacerle servicio al equipo. El incumpl...
Page 61 - ANTES DE ENSAMBLAR Y OPERAR SU PARRILLERA
A-2 LEA TODAS LAS INSTRUCCIONES Y ADVERTENCIAS DE SEGURIDAD CUIDADOSAMENTE ANTES DE ENSAMBLAR Y OPERAR SU PARRILLERA Lea todas las instrucciones cuidadosamente y asegúrese de que su parrillera esté ensamblada, instalada y reciba mantenimiento apropiadamente. El incumplimiento de estas instrucciones ...
Page 62 - PRECAUCIÓN
A-3 metal de la parrillera hasta que se haya enfriado por completo (cerca de 45 minutos) para evitar quemaduras. Considere que las partes selladas por el fabricante o agente no deben ser alteradas. Cuando ensamble la parrillera, ubique el tubo de conexión fl exible de manera que se encuentre protegi...
Page 65 - ¡PARE! ¡LLAME PRIMERO A; NO Devuelva el Producto a la Tienda.; REGISTRE SU PARRILLERA:; Documente el Número de Serial y Modelo de su Parrillera AQUÍ:
A-6 ¡PARE! ¡LLAME PRIMERO A ! NO Devuelva el Producto a la Tienda. Este producto ha sido construido bajo los más altos estándares de calidad. Si tiene alguna pregunta que no ha sido respondida en estas instrucciones, o si necesita alguna parte o repuesto, por favor llame a nuestro Departamento de At...
Page 66 - INFORMACIÓN DE GARANTÍA
A-7 DURANTE EL REGISTRO O INTRODUCCIÓN DE UN RECLAMO DE GARANTÍA* DEBERÁ PRESENTAR COPIA DE LA PRUEBA DE COMPRA FECHADA (RECIBO). POR FAVOR, GUARDE UNA COPIA DEL RECIBO PARA SUS REGISTROS. Char-Griller reemplazará cualquier pieza defectuosa de sus parrilleras/ahumadores, sujetos a garantía, como se ...
Page 69 - LISTA DE PARTES
2 3070_OM_A.1 B-2 LISTA DE PARTES 1 2 3 4 14 15 16 17 18 19 20 21 23 24 25 26 27 29 28 30 31 32 33 34 35 36 37 38 39 40 41 42 43 44 45 46 47 48 49 22 50 52 5 6 7 8 9 10 11 13 12 51
Page 71 - EQUIPOS Y HERRAMIENTAS
4 3070_OM_A.1 PERNO ¼-20 x 3/4” .............................. 1 PIEZAS PERNO DE CABEZA HEXAGONAL RECUBIERTO CON COMPUESTO BLOQUEADOR —1/4”-20 X 3/4” ................. 4 PIEZAS PERNO ¼-20 x ½” ................................ 64 PIEZAS ARANDELA PLANA ¼” ......................... 2 PIEZAS TUERCA HEXA...
Page 91 - Totalmente Ensamblada; Advertencia: ¡Use solamente el regulador suministrado!
B-24 3070_OM_A.1 Totalmente Ensamblada Advertencia: ¡Use solamente el regulador suministrado! Si es necesario reemplazarlo, Por favor llame a nuestro departamento de atención al cliente, 912- 638-4724. NO USE repuestos que no están diseñados para esta parrillera. Consejo: La calcomanía que está pega...
Page 92 - INSTRUCCIONES OPERATIVAS; Instalación del Equipo
C-1 INSTRUCCIONES OPERATIVAS Instalación del Equipo Coloque la parrillera en una superfi cie plana y sólida, resguardada del viento. Mantenga la parrillera alejada de la pared más próxima por al menos 1 ½ pies. Proteja al cilindro de GLP de la luz directa del sol y manténgalo alejado de fuentes de c...
Page 93 - Conectando el Cilindro de Gas al Equipo; Prueba de Fugas
C-2 Conectando el Cilindro de Gas al Equipo Este equipo deberá ser utilizado exclusivamente con gas butano y propano o mezclas de baja presión o mezclas de GLP, fi jados al regulador de baja presión apropiado, a través de una manguera fl exible. La manguera deberá ser fi jada al regulador y al equip...
Page 94 - Quemador Lateral
C-3 Instrucciones de Encendido Siempre abra la tapa mientras enciende la parrilla. Si la parrilla no enciende, espere cinco minutos para que el gas se vaya antes de volver a encenderlo. No hacer estas dos cosas, puede resultar en un estallido explosivo que puede causar lesiones severas o la muerte. ...
Page 95 - Apagar los Quemadores; Desconectar el Cilindro de Gas; Almacenamiento del Equipo
C-4 Apagar los Quemadores 1. Gire la(s) perilla(s) en dirección anti horaria hasta la posición HIGH, luego empuje y gire a OFF. Nunca gire la perilla sin empujarla, ya que podría dañar la válvula y perilla. Para los quemadores laterales, empuje y gire a OFF. 2. Rápidamente, cierre la válvula de cili...
Page 96 - Cilindro de Gas; Las partes selladas por el fabricante o su agente no deberán ser; Curando y Preparando su Parrillera
C-5 Cilindro de Gas ¡El cilindro de gas no deberá dejarse caer ni ser manejado bruscamente! Si el equipo no está en uso, el gas debe apagarse desde el tanque de suministro. Reemplace la tapa protectora en el cilindro luego de desconectar el cilindro del equipo. Los cilindros deben ser almacenados al...
Page 97 - LIMPIEZA Y CUIDADO; Materiales de Limpieza Recomendados
C-6 5. NUNCA EXCEDA LOS 450° F (230° C). ESTO DAÑARÍA EL ACABADO Y CONTRIBUIRÍA A LA OXIDACIÓN 6. Usted puede cubrir ligeramente el exterior del cuerpo de la parrillera (mientras está caliente) con aceite vegetal. Esto extenderá la vida útil del acabado, similar a cuando pule un carro. Su parrillera...
Page 98 - Limpieza del Ensamblaje del Quemador
C-7 de aceite vegetal en todas las superfi cies de metal dentro de la parrillera. Usted puede usar aceite vegetal en spray o líquido, aplicándolo con una toalla de papel en la parrillera fría. Limpieza del Ensamblaje del Quemador 1. Corte el suministro de gas por medio de las perillas de control y e...
Page 102 - Conozca sus Cortes de Carne; RECETAS PARA COCINAR; CORTES DE RES; CORTES DE CERDO
D-1 Conozca sus Cortes de Carne RECETAS PARA COCINAR A LA PARRILLA COSTILLAS COSTILLA PARA ASAR, EXTREMO GRANDE COSTILLA PARA ASAR, EXTREMO PEQUEÑO FILETE DE COSTILLA, EXTREMO PEQUEÑO BISTEC DE COSTILLA BISTEC DE COSTILLA PARA ASAR COSTILLITAS LOMO BISTEC DE LOMITO BISTEC DE LOMO LOMO ENTERO SOLOMO ...
Page 103 - Calor Directo
D-2 Calor Directo • El Calor Directo es un método de alta temperatura utilizado para cocinar comidas que toman menos de 25 minutos de cocción. Normalmente significa que son comidas que tienen poco grosor como los bistecs, chuletas, pechugas de pollo deshuesadas, filetes de pescado, hamburguesas, etc...
Page 105 - Calor Indirecto; RECETAS DE AHUMADOS
D-4 Calor Indirecto RECETAS DE AHUMADOS CAMARONES (Pelados) y LANGOSTA: • Coloque en pinchos. • Cubra con mantequilla derretida y ajillo con sal. • Ase por 4 minutos en cada lado o hasta que estén rosados. La salsa Cóctel es opcional. PAPAS AL HORNO: • Frótelas con mantequilla y envuelva en papel de...
Page 110 - ACCESORIOS
E-1 ACCESORIOS Cubierta a la Medida Resistente al ClimaProtege el Acabado La Cubierta se Adapta al Estante Lateral o la Parrillera Lateral Parrillera Lateral ¡En tan sólo unos minutos convierte su parrillera a carbón en un auténtico Ahumador al Estilo Texano! Asador Permite Asar FácilmentePuede Ser ...
Page 112 - Para obtener información de precios o
P.O. Box 30864 Sea Island, GA 31561 912-638-4724 www.CharGriller.com [email protected] Para obtener información de precios o para ordenar accesorios, visite: www.CharGriller.com o LLAME AL: 912-638-4724