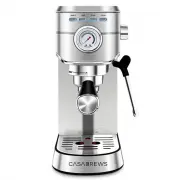
Page 2 - HOUSEHOLD USE ONLY; INSTRUCTION MANUAL; Espresso Coffee Machine
HOUSEHOLD USE ONLY Please read all instructions carefully before using the product [email protected] INSTRUCTION MANUAL Espresso Coffee Machine Model: 5700 Gense
Page 4 - Contents
Contents Scope of delivery............................................................................................................................ 1 Device parts.................................................................................................................................... 2 ...
Page 5 - Scope of delivery
Scope of delivery Scope of delivery 1 ON / OFF HOT-WATER SINGLE DOUBLE
Page 6 - Device Parts
Device parts Device Parts 2 ON / OFF HOT-WATER SINGLE DOUBLE
Page 7 - Scope of delivery/ Device parts; Coffee bean container with lid
Scope of delivery/Device parts Scope of delivery/ Device parts 3 Coffee bean container with lid Water tank Tamper Large brewing filterSmall brewing filterFilter holderCleaning needleCleaning brushCoffee spoonDrip trayDrip tray level indicatorDraining rackCoffee grinder buttonFilter holder bracketCof...
Page 8 - General
General General PLEASE READ THESE INSTRUCTIONS CAREFULLY AND KEEP THEM FOR FUTURE REFERENCE 4 Failure to comply with these operating instructions can lead to serious injury and/or damage to the espresso machine and the integrated grinding mechanism. Should you pass the product on to third parties, p...
Page 9 - Explanation of symbols; Indicates a hazard that can lead to severe (possible fatal) injury.
Explanation of symbols Explanation of symbols 5 The following symbols and signal words are used in these operating instructions, on the product or on the packaging. WARNING! Indicates a hazard that can lead to severe (possible fatal) injury. Property damage can occur if not observed. Hot surface! Th...
Page 10 - Safety; The appliance may only be used with the included accessories.
Safety Safety Intended use 6 � The espresso machine is exclusively designed for the preparation of household quantities of coffee/espresso and for frothing milk using steam. Only cold still water should be used to fill the water tank. We recommend that you use cold still filtered water to fill the w...
Page 11 - Safety instructions; Keep children away from the espresso machine and the power cable.
Safety Safety instructions 7 WARNING! Hazard for children and people with impaired physical, sensory or mental capabilities (e.g. partially disabled, elderly persons with impairment to their physical and mental capabilities) or a lack of experience and knowledge (for example, older children). � This...
Page 12 - operating the appliance.; Hazard from electricity; Only use the espresso machine in dry, interior spaces.
Electric shock hazard! The appliance operates with hazardous voltage. Faulty installation or mains voltage that is too high may lead to electric shock. A frequent cause of household accidents is a lack of attention during routine activities. Ensure that your hands are always dry when connecting/disc...
Page 14 - Remove the power plug from the socket:
Safety 10 � Remove the power plug from the socket: - if you are not using the appliance, - before cleaning or putting the appliance away, - if an obvious fault occurs during operation, - in a thunder storm. Always pull on the power plug, not on the power cable. � Do not make any modifications to the...
Page 15 - opening in the draining rack .; Injury hazard!; dismantling or cleaning the grinding mechanism.
Scalding hazard! Hot water/hot steam escapes from the espresso machine during use. Parts of the espresso machine become very hot. You may get scalded. � Each time before switching on the espresso machine, turn the steam volume regulator to OFF. Otherwise, hot water/hot steam may unintentionally esca...
Page 16 - must be turned as far as it will go.; Caution - material damage; Do not regrind ground coffee.
Safety 12 � Do not release the filter holder while the machine is running: hot water may spray out. The filter holder must be turned as far as it will go. � Allow the filter holder to cool off completely before changing the inserted brewing filter. � Please note that hot steam may also escape from t...
Page 17 - damage the heater.
Safety 13 � Protect the espresso machine from frost: Water residues may freeze at temperatures below 32 °F and damage the heater. � Place the appliance on a sturdy and level surface. In doing so, ensure that there is a sufficient distance to strong heat sources, such as hot plates, heating pipes, et...
Page 18 - Prior to initial use; Risk of damage!; Remove the appliance and accessories from the packaging.
Prior to initial use Prior to initial use Unpacking 14 NOTICE! Risk of damage! Opening the packaging without due care and attention, using a sharp knife or other pointed object, may result in damage to the appliance. 01. Remove the appliance and accessories from the packaging. 02. Carefully remove a...
Page 19 - Preparing the grinding mechanism; Cleaning the grinding mechanism
Prior to initial use Preparing the grinding mechanism 15 01. Ensure that the steam controller is switched to OFF and disconnect the power plug, if necessary. The grinding mechanism is removed for transport. Attach the grinding mechanism, as described on page 34, “ Cleaning the grinding mechanism ”, ...
Page 20 - Press the ON/OFF button and
The minimum auto-grinding time required is 5 seconds. If the custom grinding time has been set to less than 5 seconds, the auto-grinding time will revert to the default time of 14 seconds. Prior to initial use 16 NOTICE! 08. Turn the degree of grinding pre-selection to level 8-10 (the setting mark i...
Page 21 - Flushing the water system; Insert the drip tray with the draining rack .
Flushing the water system Prior to initial use 17 Prior to initial use and after a longer period of disuse of the espresso machine, allow the contents of approx. 2-3 cups of water to run through the machine. This will clean the water circuit and all parts will be heated up. During initial use, it ma...
Page 23 - Why is it slow to dispense ground coffee at settings 1-3?; The degrees of grinding 1-3 are too fine the new grinding mecha-; Scalding hazard!; Empty the drip tray carefully and reinsert it.; Why is there a setting 1-3 on the machine?
For a new user, we suggest to set the grind level to 7-10 initially, and then make adjustments depending on the extraction of the coffee and the pressure shown by the pressure gauge. Why is it slow to dispense ground coffee at settings 1-3? The degrees of grinding 1-3 are too fine the new grinding m...
Page 25 - Less than 10kg
About the pressure gauge 21 (1) Check if the filter is blocked. (2) Try reducing the force for tamping the ground coffee. (3) Select a coarser grind setting. - If the pressure gauge shows a pressure at range of 12-20bar, it means that the pressure is too high. The following measures can be taken: Le...
Page 26 - Use; such as nuts, spices or liquids, to avoid damaging the appliance.; Degree of grinding pre-selection; grinding is set by matching it to the mark above the scale.
Use Use 22 Only grind roasted coffee beans in this appliance. Do not process any other foods, such as nuts, spices or liquids, to avoid damaging the appliance. Please do not operate the appliance when it is empty, i.e. without coffee beans. We recommend always grinding coffee beans fresh, shortly be...
Page 27 - Preparing espresso; Check whether there is sufficient water in the water tank .
WARNING! Preparing espresso Use 23 Scalding hazard! If you remove the filter holder while dispensing coffee, hot water droplets will spray from the espresso machine. You may get scalded. Always make sure that the brewing filters and as well as filter holders are clean and do not contain any coffee r...
Page 28 - grinding process.; with setting 7-10 and then adjusting as required.; filter holder out of the bracket.
Use 24 Only adjust the degree of grinding levels in the direction of “finer” (15->1)during the grinding process. 08. Turn the degree of grinding pre-selection to the required level. We recommend initially working with setting 7-10 and then adjusting as required. Initially, the degrees of grinding...
Page 31 - Emptying the brewing filter; Preferably knock out the ground coffee into organic waste.; Preparing cappuccino/frothy milk
Scalding hazard! The metal parts of the filter holder and the brewing filter used become hot during use. Use Emptying the brewing filter 27 01. Swing the filter holder to the left and remove it from the filter holder bracket . Do not use excessive force to release the filter holder. Be prepared for ...
Page 32 - Prepare your espresso in a pre-heated cup.
Use 28 It is recommended to use a small, clean, stainless steel jug. This will allow you to estimate the temperature of the milk by using your sense of touch. The frothed milk should not be hotter than approx. 140°F. At this temperature, the container will feel hot but not so hot that you can’t touc...
Page 33 - foam roll. The milk foam will then become finer and creamier.
Use 29 09. You will hear a hissing sound; please make sure that the milk is whirling around. The volume of the milk will increase over time. Move the container gradually downwards, so that the nozzle is at the surface of the milk. As soon as the frothing jug heats up, hold the nozzle in the milk and...
Page 34 - Hot water function; Connect the power plug to a socket. A beep tone will sound.; Emptying the drip tray; The drip tray has an indicator that shows when the drip tray is full.
Use Hot water function 30 WARNING! Scalding hazard! The water discharged from the steam nozzle/hot water nozzle is extremely hot. You may get scalded. 01. Connect the power plug to a socket. A beep tone will sound. 02. Press the ON/OFF button. The grinding mechanism standby indicator will light up a...
Page 35 - Change water quantity for coffee preparation; A minor change of the quantity is possible during preparation:; double espresso as appropriate.
Use Change water quantity for coffee preparation 31 You can adapt the quantity of water and thereby adapt the quantity of espresso for the single or double espresso. A minor change of the quantity is possible during preparation: 01. Switch the espresso machine on and let it heat up. 02. Press the bu...
Page 36 - Water tank empty; In this case, fill water into the water tank. Please note the MAX mark.; Switching off the espresso machine; Electric shock hazard!
Use Water tank empty 32 If the water tank is empty or if it is emptied during preparation, a beep tone will sound three times and the buttons will light up red. In this case, fill the water tank as appropriate. Please note the MAX mark. In this case, fill water into the water tank. Please note the M...
Page 37 - Cleaning
WARNING! Cleaning Cleaning 33 NOTICE! NOTICE! Electric shock hazard! Incorrect handling of the appliance can cause an electric shock. � Do not immerse the appliance, the power cable or the power plug into water or other liquids. � Remove the power plug from the socket before cleaning the product. � ...
Page 39 - prepare grinding mechanism.
Cleaning 35 When coffee beans are ground, they release some oil which leaves a residue in the grinding chamber. This coffee oil needs to be removed on a regular basis using the brush. You can also vacuum the grinding mechanism carefully with a vacuum cleaner. 07. Set the coffee distributor on the gr...
Page 40 - Cleaning the brewing filter; Empty the drip tray, rinse it out and let it dry.; Clean steam nozzle/hot water nozzle; Before cleaning, it can be soaked in water.
Cleaning 36 WARNING! Cleaning the brewing filter Empty the brewing filter after each use and rinse it well with water before refilling it. Daily cleaning 01. Wash the brewing filter thoroughly with dish soap and water, then rinse all parts with clean water. 02. Empty the drip tray, rinse it out and ...
Page 41 - Descaling the espresso machine; requested from the local water management authority.
Descaling the espresso machine Descaling the espresso machine 37 Over time, (hard) water will deposit lime scale in different parts and components of the espresso machine and affect its performance as it impairs the water flow and brewing temperature, among others. It is therefore very important to ...
Page 42 - the filter holder and under the steam nozzle/hot water nozzle.; Storage
Descaling the espresso machine 38 01. Remove any water from the water tank and fill it with the prepared descaling product up to the MAX mark. 02. Place an appropriate container (with the same volume as the water tank) on the draining rack under the filter holder and under the steam nozzle/hot water...
Page 43 - Descaling signal
Descaling signal/Insufficient water signal Descaling signal Insufficient water signal 39 If the four indicators flash red twice in consecutive order when the machine is turned on (as illustrated), it means that the machine has been running for 1000 working cycles and this is a reminder that descalin...
Page 44 - Troubleshooting
Troubleshooting Troubleshooting 40 Fault ossible cause and solution Machine is not functioning Water is escaping from the side of the filter holder. Too much ground coffee in the brewing filter. Remove the filter holder, clean the rim with a small sponge and checkthe coffee quantity. Espresso is not...
Page 45 - After switching on the
Troubleshooting 41 After switching on the espresso machine, only the ON/OFF button lights up and not all four round illuminated buttons. The appliance is not heating up. Set the steam volume controller to “OFF” position. Otherwise, the steam unit will only heat up the steam nozzle. Grinding mechanis...
Page 46 - Technical data; Disposing of packaging and appliance; Appliances should not be disposed of with household waste!; Contact us; We won’t be happy until you are! Please contact us on:
Technical data/Disposal Technical data Mains voltage: 120V~ 60HzPower consumption: 1500W Water pump pressure: Max.20 barWater tank capacity: 91OZ Coffee bean container capacity: approx. 9 OZProtection class: Disposal Disposing of packaging and appliance Sort the packaging materials as appropriate fo...