Page 2 - Cleaning And Maintenance; TECHNICAL SPECIFICATIONS; Scan the QR code for more
Model No.: GCF20D Power : 1350 W Voltage: 120 V P u m p P r e s s u r e : 20 Bar C a p a c i t y o f W a t e r T a n k : 1.4 L Safety InstructionsProduct ComponentsHow To Use 2 4 5 Cleaning And Maintenance 12 Troubleshooting 14 Limited Warranty 16 TECHNICAL SPECIFICATIONS TABLE OF CONTENTS Scan the ...
Page 3 - SAFETY INSTRUCTIONS; IMPORTANT SAFETY INSTRUCTIONS
SAFETY INSTRUCTIONS 2 Read all the safety and operating instructions carefully and retain them for future reference. Don't use it outdoors. Keep it away from sources of heat, direct sunlight, humidity (never dip it into any liquid) and sharp edges. Do not use the appliance with wet hands. If the app...
Page 4 - SAVE THESE INSTRUCTIONS!; The appliance is only to be used as described in the user manual.; Do not; use the appliance for any commercial purposes.
SAFETY INSTRUCTIONS 3 SAVE THESE INSTRUCTIONS! HOUSEHOULD USE ONLY The appliance is only to be used as described in the user manual. Do not use the appliance for any commercial purposes. Any other use is not intended and can result in damages or personal injuries.The manufacturer assumes no liabilit...
Page 5 - KNOW YOUR COFFEE MAKER; PRODUCT COMPONENTS; switch and indicator
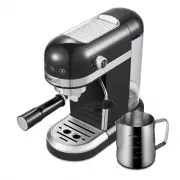
KNOW YOUR COFFEE MAKER PRODUCT COMPONENTS 4 1. Water tank cover2. Water tank 3. Steam control knob 4. Main body5. Steam wand nozzle6. ON/OFF switch7. Warm cup board 8. Single-cup coffee switch and indicator9. Double -cup coffee switch and indicator Note: The machine must use ground coffee to make co...
Page 6 - BEFORE FIRST USE; HOW TO USE; If don’t remove the red silicone cap, the machine will be unable
BEFORE FIRST USE HOW TO USE 5 Note: If don’t remove the red silicone cap, the machine will be unable to pump water. Water tank Red Silicone Cap Remove the package from coffee maker and check the accessories according to the component list.Remove the tank cover and the water tank, then remove the red...
Page 7 - the coffee filter and the cup.
From position " " to position " ", rotate counterclockwise to install the filter holder (No coffee powder added) into the funnel holder of the machine, then touch the double-cup coffee switch " " to let the hot water out to wash the coffee filter and the cup. HOW TO USE 6 8.
Page 8 - MAKING THE ESPRESSO; If too much ground coffee remaining in the edge of the filter,; on the back of the machine, press it down and close the lid.
MAKING THE ESPRESSO Note: If too much ground coffee remaining in the edge of the filter, will easily to cause poor sealing and water leakage. HOW TO USE 7 Open the lid, take out water tank, and fill cold water into water tank NOT exceed the “MAX” line. Set up the water tank vertically and align the ...
Page 10 - FROTHING MILK; To prepare a traditional cappuccino or latte, we recommend:
HOW TO USE 9 FROTHING MILK To prepare a traditional cappuccino or latte, we recommend: Continue as follows: Using cold (39°F-50°F), fresh whole milk. The density of the frothed milk will depend on the milk fat content.Using stainless steel, circular, rounded milk jugs, narrower at the top, with a sp...
Page 12 - MAKING HOT WATER
Place an empty cup under the steam wand. Touch steam switch“ ” to switch off the steam mode, the coffee indicators “ ” and “ ” will be flashing. Turn on the steam control knob and making hot water for 5s in order to clean the inside of steam wand nozzle. Turn off the steam control knob, ready to mak...
Page 13 - To avoid bums, the filter must only be replaced when; CLEANING THE FILTER HOLDER AND THE FILTER; The filters should be kept clean to guarantee perfect results.; CLEANING THE STEAM WAND; After each milk frothing:
12 CLEANING THE STEAM WAND To avoid bums, the filter must only be replaced when the filter holder has cooled down completely. Regular cleaning and maintenance keep the machine in working condition and ensure perfect coffee flavor, a constant coffee flow, and excellent milk froth for a long period of...
Page 14 - CLEANING AND MAINTENANCE; To avoid burns, the tank should be cleaned only when; CLEANING THE WATER TANK; Remove the Water tank and wash it with fresh water.; CLEANING THE BREW UNIT; and wash with hot water following the steps below.
CLEANING AND MAINTENANCE 13 To avoid burns, the tank should be cleaned only when the machine is turned off. The drain hose may reach high temperatures during operation. CLEANING THE WATER TANK Remove the Water tank and wash it with fresh water. CLEANING THE BREW UNIT Regularly remove any residual co...
Page 15 - TROUBLESHOOTING; PROBLEM
14 TROUBLESHOOTING PROBLEM CAUSE / RESULT SOLUTION No water comes out No steam is generated Water tank is empty Machine malfunctions The input voltage or frequency is inconsistent with nameplate Pour water in water tank Please contact with the authorized service No steam is generated Water tank is e...
Page 16 - shape is not fit
15 TROUBLESHOOTING PROBLEM CAUSE / RESULT SOLUTION Machine is not working The milk cannot froth The power cord is not plugged well. NTC is short circuitMachine malfunctions Steam indicator not light on Used skimmed milk The container is too big or the shape is not fit Wait steam indicator lights on. ...
Page 17 - LIMITED WARRANTY; THIS LIMITED WARRANTY DOES NOT APPLY TO :
LIMITED WARRANTY LIMITED WARRANTY Geek Technology Ltd. warrants to the original consumer or purchaser this Geek Chef Espresso Coffee Maker is free from defects in material or workmanship for a period of One (1) year from the date of purchase. If any such defect is discovered within the warranty peri...