Page 2 - Symbols used in this guide
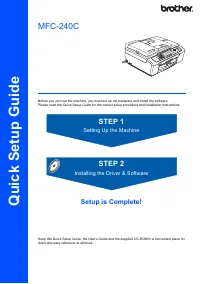
Symbols used in this guide Warning Caution Improper Setup Warnings tell you what to do to prevent possible personal injury. Cautions specify procedures you must follow or avoid to prevent possible damage to the machine or other objects. Improper Setup icons alert you to devices and operations that a...
Page 3 - Table of Contents; Getting Started; STEP1 –; Setting Up the Machine; STEP2 –; Installing the Driver & Software; Windows; Consumables
Table of Contents 1 Getting Started Carton components ...................................................................................................................................... 2Control panel ...................................................................................................
Page 4 - Carton components
Getting Started 2 1 Carton components Carton components may vary from one country to another.Save all packing materials and the carton in case for any reason you must ship your machine. A USB interface cable is not a standard accessory. Please make sure you use a USB 2.0 cable that is no longer th...
Page 5 - Control panel; Note
Getting Started 3 Control panel 1 Fax and telephone keys 2 Dial Pad 3 Mode keys 4 Fax Resolution key 5 Ink key 6 Clear/Back key 7 OK key 8 Start keys 9 Stop/Exit key 10 Navigation keys 11 Copy Options key 12 Menu key 13 LCD (Liquid Crystal Display) 14 On/Off key For the details of the control panel,...
Page 6 - Removing the protective; Improper Setup; Loading paper
Setting Up the Machine 4 STEP1 1 1 Removing the protective parts 1 Remove the protective tape and film covering the scanner glass. Improper Setup DO NOT connect the USB cable. Connecting the USB cable is done during the software installation process. 2 Loading paper You can load up to 100 sheets of ...
Page 8 - Connecting the phone line
Setting Up the Machine 6 STEP1 8 While holding the paper tray in place, pull out the paper support ( ) until it clicks, and then unfold the paper support flap ( ). Note Do not use the paper support flap for Legal paper. 3 Connecting the phone line 1 Connect the telephone line cord. Connect one end o...
Page 9 - Connecting the power cord; Installing the ink cartridges
Setting Up the Machine 7 4 Connecting the power cord 1 Connect the power cord. 5 Installing the ink cartridges Warning If ink gets in your eyes, wash them out with water at once, and if irritation occurs consult a doctor. 1 Make sure that the power is turned on.The LCD shows: No Cartridge 2 Open the...
Page 10 - Preparing System
Setting Up the Machine 8 STEP1 Improper Setup DO NOT touch the area shown in the illustration below. Note If the protective yellow cap comes off when you open the bag, the cartridge will not be damaged. 6 Install each ink cartridge in the direction of the arrow on the label. Take care to match the c...
Page 11 - Caution; Print quality check; Set Paper and
Setting Up the Machine 9 Caution • DO NOT take out ink cartridges if you do not need to replace them. If you do so, it may reduce the ink quantity and the machine will not know the quantity of ink left in the cartridge. • DO NOT shake the ink cartridges. If ink stains your skin or clothing, wash wit...
Page 12 - Choosing your language
Setting Up the Machine 10 STEP1 5 Do one of the following: If all lines are clear and visible, press 1 ( Yes ) on the dial pad to finish the quality check. If you can see missing short lines, press 2 ( No ) on the dial pad and go to step 6 . 6 The LCD asks you if the print quality is OK for blac...
Page 13 - Setting the LCD contrast; Setting the date and time
Setting Up the Machine 11 8 Setting the LCD contrast You can adjust the LCD contrast for a sharper and move vivid display. If you are having difficulty seeing the LCD from your position, we recommend the following contrast setting for improved viewing. 1 Press Menu , 1 , 7 . 2 Press a or b to choose...
Page 14 - Setting your station ID; Setting tone or pulse dialing
Setting Up the Machine 12 STEP1 10 Setting your station ID You should store your name and fax number to be printed on all fax pages that you send. 1 Press Menu . 2 Press 0 . 3 Press 3 . 4 Enter your fax number (up to 20 digits) on the dial pad, and then press OK . Fax:_ 5 Enter your name (up to 20 c...
Page 15 - Choosing a Receive Mode; Sending in the Product; Now go to; Manual
Setting Up the Machine 13 12 Choosing a Receive Mode There are four possible receive modes: Fax Only , Fax/Tel , Manual and External TAD . 1 Press Menu . 2 Press 0 . 3 Press 1 . 4 Press a or b to choose the mode. 5 Press OK . 6 Press Stop/Exit . For details, see Receive mode Settings in Chapter 6 of...
Page 16 - Macintosh
Supplied CD-ROM ‘MFL-Pro Suite’ 14 1 Supplied CD-ROM ‘MFL-Pro Suite’ Windows ® Install MFL-Pro Suite You can install the MFL-Pro Suite software and multifunction drivers. Install Other Drivers or Utilities You can install additional MFL-Pro Suite software utilities, install without PaperPort ® SE, o...
Page 17 - For USB Interface Users
Installing the Driver & Software 15 STEP2 Follow the instructions on this page for your operating system and interface.For the latest drivers and documentations and to find the best solution for your problem or question, access the Brother Solutions Center directly from the driver or visit http:...
Page 18 - Important
Installing the Driver & Software 16 STEP2 W in dow s ® US B Windows ® 1 For USB Interface Users(For Windows ® 98/98SE/Me/2000 Professional/XP/XP Professional x64 Edition) Important Make sure that you have finished the instructions from Step 1 Setting Up the Machine on pages 4 through 13. Note • ...
Page 24 - Replacement consumables; Ink cartridge
Consumables 22 1 Replacement consumables When the time comes to replace ink cartridges, an error message will be indicated on the LCD. For more information about the ink cartridges for your machine, visit http://solutions.brother.com or contact your local Brother re-seller. Ink cartridge Black Yello...