Page 2 - P a g e; ONTENTS
P a g e | 2 web: brohn.com.au C ONTENTS 1 PACKAGE ................................................................................................................................................. 3 1.1 IMPORTANT - CHECK FOR ANY DAMAGE OR MARKS ...........................................................
Page 3 - PACKAGE; IMPORTANT - CHECK FOR ANY DAMAGE OR MARKS; Please thoroughly inspect your goods
P a g e | 3 web: brohn.com.au Congratulations on purchasing your new appliance! We recommend that you read this Instruction and Installation Manual in order to fullyunderstand how to install and operate it correctly. For installation, please read theinstallation section. Read all the safety instruct...
Page 4 - BEFORE USING YOUR NEW APPLIANCE; Remove any protective film that may still be on your appliance.
P a g e | 4 web: brohn.com.au 1.3 UNPACKING During transportation, protective packaging is used to protect the applianceagainst any damage. After unpacking, please dispose of all packaging in asustainable and environmentally friendly manner. All materials used for packaging are environmentally f...
Page 5 - SAFETY WARNINGS; IMPORTANT INFORMATION; Never carry out flammable cooking under the cooker hood.
P a g e | 5 web: brohn.com.au 2 SAFETY WARNINGS 2.1 IMPORTANT INFORMATION Your safety is important to us. Please read this manual thoroughly before you start usingthe appliance.The safety precautions instructions reduce the risk of fire, electric shock and injury whencorrectly complied to.Please fol...
Page 6 - Always switch off gas burners before you remove pots or pans.; ELECTRICAL CONNECTION:; Keep exhaust corrugated flue short and straight.
P a g e | 6 web: brohn.com.au Your new rangehood is guaranteed against electrical or mechanical defects,subject to certain exclusions that are noted in the Warranty Terms and Conditions.The foregoing does not affect your statutory rights. Always cover lit gas burners with pots or pans when cooke...
Page 7 - length; USAGE CONDITIONS AND RESTRICTIONS; Cleaning and maintenance must not be done by children.
P a g e | 7 web: brohn.com.au NOTE: Some installations may require the expandable/telescopic ducting to be cut to length . Cut with sharp tin snips or a fine-tooth hack saw blade, taking care not to distort or dentthe exhaust cover. Where using expandable ducting, it’s important to have the ductingf...
Page 8 - PRODUCT OVERVIEW
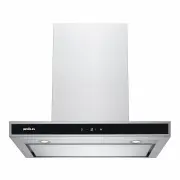
P a g e | 8 web: brohn.com.au 3 PRODUCT OVERVIEW 3.1 LAYOUT MODEL: BRR108 600 / BRR108 900
Page 11 - RANGEHOOD COMPONENTS
P a g e | 11 web: brohn.com.au 3.2 RANGEHOOD COMPONENTS The Wall Canopy Rangehood is supplied with: 1 × Rangehood 1 × Expandable 150mm pipe 1 × Packet of fasteners and wall plugs 2 × Stainless Steel flue pieces (upper and lower) 1 × Wall Bracket for the rangehood body 1 × Wall Bracket fo...
Page 12 - INSTALLATION; INSTALLATION WARNINGS; Always switch the power off prior to beginning the installation.; INSTALLATION PREPARATION; TOOLS AND MATERIAL REQUIRED FOR INSTALLATION:; Duct tape or cable ties
P a g e | 12 web: brohn.com.au 4 INSTALLATION 4.1 INSTALLATION WARNINGS Before starting the installation, please refer to the Safety Information section. • Always switch the power off prior to beginning the installation. • Ensure to handle appliance carefully as stainless steel can be easily damaged...
Page 13 - EXHAUST WAY SELECTION; DUCTING OUTSIDE MODE
P a g e | 13 web: brohn.com.au Jigsaw Ladder 4.3 EXHAUST WAY SELECTION Before beginning the installation of the rangehood, the method of ducting should be considered and selected. NOTE: Most rangehoods can be operated in recirculation mode. For better operation and performance, it is recommended...
Page 14 - Straight up and through the roof
P a g e | 14 web: brohn.com.au 2. Straight up and through the roof 3. Through the wall 4.4 RECIRCULATION / DUCTLESS, VENT INSIDE OPTION If the outside duct outlet is not available, most rangehoods areable to operate in recirculation mode. The wall installation is shown above. The activated carbon fi...
Page 15 - POSITIONING THE RANGEHOOD; minimum, then that shall be the minimum height for installation.; DIMENSION A; WALL INSTALLATION
P a g e | 15 web: brohn.com.au NOTE: Make sure the filter is securely locked. If loose, it will cause danger. In recirculation mode, when activated carbon filter is attached, the suction powerperformance will be lower then in ducted outside mode. 4.5 POSITIONING THE RANGEHOOD IMPORTANT: The heig...
Page 17 - USING RANGEHOOD; TOUCH CONTROL TO01; Speed increase button; For increasing the speed of the fan; Speed decrease button; For decreasing the speed of the fan.; Light button
P a g e | 17 web: brohn.com.au Figure 3 5 USING RANGEHOOD 5.1 CONTROLS The rangehood features touch controls with four speed levels of extraction.When the rangehood is powered, the ‘1’ button would appear illuminated.This indicates the rangehood is now in standby mode. Press any of the keys to begin...
Page 18 - USING TOUCH CONTROLS
P a g e | 18 web: brohn.com.au Quick timer: Press & hold for 1 second. Digital display will turn flashing and rangehood switch into 5 minutes countdown mode. After 5 minutes motor and light willturn off automatically and the buzzer sounds for 1 second. SPEED SETTINGS“1“ Press the ‘1’ button,the ...
Page 19 - CARE AND MAINTENANCE; ALUMINIUM GREASE FILTER
P a g e | 19 web: brohn.com.au 6 CARE AND MAINTENANCE Proper cleaning and maintenance of this rangehood will ensure long fault free operation. Warning!Always switch off the electricity supply beforeperforming maintenance work. In the event of afault, contact customer service. CAUTION: Before maint...
Page 20 - STAINLESS STEEL SURFACES; Annual Cleaning for Activated Carbon Filter; CHANGING A LIGHT GLOBE; same type and rated; LED Light
P a g e | 20 web: brohn.com.au 6.2 STAINLESS STEEL SURFACES Clean stainless-steel surfaces using non-abrasive cleaning products that are specificallydesigned to be used on stainless steel. To ensure best results, use even pressure and followthe grain of the stainless steel. Use of a soft cloth reduc...
Page 21 - Plug the LED panel light cable back in.
P a g e | 21 web: brohn.com.au Replacing the bulb: Model BRR129 900 *LED strip* 1. Switch the unit off and unplug the appliance.2. Push the glass assembly out to the left.3. Unplug the LED strip light cable and switch wire, unscrew the four screws4. Take out the switch assembly and the 2 brackets.5....
Page 22 - TROUBLESHOOTING; IN CASE OF EMERGENCY; FAULT
P a g e | 22 web: brohn.com.au 7 TROUBLESHOOTING Before calling customer service, please check that the appliance is correctly connected.Any of the following cases are not covered by the warranty: Damage caused by improper use, storage or maintenance Damage caused by unauthorised disassembly and...
Page 23 - your electrical supply and contact Customer Service.
P a g e | 23 web: brohn.com.au IMPORTANT: If your appliance appears to be operating incorrectly, then disconnect it from your electrical supply and contact Customer Service. WARNING: Do not attempt to repair the rangehood yourself. NOTE: If a service technician is asked to attend whilst the product ...
Page 24 - TECHNICAL SPECIFICATIONS; Connects to standard household 10 Amp power point
P a g e | 24 web: brohn.com.au 8 TECHNICAL SPECIFICATIONS BRR108 600 SPECIFICATIONS Model BRR108 600 Dimensions (W × D × H) 600mm × 500mm × 548-1028mm Extraction 1000m3/hr Control Touch TO01 Speed settings 3 Lighting 2x1.5w Multi Bulb LED light (LE01) Filters Aluminium perimeter extraction filter co...
Page 26 - DISPOSAL; The packaging materials are recyclable.
P a g e | 26 web: brohn.com.au 9 DISPOSAL This appliance requires special waste disposal. For further informationregarding the treatment, recovery and recycling of this productplease contact your local council, household waste disposal serviceor store of purchase. The packaging materials are recycla...
Page 27 - 0 CUSTOMER CARE; keep the receipt; For your own protection, please record installer’s details:
P a g e | 27 web: brohn.com.au 10 CUSTOMER CARE Please be advised that without the proof of purchase, your warranty may not bevalid, keep the receipt . For your convenience, please record: STORE NAME/CONTACT DETAILS: ............................................... PURCHASE DATE: .....................