Page 2 - Руководство по эксплуатации; Never attempt to observe the sun with this telescope.
22 (DE) Gebrauchsanleitung ....................................................................................... 6 (EN) Instruction Manual ........................................................................................ 12 (FR) Mode d’emploi ...................................................
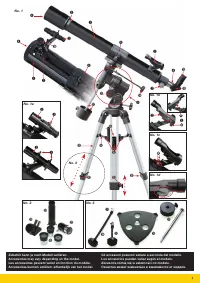
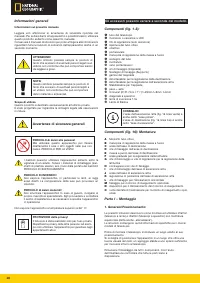
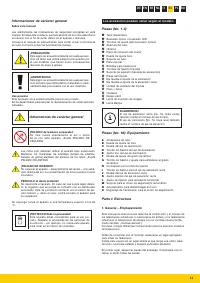
Page 6 - Allgemeine Informationen; Zu dieser Anleitung; Allgemeine Warnhinweise; GEFAHR von Körperschäden!; Zubehör kann je nach Modell variieren.; Teil I – Der Aufbau
66 Allgemeine Informationen Zu dieser Anleitung Lesen Sie bitte aufmerksam die Sicherheitshinweise in dieser Anleitung. Verwenden Sie dieses Produkt nur wie in der Anleitung beschrieben, um Schäden am Gerät oder Verletzungen zu vermeiden. Bewahren Sie die Bedienungsanleitung auf, damit Sie sich jede...
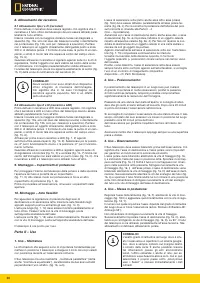
Page 7 - Hinweis: Je nach Modell kann die Tubus-Schelle auch mit zwei; Einsetzen des Okulars
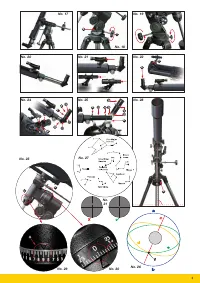
77 ES PL RU DE EN FR NL IT 2. Stativ Die Stativbeine sind vormontiert und bereits mit dem Stativkopf (No. 5, X) und der Stativspinne (No. 1, 16) verbunden. Nehmen Sie das Dreibeinstativ aus der Verpackung und stellen Sie es senkrecht mit den Stativfüßen nach unten. Nehmen Sie nun zwei der Stativbein...
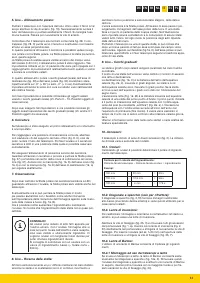
Page 8 - Ausrichtung des Suchers; Wichtig: Das Bild im Teleskop steht auf dem Kopf, sofern Sie keine; TEIL II – Die Handhabung
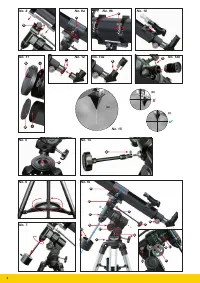
88 8. Ausrichtung des Suchers 8.1 Ausrichtung Typ I + IV (Sucherfernrohre) Das Sucherfernrohr muss vor dem Einsatz justiert werden. Dafür müssen das Sucherfernrohr und der Teleskop-Tubus parallel ausge- richtet werden. Stecken Sie das Okular mit der größten Brennweite in den Zenitspiegel (No. 13a, n...
Page 9 - Polare Ausrichtung
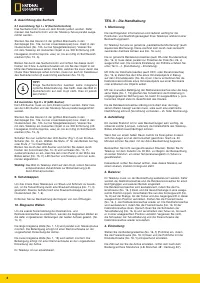
99 ES PL RU DE EN FR NL IT Vergessen Sie nicht, die Fixierschraube wieder anzudrehen. Anschließend stellen Sie die Deklinationsachse (No. 16, C), durch Lösen und Festziehen der Fixierschraube (No. 16, D) auf 90° ein. Der Teleskop-Tubus ist nun parallel zur Erdachse ausgerichtet. Dies nennt man polar...
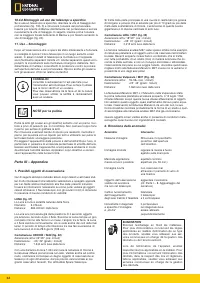
Page 10 - Formel zur Berechnung der Vergrößerung:; HINWEISE zur Reinigung; Mögliche Beobachtungsobjekte
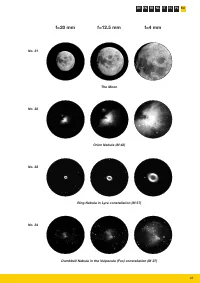
10 10 700 mm ÷ 20 mm = 35 x 700 mm ÷ 12,5 mm = 56 x 700 mm ÷ 4 mm = 175 x Formel zur Berechnung der Vergrößerung: Brennweite (Teleskop) ÷ Brennweite (Okular) = Vergrößerung Beispiele: 10.2. Zenitspiegel (nur Refraktor): Der Zenitspiegel (No. 2, 19) bewirkt eine Bildumkehrung (spiegelver- kehrt) und ...
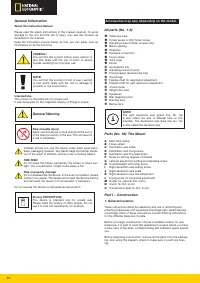
Page 12 - General Information; About this Instruction Manual; General Warning; Risk of bodily injury!; This device is intended only for private use.; Accessories may vary depending on the model.; Part I – Construction
12 General Information About this Instruction Manual Please read the safety instructions in this manual carefully. To avoid damage to the unit and the risk of injury, only use this product as described in the manual. Keep the instruction manual handy so that you can easily look up information on all...
Page 13 - Note: The main tube clamp may have two screws depending; Inserting the eyepiece; Assembling the finder scope/LED finder scope; Note: The LED finder scope's battery is safeguarded against
13 ES PL RU DE EN FR NL IT IMPORTANT! Only secure screws finger tight. Do not overtighten screws. 2. Tripod The tripod legs are preinstalled and connected to the tripod head (No. 5, X) and tripod spider (No. 1, 16). Remove the tripod from its packaging and place it upright, with the feet at the base...
Page 14 - Aligning the finder scope; Part II – Handling
14 8. Aligning the finder scope 8.1 Aligning types I and IV (finder scopes) The finder scope must be adjusted before use; the finder scope and the telescope's main tube must be aligned parallel to one another. Insert the eyepiece with the greatest focal length into the zenith mir- ror ( No. 13a, ref...
Page 15 - Formula for calculating magnification:
15 ES PL RU DE EN FR NL IT 5. Polar alignment Align the telescope with the front barrel opening pointing north by loosening the fastening screw (No. 19) and turning the barrel until it points north. If necessary, use a compass to determine the direction. Then retighten the fastening screw. Examine w...
Page 16 - Possible observation targets
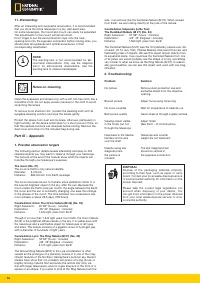
16 11. Dismantling: After an interesting and successful observation, it is recommended that you store the entire telescope in a dry, well-aired area. On some telescopes, the tripod and mount can easily be separated. The adjustments to the mount will remain intact. Don't forget to put the dust-protec...
Page 17 - A propos de ce manuel; Consignes générales de sécurité; RISQUE de dommages corporels !; Les accessoires peuvent varier en fonction du modèle.; Partie I –La construction
17 ES PL RU DE EN FR NL IT Informations générales A propos de ce manuel Veuillez lire attentivement les consignes de sécurité présentées dans ce manuel. N’utilisez ce produit comme décrit dans ce manuel, afin d’éviter tout risque de blessure ou de dommage sur l’appareil. Conservez le manuel d’utilis...
Page 18 - Assemblage du chercheur/ chercheur LED
18 IMPORTANT! Pour toutes les, vis ne les serrez qu‘à la main afin d‘éviter de foirer un filet. 2. Statif : Les jambes du statif sont prémontées et assemblées avec la tête du statif (No. 5, X) et l‘entretoise du statif (No. 1, 16). Sortez le trépied de son emballage et placez le en position vertical...
Page 19 - Mise au point du chercheur; PARTIE II – Le maniement
19 ES PL RU DE EN FR NL IT 8. Mise au point du chercheur 8.1. Mise au point des types I et IV (chercheurs) Avant utilisation, il faut mettre le chercheur au point. C‘est-à-dire que le chercheur et le tube du télescope doivent être orientés parallèle- ment. Insérez l‘oculaire possédant la distance fo...
Page 21 - Formule pour calculer l‘agrandissement :; REMARQUE concernant le nettoyage; Objets à observer possibles
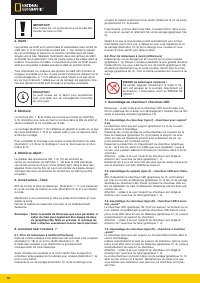
21 ES PL RU DE EN FR NL IT 10. Accessoires: L‘équipement de base de votre télescope comprend plusieurs accessoires (graphique 2). Selon le modèle, il comprend 10.1 Des oculaires: En changeant les oculaires, vous pouvez choisir l‘agrandissement de votre télescope. 700 mm ÷ 20 mm = 35 x 700 mm ÷ 12,5 ...
Page 22 - ELIMINATION
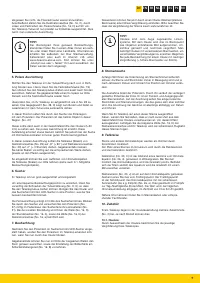
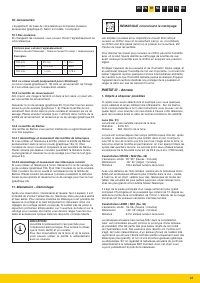
22 Constellation Füchslein / M27 (No. 34) L’ascension droite: 19 h 59 m (heures : minutes) Déclinaison: +22° 43' (degré : minutes) Distance : 1360 années lumière de la terre. La nébuleuse M27 Dumbbell ou Hantelbebel dans le Füchslein était la première nébuleuse planétaire jamais découverte. Le 12. j...
Page 23 - Over deze handleiding; Algemene waarschuwingen; GEVAAR voor verwondingen!; Deel I – Opstellen
23 ES PL RU DE EN FR NL IT Algemene informatie Over deze handleiding Leest u aandachtig de veiligheidsinstructies in deze handleiding. Gebruik dit product, om schade aan het apparaat of verwondingen te voorkomen, alleen zoals in de handleiding is beschreven. Bewaar deze gebruikershandleiding zodat u...
Page 24 - Inzetten van het oculair; Het richten van de zoeker
24 2. Statief: De statiefpoten zijn voorgemonteerd en al verbonden met de statiefkop (No. 5, X) en de statiefspin (No. 1, 16). Neem het driepootstatief uit de verpakking en stel deze lood recht met de statiefvoeten naar beneden. Neem dan 2 van de statiefbenen en trek aan deze 2 benen tot ze in een v...
Page 26 - Formule voor de berekening van de vergroting:
26 Controleer of de telescoop net zo is opgesteld als in No. 28 wordt getoond. Het contragewicht (No. 28, X) wijst naar de grond en vormt samen met de kijkbuis een loodrechte as. In deze positie ziet u door de zoeker het poolgebied met de poolster. De poolster is de meest heldere ster in dit gebied....
Page 27 - Suggesties voor te observeren hemellichamen
27 ES PL RU DE EN FR NL IT men het beste verwijderen met een zachte, pluisvrije doek waarop men een beetje alcohol kan doen. Wanneer de telescoop eenmaal verstoft en vochtig is probeer het dan niet te reinigen maar laat het in dit geval doen door een vakman. Tip: Voor astronomische observatie is de ...
Page 28 - Informazioni generali; Avvertenze di sicurezza generali; Parte I – Montaggio
28 Informazioni generali Informazioni sul presente manuale Leggere con attenzione le avvertenze di sicurezza riportate nel manuale. Per evitare danni all‘apparecchio o possibili lesioni, utilizzare questo prodotto soltanto come descritto manuale. Conservare il manuale di istruzioni per poter attinge...
Page 29 - Montaggio – Montaggio del vano portaccessori:
29 ES PL RU DE EN FR NL IT NOTA! Stringere le viti in modo tale che siano ben salde, evitando però di spanarle. 2. Montaggio – Treppiede: Le gambe del treppiede sono già montate e unite alla testa del trep- piede (fig. 5,X) e allo stabilizzatore (fig.16). Rimuovere il treppiede a tre sezioni dall’im...
Page 30 - Parte II – Uso
30 8. Allineamento del cercatore 8.1 Allineamento tipo I e IV (cercatori) Prima dell‘uso il cercatore deve essere regolato. Ciò significa che il cercatore e il tubo ottico del telescopio devono essere allineati paral- lelamente l‘uno all‘altro. Inserire l’oculare con la maggiore distanza focale nel ...
Page 31 - Formula per il calcolo dell’ingrandimento:; Montaggio ed uso dei telescopi a lente
31 ES PL RU DE EN FR NL IT 5. Uso – Allineamento polare: Puntare il telescopio con l’apertura del tubo ottico verso il Nord. A tal scopo allentare la vite di arresto (fig. 19). Successivamente ruotare il tubo del telescopio e puntare esattamente il Nord. Si consiglia l’uso di una bussola. Fissare po...
Page 32 - Montaggio ed uso dei telescopi a specchio; NOTE per la pulizia; Possibili oggetti di osservazione
32 10.4.2 Montaggio ed uso dei telescopi a specchio Se si usa un telescopio a specchio, allentare la vite di fissaggio del portaoculare (fig. 13b, X) e rimuovere l‘oculare dal portaoculare. Inserire poi la lente di Barlow direttamente nel portaoculare e serrare nuovamente la vite di fissaggio. In se...
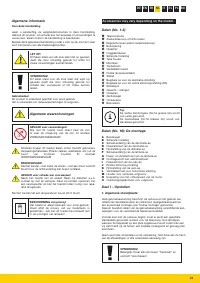
Page 33 - Los accesorios pueden variar según el modelo.; General – Emplazamiento
33 ES PL RU DE EN FR NL IT Informaciones de carácter general Sobre este manual Lea atentamente las indicaciones de seguridad recogidas en este manual. Emplee este producto exclusivamente de la forma descrita en el manual, con el fin de evitar daños en el aparato o lesiones. Conserve el manual de ins...
Page 34 - Bandeja de accesorios; Nota: En función del modelo, la abrazadera de tubo también; Colocación del ocular; ¡PELIGRO de lesiones corporales!; Montaje del buscador óptico o buscador LED; Orientación del buscador
34 ¡ADVERTENCIA! Apriete todos los tornillos sólo „a mano” para de esta forma evitar „pasarlos de rosca”. 2. Trípode Las patas del trípode están premontadas y unidas con la cabeza (No. 5, X) y la unidad de centrado del mismo (No. 1, 16). Extraiga el trípode de su caja y colóquelo perpendicularmente ...
Page 35 - Tapas de protección
35 ES PL RU DE EN FR NL IT buscador y el tubo del telescopio deben estar orientados paralela- mente. Inserte el ocular con la distancia focal mayor en el espejo ceni- tal (No. 13a, sólo en telescopios refractores) o directamente en el soporte del ocular (No. 13b, sólo en telescopios reflectores). En...
Page 36 - Búsqueda de estrellas; Fórmula para calcular el aumento:
36 5. Orientación polar: Oriente el telescopio hacia el Norte, con el orificio del tubo hacia delante. Afloje a tal fin el tornillo de ajuste (No. 19). Ahora puede girar el tubo del telescopio para orientarlo exactamente hacia el Norte. Utilice una brújula en caso necesario. Acto seguido, apriete de...
Page 37 - Manejo – Desmontaje; Posibles objetos de observación
37 ES PL RU DE EN FR NL IT soporte del ocular. Coloque la lente de Barlow en el soporte del ocu- lar y apriete de nuevo manualmente el tornillo prisionero. A continua- ción, coloque primero el ocular la distancia focal máxima en la lente de Barlow y sujételo con el tornillo prisionero (No. 24). 11. ...
Page 39 - DE EN FR NL IT; Umieszczenie okularu; Nastawienie szukacza
39 ES PL RU DE EN FR NL IT 2. Statyw: Nóżki statywu są już zmontowane i połączone z głowicą statywu (No. 5, X) oraz rozdzielaczem statywu (No. 1, 16). Proszę wyjąć trójnogi statyw z opakowania i utawić pionowo nogami statywu w dół. Następnie wyjąć dwie nogi statywu i rozciągnąć je ostrożnie do w peł...
Page 40 - CZĘŚĆ II – Obsługa
40 Proszę spojrzeć teraz przez szukacz lunetkowy i nastawić go przez kręcenie 3 lub 6 śrub regulacyjnych, aż dany obiekt widoczny będzie w środku krzyża nitkowego. Obraz, który wcześniej widoczny był przez okular teleskopu, musi być także widoczny na nitce krzyżowej szukacza lunetkowego (2) dokładni...
Page 42 - Możliwe obiekty obserwacji
42 w nasadkę okularu i ponownie dokręcić ręcznie śrubę zaciskową. Na koniec proszę włożyć najpierw okular z największą ogniskową do soczewki Barlowęa i unieruchomić śrubą zaciskową (No. 24). 11. Demontaż: Po zapewne interesującej i pomyślnej obserwacji zalecane jest, aby cały teleskop przechowywać w...
Page 43 - Общие предупреждения; Оснастка может изменяться в зависимости от модели.; Тренога
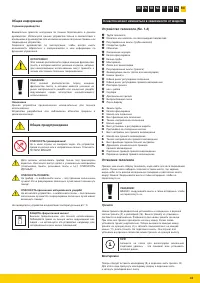
43 ES PL RU DE EN FR NL IT Общая информация О данном руководстве Внимательно прочтите инструкции по технике безопасности в данном руководстве. Используйте данное устройство только в соответствии с описаниями в руководстве для исключения риска получения травмы или повреждения устройства.Сохраните рук...
Page 44 - Использование телескопа
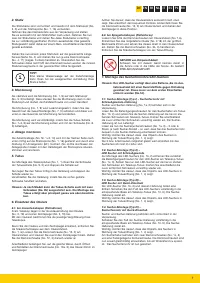
44 Сначала подготовьте монтировку (9), положите вес на рейку рычага (Х) и надежно завинтите ее в монтировку снизу. Теперь на монтировкуследует установить кольцо трубы (8), зафиксировав его винтом (Х). Лоток для аксессуаров Лоток для аксессуаров (3 и 10) вставляется плоской стороной вниз в центр расп...
Page 46 - УКАЗАНИЯ по чистке; Возможные объекты наблюдения; Устранение возможных проблем
46 Зенитное зеркало (только для телескопов-рефракторов) Зенитное зеркало (19) переворачивает изображение (зеркальное изображение) и потому используется только для наблюдениянебесных объектов. Выпрямляющая линза Чтобы правильно видеть вертикальное изображение, можно использовать выпрямляющую линзу (2...
Page 48 - Meade Instruments Europe; TELESKOPE; mit EQ Montierung; TELESCOPES; with EQ Mount; Irrtümer und technische Änderungen vorbehalten.; © 2012 National Geographic Society
Meade Instruments Europe GmbH & Co. KG Gutenbergstr. 2 · DE-46414 Rhedewww.bresser.de · [email protected] TELESKOPE mit EQ Montierung TELESCOPES with EQ Mount ANLTELEEQMSP0612NG Irrtümer und technische Änderungen vorbehalten. Errors and technical changes reserved. © 2012 National Geographic Soci...