Page 2 - Never attempt to observe the sun with this telescope.
(EN) CAUTION: Never attempt to observe the sun with this telescope. Make sure children do not attempt to observe the sun with the telescope. Observing the sun directly, even for a short time, may cause blindness. Packing materials, like plastic bags and rubber bands, should be kept out of the reach ...
Page 3 - Руководство по эксплуатации
(DE) Gebrauchsanleitung ....................................................................................... 6 (EN) Instruction Manual ........................................................................................ 10 (FR) Mode d’emploi ......................................................
Page 6 - Allgemeine Informationen; Zu dieser Anleitung; Allgemeine Warnhinweise; GEFAHR von Körperschäden!; Zubehör kann je nach Modell variieren.
6 Allgemeine Informationen Zu dieser Anleitung Lesen Sie bitte aufmerksam die Sicherheitshinweise in dieser Anleitung. Verwenden Sie dieses Produkt nur wie in der Anleitung beschrieben, um Schäden am Gerät oder Verletzungen zu vermeiden. Bewahren Sie die Bedienungsanleitung auf, damit Sie sich jeder...
Page 7 - Ausrichtung des Suchers
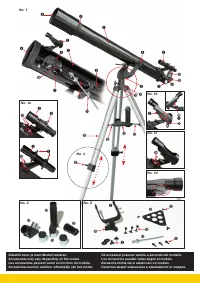
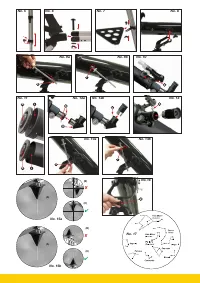
7 ES PL RU DE EN FR NL IT 4. Zubehörablage Halten Sie die Zubehörablage (10) auf die Halterungen (22) an den Stativbeinen. Schrauben Sie die drei Flügelschrauben (12) von unten durch die Halterungen in die Zubehör-Ablage fest ein (No. 7). 5. Tubus Setzen Sie den Teleskop-Tubus (1) in die Gabel der M...
Page 8 - TEIL II – Die Handhabung; Vertikale und horizontale Verstellung; Formel zur Berechnung der Vergrößerung:
8 Bevor Sie die Okulare und den Zenitspiegel einsetzen, entfernen Sie die Staubschutzkappe aus dem Okularstutzen (6). Lockern Sie die Klemmschraube (No. 12a, X) am Okularstutzen und stecken Sie zuerst den Zenitspiegel hinein. Ziehen Sie die Klemmschraube (X) danach wieder an. Befestigen Sie anschlie...
Page 9 - TEIL III – Anhang; Mögliche Beobachtungsobjekte
9 ES PL RU DE EN FR NL IT Anschließend setzen Sie zunächst das Okular mit der größten Brennweite in die Barlow-Linse ein und fixieren Sie es mit der Klemmschraube (No. 21, Z). 7. Abbau Nach einer hoffentlich interessanten und erfolgreichen Beobachtung emp- fiehlt es sich, das gesamte Teleskop in ein...
Page 10 - General Information; About this Instruction Manual; General Warning; Risk of bodily injury!; Accessories may vary depending on the model.; Mounting and tripod
10 General Information About this Instruction Manual Please read the safety instructions in this manual carefully. To avoid damage to the unit and the risk of injury, only use this product as described in the manual. Keep the instruction manual handy so that you can easily look up information on all...
Page 11 - Vertical fine adjustment; Aligning the finder scope
ES PL RU DE EN FR NL IT 11 4. Accessories tray Hold the accessories tray (10) against the fastening devices (22) on the tripod legs. Screw the three butterfly screws (12) from below through the fastening devices in the tray (No. 7). 5. Tube Hold the telescope's main tube (1) as shown, in the middle ...
Page 12 - Part II – Handling; Vertical and horizontal adjustment; Formula for calculating magnification:; Notes on cleaning
12 10.2. On reflecting telescopes Loosen the clamping screws on the eyepiece supports (6). Insert the 20 mm eyepiece (18) directly into the eyepiece supports. Hand tighten the clamping screws (No. 13, X). Remove the dust cap from the main tube end. Part II – Handling 1. Mount Your telescope is equip...
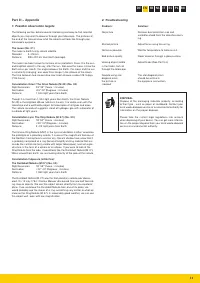
Page 13 - Part III – Appendix; Possible observation targets
ES PL RU DE EN FR NL IT 13 Part III – Appendix 1. Possible observation targets The following section details several interesting and easy-to-find celestial objects you may want to observe through your telescope. The pictures at the end of the manual show what the objects will look like through your ...
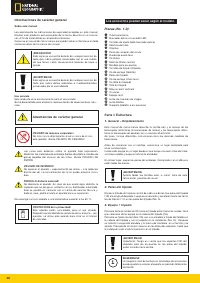
Page 14 - Informations générales; A propos de ce manuel; Consignes générales de sécurité; RISQUE de dommages corporels !; Les accessoires peuvent varier en fonction du modèle.
14 Informations générales A propos de ce manuel Veuillez lire attentivement les consignes de sécurité présentées dans ce manuel. N’utilisez ce produit comme décrit dans ce manuel, afin d’éviter tout risque de blessure ou de dommage sur l’appareil. Conservez le manuel d’utilisation afin de pouvoir re...
Page 15 - Attention: Ne serrez pas trop fort la vis de blocage (X) pour la mise; Attention: Veillez à ce que l‘objectif du chercheur soit dirigé en
ES PL RU DE EN FR NL IT 15 INDICATION: Un petit niveau sur le dépôt pour accessoires peut vous aider lors de l‘arrangement horizontal de votre pied. i 4. Assemblage de la tablette Placez, en la tenant bien, la tablette à accessoires (10) à la hauteur des supports (22) sur les jambes du trépied. Intr...
Page 16 - PARTIE II – Le maniement; Recherche d’étoiles; Formule pour calculer l‘agrandissement :
16 Avant d‘insérer les oculaires et le miroir zénith ôtez le capuchon protecteur antipoussière de la rallonge pour oculaire (6) et du miroir zénith. Desserrez la vis de serrage (No. 12a, X) de la rallonge pour oculaire et insérez d‘abord le miroir zénith. Resserrez la vis de serrage (X) ensuite. Fix...
Page 17 - PARTIE III Annexe; Objets à observer possibles
ES PL RU DE EN FR NL IT 17 INDICATION: La lentille à redressement n‘est pas faite pour l‘observation astronomique. Pour ce faire n‘utilisez que le miroir zénith et un oculaire. Pour des observations de la terre et de la nature vous pouvez utiliser la lentille à redressement avec un oculaire. i REMAR...
Page 18 - Algemene informatie; Over deze handleiding; Algemene waarschuwingen; GEVAAR voor verwondingen!; Accessoires kunnen variëren, afhankelijk van het model.; Algemene standplaats
18 Algemene informatie Over deze handleiding Leest u aandachtig de veiligheidsinstructies in deze handleiding. Gebruik dit product, om schade aan het apparaat of verwondingen te voorkomen, alleen zoals in de handleiding is beschreven. Bewaar deze gebruikershandleiding zodat u zich op elk moment weer...
Page 19 - Verticale precieze instelling; Het richten van de zoeker
ES PL RU DE EN FR NL IT 19 Tip: Een kleine waterpas op het accessoireplankje kan helpen het statief waterpas op te stellen. i 4. Toebehoortafel Houd de toebehoortafel (10) op de houders (22) aan de statiefpoten. Schroef de drie vleugelschroeven (12) beneden door de houders vast in de toebehoortafel ...
Page 20 - Deel II – Bediening; Verticale en horizontale verstelling; Formule voor de berekening van de vergroting:
20 Let op dat het oogglas naar boven is gericht. In andere gevallen de klemschroef (No. 12a, X) verwijderen van de oogglassteunen en draai de Zenitspiegel is deze positie. Verwijder de stofbeschermingskap van de buisopening (No. 11, X). 10.2. Bij spiegeltelescopen (reflectoren) Maak alsjeblieft de k...
Page 21 - Deel III – Aanhangsel; Suggesties voor te observeren hemellichamen
ES PL RU DE EN FR NL IT 21 Tip: Voor astronomische observatie is de omkeerlens niet geschikt. Gebruik hierbij uitsluitend de zenitspiegel en een oculair. Voor observaties op de aarde of van de natuur kunt u gebruik maken van de omkeerlens met een oculair. i TIPS voor reiniging Reinig de lenzen (ocul...
Page 22 - Gambe del treppiede
22 Informazioni generali Informazioni sul presente manuale Leggere con attenzione le avvertenze di sicurezza riportate nel manuale. Per evitare danni all‘apparecchio o possibili lesioni, utilizzare questo prodotto soltanto come descritto manuale. Conservare il manuale di istruzioni per poter attinge...
Page 23 - Regolazione micrometrica verticale; Allineamento del cercatore
ES PL RU DE EN FR NL IT 23 4. Montaggio del portaccessori: Tenere fermo il portaccessori (10) sui supporti di fissaggio (22) posti sulle gambe del treppiede. Inserire le tre viti ad alette (12) dal basso verso l‘alto, passando attraverso i supporti di fissaggio, nel portaccessori (fig. 7). 5. Tubo o...
Page 24 - Parte II – Uso; Osservazione di stelle; Formula per il calcolo dell’ingrandimento:
24 Prima di montare gli oculari e il diagonale, rimuovere i coperchietti di prote- zione dal portaoculare (6) e dal diagonale a specchio. Allentare la vite di fissaggio (fig. 12a, X) sul portaoculare e inserire il diagonale. Successivamente stringere di nuovo la vite di fissaggio (X). Successivament...
Page 25 - Parte III – Appendice; Possibili oggetti di osservazione
ES PL RU DE EN FR NL IT 25 NOTE per la pulizia Pulire le lenti (gli oculari e/o gli obiettivi) soltanto con un panno morbido e privo di pelucchi (es. in microfibra). Non premere troppo forte il panno per evitare di graffiare le lenti. Per rimuovere eventuali residui di sporco più resistenti, inumidi...
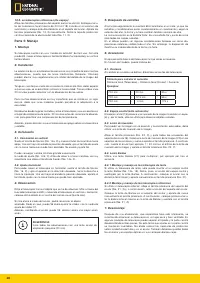
Page 26 - General – Emplazamiento
26 Informaciones de carácter general Sobre este manual Lea atentamente las indicaciones de seguridad recogidas en este manual. Emplee este producto exclusivamente de la forma descrita en el manual, con el fin de evitar daños en el aparato o lesiones. Conserve el manual de instrucciones para poder vo...
Page 28 - Búsqueda de estrellas; Fórmula para calcular el aumento:
28 10.2. en telescopios reflectores (de espejo) Afloje los tornillos prisioneros del soporte para el ocular (6). Extraiga el ocu- lar de la distancia focal máxima de 20 mm (18) incluido en el volumen de suministro y coloque éste directamente en el soporte del ocular. Apriete los tornillos prisionero...
Page 29 - Posibles objetos de observación
ES PL RU DE EN FR NL IT 29 SUGERENCIA: La lente de inversión de la imagen no resulta adecuada para la observación astronómica. En este caso, basta con que utilice un espejo cénit y un ocular. La lente de inversión de la imagen puede utilizarse con un ocular para observaciones terrestres y de la natu...
Page 31 - DE EN FR NL IT; Podzespół montażowy nastawy dokładnej w pionie; Nastawienie szukacza
ES PL RU DE EN FR NL IT 31 4. Zakładanie półki Przytrzymaj półkę na osprzęt (10) na zamocowaniach (22) na nogach statywu. Wkręć mocno trzy śruby skrzydełkowe (12) od dołu przez zamoco- wania do półki na osprzęt (No. 7). 5. Tubus Przytrzymaj teraz tubus teleskopowy (1) tak, jak to pokazano w środku a...
Page 32 - CZĘŚĆ II – Obsługa; Wyszukiwanie gwiazd
32 przekręcić zwierciadło zenitalne w tą pozycję. Proszę usunąć pokrywy przeciwpyłowe z wlotu tubusa (No. 11, X). 10.2. w teleskopach zwierciadlanych (reflektorach) Proszę poluzować śruby zaciskowe przy nasadce okularowej (6). Proszę wziąć dołączony okular (18) z największą ogniskową o 20 mm i włoży...
Page 33 - Możliwe obiekty obserwacji
ES PL RU DE EN FR NL IT 33 WSKAZÓWKA: Soczewka odwracająca nie nadaje się do obserwacji astronomicznych. Tu należy posługiwać się zwierciadłem zenitalnym i okularem. Do obserwacji naziemnych i natury mogą Państwo korzystać z soczewki odwracającej. i WSKAZÓWKI dotyczące czyszczenia Czyścić soczewki (...
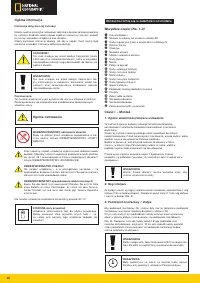
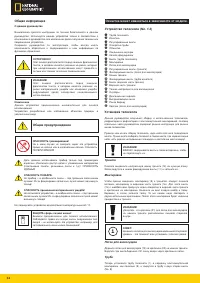
Page 34 - Общая информация; Общие предупреждения; Оснастка может изменяться в зависимости от модели.; Тренога
34 Общая информация О данном руководстве Внимательно прочтите инструкции по технике безопасности в данном руководстве. Используйте данное устройство только в соответствии с описаниями в руководстве для исключения риска получения травмы или повреждения устройства.Сохраните руководство по эксплуатации...
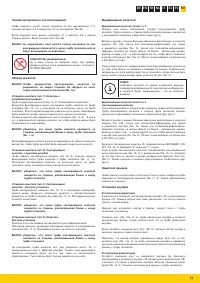
Page 35 - Тонкая настройка по оси восхождения; Защитная крышка
ES PL RU DE EN FR NL IT 35 Тонкая настройка по оси восхождения Чтобы закрепить рычаг тонкой настройки по оси восхождения (17), сначала вставьте его в держатель (Х) на монтировке (No. 9а). Затем открутите винт рычага настройки (Y) и вкрутите его с другой стороны рычага. Затем затяните винт (No. 9b). ...
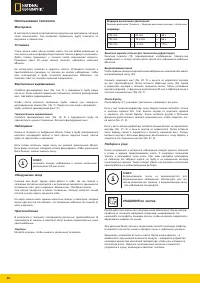
Page 36 - Использование телескопа; УКАЗАНИЯ по чистке
36 Использование телескопа Монтировка В комплекте телескопа поставляется азимутальная монтировка, которую легко использовать. Она позволяет перемещать трубу телескопа по вертикали и горизонтали. Установка Очень важно найти ночью темное место, так как любое освещение (в том числе и уличные фонари) бу...
Page 37 - Устранение возможных проблем
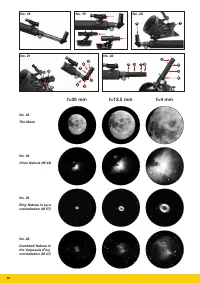
ES PL RU DE EN FR NL IT 37 Возможные объекты наблюдения Мы хотим предложить вам ряд очень интересных небесных объектов, которые легко наблюдать. На соответствующих иллюстрациях в конце руководства пользователя вы увидите их такими, какими они видны в окуляре телескопа. Луна Луна - единственный естес...
Page 38 - The Moon
38 No. 18 No. 19 No. 20 No. 21 No. 22 Y X X X Y Z X Z f=20 mm f=12.5 mm f=4 mm No. 23 No. 24 No. 25 No. 26 The Moon Orion Nebula (M 42) Ring Nebula in Lyra constellation (M 57) Dumbbell Nebula in the Vulpecula (Fox) constellation (M 27) X Y 2! 1* 1* 1( 2! 1* 1* 1* Y 2)
Page 40 - Meade Instruments Europe; Irrtümer und technische Änderungen vorbehalten.; © 2012 National Geographic Society; TELESKOPE; mit AZ Montierung; TELESCOPES; with AZ Mount
Meade Instruments Europe GmbH & Co. KG Gutenbergstr. 2 · DE-46414 Rhedewww.bresser.de · [email protected] ANLTELEAZMSP0612NG Irrtümer und technische Änderungen vorbehalten. Errors and technical changes reserved. © 2012 National Geographic Society NATIONAL GEOGRAPHIC and Yellow Border Design are ...