Page 2 - GENERAL OPERATING INSTRUCTIONS; READ ALL INSTRUCTIONS BEFORE USING THIS APPLIANCE; Protect Your Investment with an Extended Warranty!
2 W W W . V I N O T E M P . C O M ! ! GENERAL OPERATING INSTRUCTIONS Remove all external and internal packaging from your appliance. Be sure that all parts have been included before discarding any packaging materials. You may want to keep the box and packing materials for use at a later date. Upon r...
Page 3 - Table of Contents; Cooking with multiple cooking
3 7 3 2 S o u t h R a c e t r a c k R o a d , H e n d e r s o n , N e v a d a 8 9 0 1 5 i n f o @ v i n o t e m p . c o m Table of Contents Important Safety Instructions ------------------------------------------------- 4-5 Grounding Instructions -----------------------------------------------------...
Page 4 - cleaner residue to accumulate on sealing surfaces.; SAVE THESE INSTRUCTIONS CAREFULLY; IMPORTANT SAFETY INSTRUCTIONS; “GROUNDING INSTRUCTIONS” on page 6.
4 W W W . V I N O T E M P . C O M ! ! PRECAUTIONS TO AVOID POSSIBLE EXPOSURE TO EXCESSIVE MICROWAVE ENERGY 1) Do not attempt to operate this oven with the door open since open door operation can result in harmful exposure to microwave energy. It is important not to defeat or tamper with the safety i...
Page 5 - To reduce the risk of fire in the microwave oven cavity:; SAVE THESE INSTRUCTIONS; UNPACKING AND EXAMINING YOUR MICROWAVE
5 7 3 2 S o u t h R a c e t r a c k R o a d , H e n d e r s o n , N e v a d a 8 9 0 1 5 i n f o @ v i n o t e m p . c o m 17. To reduce the risk of fire in the microwave oven cavity: a. Do not overcook food. Carefully attend appliance when paper, plastic, or other combustible materials are placed in...
Page 6 - GROUNDING INSTRUCTIONS; Electrical Requirements
6 W W W . V I N O T E M P . C O M ! ! GROUNDING INSTRUCTIONS This appliance must be grounded. This microwave oven is equipped with a cord having a grounding wire with a grounding plug. It must be plugged into a wall receptacle that is properly installed and grounded in accordance with the National E...
Page 7 - ABOUT YOUR MICROWAVE OVEN; magnetron cycling on and off.; ABOUT MICROWAVE COOKING; as needed. Food severely overcooked can smoke or ignite.
7 7 3 2 S o u t h R a c e t r a c k R o a d , H e n d e r s o n , N e v a d a 8 9 0 1 5 i n f o @ v i n o t e m p . c o m ABOUT YOUR MICROWAVE OVEN • Read this Owner’s Manual and always save it for reference. • A good microwave cookbook is a valuable asset. Check it for microwave cooking principles,...
Page 8 - RADIO INTERFERENCE; on different branch circuits.; COOKWARE AND COOKING MATERIALS; – Personal Injury Hazard; Cookware and Materials Test:
8 W W W . V I N O T E M P . C O M ! ! RADIO INTERFERENCE 1. Operation of the microwave oven may cause interference to your radio, TV or similar equipment. 2. When there is interference, it may be reduced or eliminated by taking the following measures: 1) Clean door and sealing surface of the oven. 2...
Page 9 - Materials you can use in microwave oven; Materials to be avoided in microwave oven; Utensils
9 7 3 2 S o u t h R a c e t r a c k R o a d , H e n d e r s o n , N e v a d a 8 9 0 1 5 i n f o @ v i n o t e m p . c o m Materials you can use in microwave oven Utensils Remarks Browning dish Follow manufacturer’s instructions. The bottom of browning dish must be at least 3/16 inch (5mm) above the ...
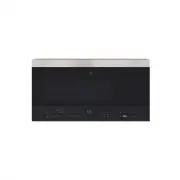
Page 10 - PARTS AND SPECIFICATIONS; FEATURES OF MICROWAVE OVEN; Model; Package Contents
10 W W W . V I N O T E M P . C O M ! ! PARTS AND SPECIFICATIONS FEATURES OF MICROWAVE OVEN • Sensor cooking • 10 variable power levels • Add 30 seconds and express cooking • 1000W of power • Exhaust fan with two speeds • Task lighting • Child lock • Turntable • Hidden vent Model EM044K6BB (BR-MW OH1...
Page 11 - CONTROL PANEL
11 7 3 2 S o u t h R a c e t r a c k R o a d , H e n d e r s o n , N e v a d a 8 9 0 1 5 i n f o @ v i n o t e m p . c o m CONTROL PANEL # ITEM DESCRIPTION 1 Light Press to turn on/off the light underneath your microwave. See “Using the light” on page 17. 2 SENSOR COOKING Detects the humidity releas...
Page 12 - SETTING UP YOUR OVEN; INSTALLING THE TURNTABLE
12 W W W . V I N O T E M P . C O M ! ! SETTING UP YOUR OVEN You can see the Installation Manual (included in your box) to install and set up your microwave. INSTALLING THE TURNTABLE 1. Place the turntable ring in the round depression in the bottom of the microwave oven so that it turns freely. 2. Pl...
Page 13 - COOKING IN YOUR MICROWAVE; Time Cook; , then use the number pad to enter the cooking time that you want.; Power Level
13 7 3 2 S o u t h R a c e t r a c k R o a d , H e n d e r s o n , N e v a d a 8 9 0 1 5 i n f o @ v i n o t e m p . c o m Sandwiches and many other food types containing pre baked bread should be wrapped prior to placing in the microwave to help prevent the food items from drying out while heating....
Page 15 - Cooking with the sensor
15 7 3 2 S o u t h R a c e t r a c k R o a d , H e n d e r s o n , N e v a d a 8 9 0 1 5 i n f o @ v i n o t e m p . c o m Tips for best results: • Use defrost only for raw food items. • Defrosting gives best results when your food is taken directly from the freezer. If the food has been stored in a...
Page 17 - VARIOUS FUNCTIONS OF YOUR MICROWAVE
17 7 3 2 S o u t h R a c e t r a c k R o a d , H e n d e r s o n , N e v a d a 8 9 0 1 5 i n f o @ v i n o t e m p . c o m 2. Press START . CAUTION : DO NOT leave the microwave unattended while popping popcorn. BEVERAGE The beverage setting heats one two three cups of a beverage. Use the table below...
Page 18 - Cleaning and Maintaining Your Microwave; Cleaning the outside of your microwave; to clear any buttons you may have; Cleaning the inside of your microwave; : Do not operate the oven hood without the filters properly in place.
18 W W W . V I N O T E M P . C O M ! ! Cleaning and Maintaining Your Microwave Cleaning the outside of your microwave Exterior The outside surface is pre-coated steel and plastic. Clean the outside with mild soap and water, then rinse and dry with a soft cloth. Do not use any type of household or ab...
Page 19 - CAUTION
19 7 3 2 S o u t h R a c e t r a c k R o a d , H e n d e r s o n , N e v a d a 8 9 0 1 5 i n f o @ v i n o t e m p . c o m 1. To remove the exhaust filters, slide the filter toward the back of the microwave and then pull it downward while sliding it out of the side slot. Repeat the step for the seco...
Page 20 - Replacing the lights
20 W W W . V I N O T E M P . C O M ! ! 4. Remove the charcoal filter by pushing it inwards, then lift up and pull it out of the microwave. 5. Insert the new charcoal filter, close the vent grill, and secure with the vent grill screws. 6. Plug the microwave back in or turn the power back on at the ma...
Page 22 - MAINTENANCE; Troubleshooting; TROUBLE
22 W W W . V I N O T E M P . C O M ! ! MAINTENANCE Troubleshooting If you have a problem with your microwave, review the following chart for a possible solution. If the microwave still does not work properly, contact the nearest authorized service center. TROUBLE POSSIBLE CAUSE POSSIBLE REMEDY Micro...
Page 23 - Shipping
23 7 3 2 S o u t h R a c e t r a c k R o a d , H e n d e r s o n , N e v a d a 8 9 0 1 5 i n f o @ v i n o t e m p . c o m TERMS & CONDITIONS Shipping/Delivery fees are the responsibility of the Purchaser. Seller is not responsible for the carrier’s missed/Non delivery for any reason. Delivery i...
Page 24 - California; Proposition 65; Warning: The products sold on this ecommerce website and to the; Damage
24 W W W . V I N O T E M P . C O M ! ! We are a manufacturer not a shipping company, deliveries are done by a 3rd party service. Email us at [email protected] for a quote or any additional information. Freight discussed is Continental USA (excluding Alaska, Puerto Rico, Hawaii), cost is additional p...
Page 26 - Storage Fees
26 W W W . V I N O T E M P . C O M ! ! Removal or reinstallation of a unit is not included in warranted costs. Purchaser’s exclusive remedy is limited at Seller’s option to repair or replace defective part[s] with either new or reconditioned part[s]. Purchaser is responsible for shipping the unit pr...
Page 30 - SERVICE & IMPORTANT NOTICE; Please do not place the unit within reach of children.; Contact
30 W W W . V I N O T E M P . C O M ! ! SERVICE & IMPORTANT NOTICE Upon receipt and inspection of unit, the supply cord must be replaced if it is damaged. Contact our customer service at 1-800-777-8466 or [email protected]. The manufacturer has a policy of continuous improvement on its products a...