Bosch SMS50M22AU - Manuals
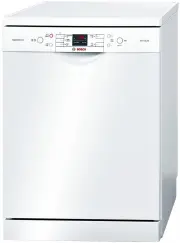
User Manual Bosch SMS50M22AU
1

2

3

4

5

6

7

8

9

10

11

12

13

14

15

16

17

18

19

20

21

22

23

24

25

26

27

28

29

30

31

32

33

34

35

36

37

38

Summary
Page 2 - HVHWVHF
Page 3 - aus; Table of contents; Protection of the environment . 9
aus 3 Table of contents 8 Intended use . . . . . . . . . . . . . . . 4 ( Safety instructions . . . . . . . . . . 4 Before you switch ON the appliance . 4Delivery . . . . . . . . . . . . . . . . . . . . . . . . 5Installation. . . . . . . . . . . . . . . . . . . . . . 5In daily use . . . . . . . . . ....
Page 4 - Intended use
aus Intended use 4 3 Fault, what to do? . . . . . . . . . . 25 Waste water pump . . . . . . . . . . . . . . 25Fault table . . . . . . . . . . . . . . . . . . . . . 26 4 Customer service . . . . . . . . . . 33 5 Installation and connection . . 33 Product package . . . . . . . . . . . . . . . 33Safety...
Bosch Dishwashers Manuals
-
 Bosch SBI8EDS01A
User Manual
Bosch SBI8EDS01A
User Manual
-
 Bosch SBT8ZD801A
User Manual
Bosch SBT8ZD801A
User Manual
-
 Bosch SBV88TX06A
User Manual
Bosch SBV88TX06A
User Manual
-
 Bosch SBV8EDX01A
User Manual
Bosch SBV8EDX01A
User Manual
-
 Bosch SCE53M05AU
User Manual
Bosch SCE53M05AU
User Manual
-
 Bosch SGE53B55UC
User Manual
Bosch SGE53B55UC
User Manual
-
 Bosch SGI 55M26EU
User Manual
Bosch SGI 55M26EU
User Manual
-
 Bosch SGI 56E35EU
User Manual
Bosch SGI 56E35EU
User Manual
-
 Bosch SGS 43E52
User Manual
Bosch SGS 43E52
User Manual
-
 Bosch SGS 55E02EU
User Manual
Bosch SGS 55E02EU
User Manual
-
 Bosch SGS 55E08EU
User Manual
Bosch SGS 55E08EU
User Manual
-
 Bosch SGS 55E12EU
User Manual
Bosch SGS 55E12EU
User Manual
-
 Bosch SGU 65T12SK
User Manual
Bosch SGU 65T12SK
User Manual
-
Bosch SGU 65T15SK
User Manual
-
 Bosch SGU53E15
User Manual
Bosch SGU53E15
User Manual
-
 Bosch SGV 43E23EU
User Manual
Bosch SGV 43E23EU
User Manual
-
 Bosch SGV 57T13EU
User Manual
Bosch SGV 57T13EU
User Manual
-
 Bosch SGV78C53UC
User Manual
Bosch SGV78C53UC
User Manual
-
Bosch SGV78C53UC
Manual
-
 Bosch SGX78C55UC
User Manual
Bosch SGX78C55UC
User Manual