Bosch SHX3AR75UC - Manuals
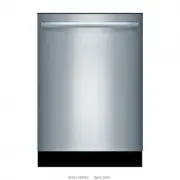
User Manual Bosch SHX3AR75UC


Summary
Dear Valued Customer, Thank you for selecting a Bosch® dishwasher. You have joined the manyconsumers who demand quiet and superior performance from theirdishwashers. This manual was written with your safety and convenience in mind, and theinformation contained herein is very important. We highly rec...
2 9 IMPORTANT SAFETY INSTRUCTIONS: Please READ and SAVE this information Misuse of the dishwasher can result in serious injury or death. Do not use the dishwasher in any waynot covered in this manual or for any purpose other than those explained in the following pages. Severe product damage and/or...
3 WARNING: To reduce the risk of fire, electrical shock, or serious injury, observe the following: 1 This dishwasher is provided with Installation Instructions and this Use and Care Manual (operating instructions). Read and understand all instructions before using the dish-washer. 2 This appliance m...
Manual Bosch SHX3AR75UC


Bosch Dishwashers Manuals
-
 Bosch SBI8EDS01A
User Manual
Bosch SBI8EDS01A
User Manual
-
 Bosch SBT8ZD801A
User Manual
Bosch SBT8ZD801A
User Manual
-
 Bosch SBV88TX06A
User Manual
Bosch SBV88TX06A
User Manual
-
 Bosch SBV8EDX01A
User Manual
Bosch SBV8EDX01A
User Manual
-
 Bosch SCE53M05AU
User Manual
Bosch SCE53M05AU
User Manual
-
 Bosch SGE53B55UC
User Manual
Bosch SGE53B55UC
User Manual
-
 Bosch SGI 55M26EU
User Manual
Bosch SGI 55M26EU
User Manual
-
 Bosch SGI 56E35EU
User Manual
Bosch SGI 56E35EU
User Manual
-
 Bosch SGS 43E52
User Manual
Bosch SGS 43E52
User Manual
-
 Bosch SGS 55E02EU
User Manual
Bosch SGS 55E02EU
User Manual
-
 Bosch SGS 55E08EU
User Manual
Bosch SGS 55E08EU
User Manual
-
 Bosch SGS 55E12EU
User Manual
Bosch SGS 55E12EU
User Manual
-
 Bosch SGU 65T12SK
User Manual
Bosch SGU 65T12SK
User Manual
-
Bosch SGU 65T15SK
User Manual
-
 Bosch SGU53E15
User Manual
Bosch SGU53E15
User Manual
-
 Bosch SGV 43E23EU
User Manual
Bosch SGV 43E23EU
User Manual
-
 Bosch SGV 57T13EU
User Manual
Bosch SGV 57T13EU
User Manual
-
 Bosch SGV78C53UC
User Manual
Bosch SGV78C53UC
User Manual
-
Bosch SGV78C53UC
Manual
-
 Bosch SGX78C55UC
User Manual
Bosch SGX78C55UC
User Manual