Bosch PPH6A6B20A - Manuals
User Manual Bosch PPH6A6B20A


Summary
en 2 Table of contents [en]Instructi on manual 8 Intended use . . . . . . . . . . . . . . . . . . . . . . . . . . . . . 2 ( Important safety information . . . . . . . . . . . . . . . 3 What to do if you smell gas . . . . . . . . . . . . . . . . . . . . . 4 5 Installation and connection. . . . . . . ...
Important safety information en 3 This appliance is not intended for use by persons (including children) with reduced physical, sensory or mental capabilities, or lack of experience and knowledge, unless they have been given supervision or instruction concerning use of the appliance by a person resp...
en Important safety information 4 Risk of fire! ■ The burners get very hot. Do not rest inflammable objects on the hob. Do not store objects on the hob. Risk of fire! ■ Do not store or use corrosive chemicals, products which produce fumes, inflammable materials or non-food products below or near thi...
Bosch Hobs Manuals
-
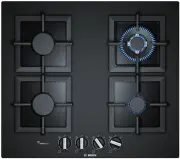
 Bosch BH6B5B60A
User Manual
Bosch BH6B5B60A
User Manual
-
 Bosch NEM5066UC
User Manual
Bosch NEM5066UC
User Manual
-
Bosch NEM5066UC
Installation Manual
-
 Bosch NEM5466UC
User Manual
Bosch NEM5466UC
User Manual
-
 Bosch NEM5666UC
User Manual
Bosch NEM5666UC
User Manual
-
Bosch NEM5666UC
Installation Manual
-
Bosch NEM5666UC
Manual
-
 Bosch NET8068SUC
User Manual
Bosch NET8068SUC
User Manual
-
Bosch NET8068SUC
Installation Manual
-
Bosch NET8068SUC
Manual
-
 Bosch NET8069SUC
User Manual
Bosch NET8069SUC
User Manual
-
Bosch NET8069SUC
Manual
-
 Bosch NET8069UC
User Manual
Bosch NET8069UC
User Manual
-
Bosch NET8069UC
Manual
-
 Bosch NET8669SUC
User Manual
Bosch NET8669SUC
User Manual
-
Bosch NET8669SUC
Manual
-
 Bosch NET8669UC
User Manual
Bosch NET8669UC
User Manual
-
Bosch NET8669UC
Manual
-
 Bosch NETP068SUC
User Manual
Bosch NETP068SUC
User Manual
-
Bosch NETP068SUC
Installation Manual