Page 2 - Table of contents; Additional information on products, accessories,
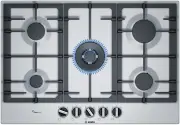
en 2 Table of contents [en]Instructi on manual Gas hob 8 Intended use . . . . . . . . . . . . . . . . . . . . . . . . . . . . . 3 ( Important safety information . . . . . . . . . . . . . . . 4 What to do if you smell gas . . . . . . . . . . . . . . . . . . . . . 4 5 Installation and connection. . . ...
Page 3 - Intended use
Intended use en 3 8 Intended use Intended use Read these instructions carefully. You will only be able to use your appliance safely and effectively when you have read them. These operating and installation instructions should be retained, and passed onto the buyer if the appliance is sold.Removal of...
Page 4 - Important safety information; Important safety; What to do if you smell gas
en Important safety information 4 ( Important safety information Important safety i nformati on DO NOT MODIFY THIS APPLIANCE. DO NOT USE OR STORE FLAMMABLE MATERIALS IN THE APPLIANCE STORAGE DRAWER OR NEAR THE APPLIANCE.DO NOT SPRAY AEROSOLS IN THE VICINITY OF THIS APPLIANCE WHILE IT IS IN OPERATION...
Page 5 - Installation and connection; Statutory requirements
Installation and connection en 5 5 Installation and connection Instal l ati on and connecti on Statutory requirements This installation must conform with the following: ■ Manufacturer’s Installation instructions ■ Local Gas Fitting Regulations ■ Municipal Building Codes ■ Refer to AS/NZS 5601.1 for ...
Page 6 - PLQ
en Installation and connection 6 Clearances A range hood fitted above the top must be installed according to the installation instructions for the range hood. A minimum distance of 650 mm is required for a range hood and 750 mm for an exhaust fan.Any adjoining wall surface situated within 200 mm fro...
Page 7 - Electrical connection; Wiring diagram
Installation and connection en 7 Depending on the model, the adhesive seal may be factory-fitted. If this is the case, it should not be removed under any circumstances, since the adhesive seal prevents leaks. If the seal has not been factory- fitted, apply it to the underside of the hob.Fitting the ...
Page 8 - Gas connection; Before Leaving; Converting the cooktop from Nat. Gas to
en Installation and connection 8 Gas connection During the planning stage, consider the position of supply connections.The cooktop must be connected to the gas supply with upstream connection of an isolation valve in accordance with the respectively valid regulations. We recommend that the isolation...
Page 10 - Burner locations
en Getting to know your appliance 10 * Getting to know your appliance Getti ng to know your appl i ance Burner locations ! Pan supports " Control knobs # Economy burner with an output of up to 1 kW $ Standard-output burner with an output of up to 1.75 kW % High-output burner with an output of up...
Page 11 - Indicators
Getting to know your appliance en 11 Controls and burners Each control knob is marked with the burner it controls. You can use the control knobs to set the output required in each case to various positions between the maximum and the minimum settings. Never try to switch directly from position 0 to ...
Page 12 - Code; Warning – Risk of deflagration!; Settings table and tips; Simmer plate
en Gas burners 12 -------- Code The manufacturer accepts no liability if these accessories are not used or are used incorrectly. Ä Gas burners Gas burners Switching on manually 1. Press the control knob for the selected burner and turn it anticlockwise to the highest power setting. 2. Hold an ignite...
Page 13 - Information on the table; Fish soup
Settings table and tips en 13 Instructions for use Note: When using certain pots or pans, a slight and temporary deformation of the steel cooking surface may occur. This is normal and does not affect the functionality of the appliance. The following recommendations can help you save energy and avoid...
Page 14 - Pasta and rice
en Settings table and tips 14 ■ Step 1: Bring to the boil. Set heat setting 8 for 7-9 minutes. ■ Step 2: Continue boiling. Switch to heat setting 1 for 5-8 minutes. This information also applies for the other suggested burners. Food Total time in min. Step 1 Step 2 Burner ˜ § v ˜ § v Soups, creamy s...
Page 15 - Sauces
Settings table and tips en 15 Sauces Béchamel sauce** Economy burner 10-15 Ÿ * 6 2-4 œ * 6 8-11 Standard-output burner 10-15 Ÿ * 5 2-4 œ * 5 8-11 Wok burner 3-8 Ÿ * 5 1-2 œ * 5 2-6 Blue cheese sauce** Economy burner 4-6 Ÿ * 7 4-6 Standard-output burner 3-5 Ÿ * 7 3-5 Dual wok burner 4-6 Ÿ * 3 4-6 Nea...
Page 16 - Cooking tips; Cleaning and maintenance; Cleaning; Desserts
en Cleaning and maintenance 16 Cooking tips ■ Use a pressure cooker to cook creamy soups and pulses. This significantly reduces the cooking time. If you are using a pressure cooker, follow the manufacturer's instructions. Add all of the ingredients at the start. ■ Always use a lid when cooking potat...
Page 17 - Trouble shooting; Fault
Trouble shooting en 17 3 Trouble shooting Troubl e shooti ng DO NOT MODIFY THIS APPLIANCE. Only authorized personnel from the Service Centre are qualified to work on the appliance.Sometimes certain faults detected can be easily resolved. Before calling the Technical Assistance Service, bear in mind ...
Page 18 - Customer service; Warranty conditions
en Customer service 18 4 Customer service Customer servi ce When contacting our customer service, please provide the product number (E-Nr.) and production number (FD) of the appliance. This information is given on the specifications plate located on the lower section of the hob and on the label in t...
Page 20 - XXXCPTDIIPNFDPNXFMDPNF; XXXCPTDIIPNFDPN
5IBOLZPVGPSCVZJOHB#PTDI)PNF"QQMJBODF 3FHJTUFSZPVSOFXEFWJDFPO.Z#PTDIOPXBOEQSPGJUEJSFDUMZGSPN t&YQFSUUJQTUSJDLTGPSZPVSBQQMJBODFt8BSSBOUZFYUFOTJPOPQUJPOTt%JTDPVOUTGPSBDDFTTPSJFTTQBSFQBSUTt%JHJUBMNBOVBMBOEBMMBQQMJBODFEBUBBUIBOEt&BTZBDDFTTUP#PTDI)PNF"QQMJBODFT4FSWJDF 'SFFBOEFBTZSFHJTUSBUJ...