Bosch BEL653MB3A - Manuals
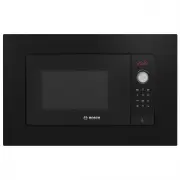
User Manual Bosch BEL653MB3A


Summary
en Safety 2 Table of contents INFORMATION FOR USE 1 Safety .................................................................... 2 2 Preventing material damage ............................... 5 3 Environmental protection and saving en-ergy .............................................................
en Safety 4 1.5 Microwave CAREFULLY READ THE IMPORTANT SAFETYINSTRUCTIONS AND KEEP THEM SAFE FORFUTURE USE WARNING ‒ Risk of fire! Using the appliance for anything other than itsintended purpose is dangerous and maycause damage. For example, heated slippersand pillows filled with grain or cereal ma...
Preventing material damage en 5 WARNING ‒ Risk of scalding! There is a possibility of delayed boiling whena liquid is heated. This means that the liquidreaches the boiling temperature without theusual steam bubbles rising to the surface. Ex-ercise caution even when only gently shakingthe container....
Bosch Microwaves Manuals
-
 Bosch BEL523MS0
Manual
Bosch BEL523MS0
Manual
-
 Bosch BEL554MS0
Manual
Bosch BEL554MS0
Manual
-
 Bosch BEL554MS0A
User Manual
Bosch BEL554MS0A
User Manual
-
 Bosch BEL634GS1
Manual
Bosch BEL634GS1
Manual
-
 Bosch BFL524MB0
Manual
Bosch BFL524MB0
Manual
-
 Bosch FEL053MS2A
User Manual
Bosch FEL053MS2A
User Manual
-
 Bosch HMB50152UC
User Manual
Bosch HMB50152UC
User Manual
-
Bosch HMB50152UC
Installation Manual
-
 Bosch HMB57152UC
User Manual
Bosch HMB57152UC
User Manual
-
Bosch HMB57152UC
Installation Manual
-
Bosch HMB57152UC
Manual
-
 Bosch HMC54151UC
User Manual
Bosch HMC54151UC
User Manual
-
Bosch HMC54151UC
Installation Manual
-
Bosch HMC54151UC
Manual
-
 Bosch HMC80152UC
User Manual
Bosch HMC80152UC
User Manual
-
Bosch HMC80152UC
Installation Manual
-
Bosch HMC80152UC
Manual
-
 Bosch HMC80242UC
User Manual
Bosch HMC80242UC
User Manual
-
Bosch HMC80242UC
Installation Manual
-
Bosch HMC80242UC
Manual