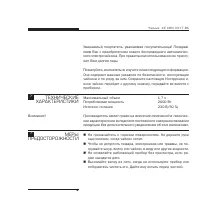
Page 2 - Максимальный объем; ТЕХНИЧЕСКИЕ
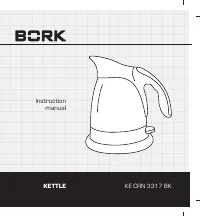
Ч а й н и к K E C R N 3 3 1 7 B K 2 Уважаемый покупатель, уважаемая покупательница! Поздрав-ляем Вас с приобретением нового беспроводного автоматичес-кого электрочайника. При правильном использовании он прослу-жит Вам долгие годы. Пожалуйста, внимательно изучите нижеследующую информацию.Она содержит...
Page 3 - Не используйте прибор вне помещения.
И н с т р у к ц и я п о э к с п л у а т а ц и и 3 Не используйте чайник с поврежденным шнуром или вилкой,а также после каких-либо неисправностей или повреждений.Ни в коем случае не разбирайте его. Не используйте прибор вне помещения. Не позволяйте шнуру свешиваться над кромкой стола или со-прикасать...
Page 5 - КОМПЛЕКТАЦИЯ
И н с т р у к ц и я п о э к с п л у а т а ц и и 5 Внимание! КОМПЛЕКТАЦИЯ ПЕРЕД НАЧАЛОМ ЭКСПЛУАТАЦИИ ЧАЙНИКА Электрочайник предназначен исключительно для подогревапитьевой воды. Не используйте его для подогрева других жид-костей. Не удерживайте выключатель в положении ВКЛ, так как этоможет привести к...
Page 6 - ЭКСПЛУАТАЦИЯ; Вставьте вилку в сеть и включите чайник.
Ч а й н и к K E C R N 3 3 1 7 B K 6 ЭКСПЛУАТАЦИЯ > Чтобы заполнить чайник, снимите крышку. Залейте в него воду так, чтобы она закрывала дно, но не пре-вышайте отметку MAX. Закройте крышку чайника.Не эксплуатируйте чайник с открытой крышкой. Не эксплуати-руйте чайник без фильтра в сливном отверсти...
Page 7 - ЧИСТКА И УХОД
И н с т р у к ц и я п о э к с п л у а т а ц и и 7 Внимание! ЧИСТКА И УХОД При включении чайника загорается индикатор, указывающийна работу прибора. Чайник должен использоваться только с прилагаемой в комплектеподставкой. Он не должен оставаться заполненным водой на под-ставке, если вы не собираетесь...
Page 9 - Условия гарантии; Гарантия действительна только, если прибор использовался в; ГАРАНТИЯ
И н с т р у к ц и я п о э к с п л у а т а ц и и 9 Потребитель имеет право на гарантию к данному прибору в со-ответствии c установленными правилами торговли. При соблюдении следующих условий покупатель имеет право нагарантию. Условия гарантии 1. Гарантия действительна только, если прибор использовалс...
Page 11 - KETTLE
123456789012345678901234567890121234567890123456789012345678901212345678901234567890123456789012123456789 123456789012345678901234567890121234567890123456789012345678901212345678901234567890123456789012123456789 1234567890123456789012345678901212345678901234567890123456789012123456789012345678901234...
Page 12 - Congratulations on the purchase of your new Kettle.; TECHNICAL
K e t t l e K E C R N 3 3 1 7 B K 12 Congratulations on the purchase of your new Kettle. Before first using your new Kettle, it is most important that you readand follow the instructions in this use and care booklet, even if youfeel you are familiar with this type of appliance. Your attention is dra...
Page 13 - Use only original accessories.
I n s t r u c t i o n m a n u a l 13 Always remove the plug from the socket whenever the device isnot in use, when attaching accessory parts, cleaning the deviceor whenever any disturbance occurs. Switch off the devicebeforehand. Pull on the plug, not on the cable. In order to protect children from ...
Page 14 - Special Safety Instructions for this Product; COMPLETE SET
K e t t l e K E C R N 3 3 1 7 B K 14 Use the device only for the intended purpose. The kettle is only to be used with the stand provided. Special Safety Instructions for this Product Use only cold water when filling. The water level must be under the MAX marks. Switch the product off before removing...
Page 16 - Operation; Replace the lid on the Kettle.
K e t t l e K E C R N 3 3 1 7 B K 16 Follow the directions under “Operation” to fill and boil water in theKettle. Drain the boiled water before use for the first time to ensure the Kettleis completely clean. Operation Fill the Kettle by opening the lid and filling with water, taking care notto over ...
Page 17 - Do not immerse the Kettle or powerbase in water or any other liquid.; CARE AND; Note
I n s t r u c t i o n m a n u a l 17 depressing the on/off switch again. If the Kettle has automaticallyturned itself off it may be necessary to wait a few seconds before theswitch can be reset. You can stop the boiling process at any time bygently lifting the on/off switch or turning the power outl...
Page 18 - Removing Calcium Deposits; Boil the mixture and leave standing for 30 seconds.
Do not leave the Kettle in direct sunlight as the quality of the finishmay deteriorate. Removing Calcium Deposits In order to maintain the performance of your Kettle, it is important toremove built-up deposits inside the Kettle. To descale your Kettleyou can use a descalent available from most leadi...
Page 19 - WARRANTY
WARRANTY The benefits conferred by this warranty are in addition to all impliedwarranties, other rights and remedies in respect of the product whichthe consumer has under the Trade Practices Act and Territory Laws. >