BLUE BLOWER PROFESSIONAL HV-20D - Manuals
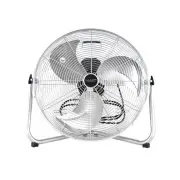
User Manual BLUE BLOWER PROFESSIONAL HV-20D


Summary
ASSEMBLY AND OPERATING INSTRUCTIONS CAUTION Read and follow all instructions before operating fan. DO not use fan if any part is damaged or missing. WARNING To reduce the risk of fire or electrical shock, do not expose to water or rain. To reduce the risk of fire or electrical shock, do not use this...
HOW TO ADJUST TILT 1. Loose knob by turning counter-clockwise. 2. Adjust fan head to tile you want. 3. Tightened the knob by turning clockwise. SPEED CONTROL Rotate SWITCH to LOW (1), MEDIUM (2) AND HIGH (3) speeds for respective air velocity. It is normal for the motor to feel warm to touch after c...
INSTRUCCIONES DE FUNCIONAMIENTO Y MONTAJE PRECAUCION lea y siga todas las instrucciones antes de operar el ventilador. No utilice el ventilador si cualquier pieza esta danada o faltante. ADVERTENCIAS Para reducir el riesgo de descarga electrica. o Incendio no exponga el ventilador al agua o lluvia. ...