Page 3 - IMPORTANT WARNINGS FOR SHRUBBERS & SHEARS; SAVE THESE INSTRUCTIONS; Extension Cord
3 • BEFORE TRIMMING, inspect areas for wires, cords, glass or other foreign objects which could come in contact with the blade. • DRESS PROPERLY. Do not wear loose clothing or jewelry. They can be caught in moving parts. Gloves and substantial, non-skid footwear are recommended when working outdoors...
Page 4 - Charging Procedure; Features; Assembly; WARNING
Note: No alignment of blade with drive pin is required and operation of the blade cover release button is not required when re-fitting the blade cover. Charging Procedure The battery needs to be charged before first use and whenever it fails to produce sufficient power on jobs that were easily done ...
Page 5 - Use; CAUTION: Let the tool work at its own pace.; Maintenance
5 Use CAUTION: Let the tool work at its own pace. DO NOT OVERLOAD.Switching on and off CAUTION: Blades coast after turn off. Switching on • Push and hold the lock button (2) (fig. E) to the right or to the left and then squeeze the on/off switch (1). • Release the lock-off button. Switching off • Re...
Page 6 - The RBRCTM Seal
• After use, carefully clean the blades. After cleaning, apply a film of light machine oil to prevent the blades from rusting. Storage When the tool will not be used for several months, ideally leave the battery connected to the charger. Otherwise proceed as follows: • Fully charge the battery. • St...
Page 7 - TROUBLESHOOTING
7 TROUBLESHOOTING Problem Possible Cause Possible Solution • Battery wonʼt charge. • Charger not plugged into a working outlet. • Plug charger into a working outlet. Refer to or not plugged into shear shrubber. “Important Charging Notes” for more details. • Check current at receptacle by plugging in...
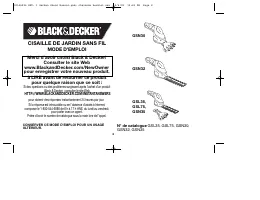
Page 8 - N° de catalogue; CISAILLE DE JARDIN SANS FIL; MODE D’EMPLOI; Consulter le site Web; Si la réponse est introuvable ou en l’absence d’accès à Internet,
8 N° de catalogue GSL35, GSL75, GSN30, GSN32, GSN35 CISAILLE DE JARDIN SANS FIL MODE D’EMPLOI CONSERVER CE MODE D’EMPLOI POUR UN USAGEULTÉRIEUR. Merci d’avoir choisi Black & Decker! Consulter le site Web www.BlackandDecker.com/NewOwner pour enregistrer votre nouveau produit. à LIRE avant de reto...
Page 9 - Avertissements de sécurité et directives importantes :
LIGNES DIRECTRICES EN MATIERE DE SECURITE -DEFINITIONS Il est important que vous lisiez et compreniez ce mode dʼemploi. Les informations quʼil contient concernent VOTRE SÉCURITÉ et visent à ÉVITER TOUT PROBLÈME. Les symboles ci-dessous servent à vous aider à reconnaître cette information. DANGER : I...
Page 11 - CONSERVER CES DIRECTIVES; Rallonge; Assemblage
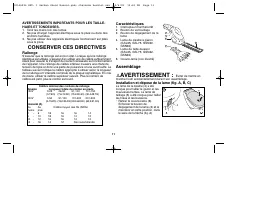
11 AVERTISSEMENTS IMPORTANTS POUR LES TAILLE-HAIES ET TONDEUSES. 1. Tenir les mains loin des lames. 2. Ne pas charger lʼappareil électrique sous la pluie ou dans des endroits humides. 3. Ne pas utiliser des appareils électriques fonctionnant sur piles sous la pluie. CONSERVER CES DIRECTIVES Rallonge...
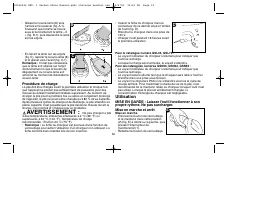
Page 12 - Utilisation; MISE EN GARDE : Laisser l'outil fonctionner à son; Procédure de charge
12 • Insérer la fiche du chargeur dans le connecteur de ce dernier situé à l'arrière de l'outil (fig. D). • Brancher le chargeur dans une prise de 120 V. • Charger l'outil pendant 16 heures avant la première utilisation. Pour le catalogue numéro GSL35, GSL75 : • Le voyant indicateur du chargeur s'al...
Page 13 - Entretien
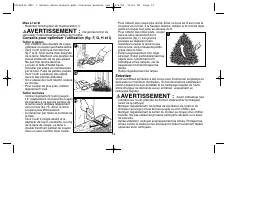
13 Mise à l'arrêt • Relâcher l'interrupteur de marche/arrêt (1). AVERTISSEMENT : Ne jamais tenter de verrouiller l'interrupteur en position de marche. Conseils pour optimiser l’utilisation (fig. F, G, H, I) Tailler le gazon MISE EN GARDE : La lame fonctionne après l'éteindre. • Afin d'obtenir des ré...
Page 14 - Information sur les réparations
14 Rangement Si l'outil doit être inutilisé durant plusieurs mois, il vaut mieux laisser la pile reliée au chargeur. Sinon, procéder de la façon suivante : • Charger entièrement la pile. • Ranger l'outil dans un endroit sûr et sec. La plage de températures pour la pièce où lʼoutil sera rangé doit to...
Page 15 - DEPANNAGE
15 Imported by / Importé par Black & Decker Canada Inc. 100 Central Ave. Brockville (Ontario) K6V 5W6 Voir la rubrique “Outils électriques” des Pages Jaunes pour le service et les ventes. DEPANNAGE Problème Cause possible Solution possible • La pile ne se charge pas. • Le chargeur n'est pas bran...
Page 16 - Si tiene una consulta o algún inconveniente con su producto Black &; Visite; CONSERVE ESTE MANUAL PARA FUTURAS CONSULTAS.; TIJERAS INALÁMBRICAS PARA JARDÍN; MANUAL DE INSTRUCCIONES
16 LEA EL MANUAL ANTES DE DEVOLVER ESTE PRODUCTO POR CUALQUIER MOTIVO: Si tiene una consulta o algún inconveniente con su producto Black & Decker, visite HTTP://WWW.BLACKANDDECKER.COM/INSTANTANSWERS Si no encuentra la respuesta o no tiene acceso a Internet, llame al 1-800-544-6986 de lunes a vie...
Page 17 - Instrucciones y advertencias de seguridad importantes.; PAUTAS DE SEGURIDAD/DEFINICIONES; Advertencias e instrucciones generales de seguridad
17 ADVERTENCIA: Lea y comprenda todas las instrucciones. El incumplimiento de todas y cada una de las instrucciones enumeradas a continuación puede provocar descarga eléctrica, incendio o daños personales serios. Instrucciones y advertencias de seguridad importantes. PARA REDUCIR EL RIESGO DE LESION...
Page 18 - CONSERVE ESTAS INSTRUCCIONES
18 • MANTENGA LAS MANOS Y EL CUERPO ALEJADOS de la hoja; los bordes son filosos y pueden provocar lesiones aunque el aparato esté APAGADO. • ANTES DE PODAR, inspeccione las áreas en busca de cables, alambres, vidrio u otros objetos extraños que puedan entrar en contacto con la hoja. • USE LA VESTIME...
Page 19 - Ensamblaje
19 CABLES PROLONGADORES Asegúrese de que el cable prolongador esté en buenas condiciones. Cuando utilice un cable prolongador, cerciórese de que tenga la capacidad para conducir la corriente que su producto exige. Un cable de menor capacidad provocará una disminución en el voltaje de la línea, lo cu...
Page 20 - Uso; ATENCIÓN: Permita que la; Procedimiento de carga
Uso ATENCIÓN: Permita que la herramienta trabaje a su propio ritmo. No la sobrecargue. Encendido y apagado PRECAUCIÓN: Las cuchillas funcionando después de apagarla. Encendido • Mantenga presionado el botón de bloqueo (2) (Fig. E) hacia la derecha o hacia la izquierda y luego presione el interruptor...
Page 21 - Mantenimiento
21 • Para hacer un corte más pequeño, incline levemente la herramienta. • Rocíe la hoja con una ligera película de aceite de uso general antes del primer uso y cada vez que las hojas comiencen a tener un aspecto seco. Poda de setos PRECAUCIÓN: Las cuchillas funcionando después de apagarla. • Incline...
Page 25 - DETECCION DE PROBLEMAS
25 DETECCION DE PROBLEMAS Problema Causa posible Solución posible • La batería no se carga. • El cargador no está enchufado en un tomacorriente • Enchufe el cargador en un tomacorriente que que funciona o no está enchufado en la podadora funcione. Para conocer más detalles, consulte de tijeras. las ...