Page 3 - SAFETY INFORMATION
Page 3 Staple your receipt to your manual. You will need it to obtain warranty service. Thank you for purchasing our BLACK+DECKER product. This easy-to-use manual will guide you in getting the best use of your refrigerator. Remember to record the model and serial numbers. They are on a label on the ...
Page 4 - IMPORTANT SAFETY INSTRUCTIONS; WARNING; CAUTION
Page 4 IMPORTANT SAFETY INSTRUCTIONS 1. Use this appliance only for its intended purpose as described in this use and care guide. 2. This refrigerator must be properly installed in accordance with the installation instructions before it is used. See grounding instructions in the installation section...
Page 5 - SAVE THESE INSTRUCTIONS; HOUSEHOLD USE ONLY
Page 5 9. Do not refreeze foods that have been thawed completely. The United States Department of Agriculture in Home and Garden Bulletin No. 69 reads: “…You may safely refreeze frozen foods that have thawed if they still contain ice crystals or if they are still cold- below 40˚F. “…Thawed ground me...
Page 6 - REFRIGERANT; GAS WARNINGS
Page 6 REFRIGERANT GAS WARNINGS DANGER - Risk of fire or explosion. Flammable refrigerant used. DO NOT use mechanical devices to defrost refrigerator. DO NOT puncture refrigerant tubing. DANGER - Risk of fire or explosion. Flammable refrigerant used. To be repaired only by trained service personnel....
Page 7 - GROUNDING INSTRUCTIONS; ELECTRICAL REQUIREMENTS
Page 7 GROUNDING INSTRUCTIONS ELECTRICAL REQUIREMENTS The electrical requirements are a 115 volt 60 Hz, AC only, 15 amp. It is recommended that a separate circuit serving only the product be provided. The product is equipped with a 3-wire cord having a 3-prong grounding plug. It must be plugged into...
Page 8 - INSTALLATION GUIDE
Page 8 INSTALLATION GUIDE 1. Unpack your refrigerator by removing all packaging materials like carton, base, foams, adhesive tape, etc. 2. Remove all accessories, internal packaging material used to hold shelves, ice tray, etc. in place. 3. Clean the remains of all adhesive tap used and remove all p...
Page 9 - STARTING YOUR NEW REFRIGERATOR
Page 9 SET UP & USE PROTECTION FROM HEAT AND MOISTURE • Do not install your refrigerator in any location where heavy moisture is present or if the location is not properly insulated. This refrigerator is not designed to operate in temperature setting below 55° Fahrenheit. • Location for the refr...
Page 10 - OPERATION INSTRUCTIONS; TEMPERATURE CONTROL
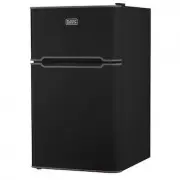
Page 10 PARTS & FEATURES Temperature Control / Interior Light Crisper Adjustable Leveling Legs 2-Liter Tall Bottle Storage Area Can Dispenser Storage Inner Door Shelf Hinge Cover Freezer Compartment Full Width Wire & Glass Shelves OPERATION INSTRUCTIONS TEMPERATURE CONTROL NOTE: · If the ref...
Page 12 - USING THE CAN DISPENSER STORAGE; REPLACING THE INTERIOR LIGHT BULB
Page 12 SET UP & USE USING THE CAN DISPENSER STORAGE Your refrigerator is equipped with a convenient can storage. The compartment will hold up to five cans. Simply load the cans from the top. To dispense a can, simply draw one out from the bottom. REPLACING THE INTERIOR LIGHT BULB 1. Using a Phi...
Page 13 - REVERSING THE DOOR HINGE
Page 13 SET UP & USE REVERSING THE DOOR HINGE 1. Remove the top hinge and cover. 2. Lift the door upwards to disengage it from the middle hinge. Put the door to one side and lay it down gently on a padded surface. 3. Using a screwdriver, dismantle the middle hinge. Lift the door upwards to disen...
Page 15 - CLEANING AND CARE
Page 15 VACATION AND MOVING CARE • When going on vacation, it is best that you empty all the food from your refrigerator and freezer. Set the temperature dial to “0” and unplug the refrigerator. Clean the unit as per “Cleaning Method” and leave the door open to remove any odors. When travelling or m...
Page 16 - IMPORTANT; DO NOT RETURN THIS PRODUCT TO THE STORE; If you have a problem with this product, please contact the
Page 16 TROUBLESHOOTING & WARRANTY BEFORE YOU CALL FOR SERVICE IF THE UNIT FAILS TO OPERATE: A) Check to make sure that the unit is plugged in securely. If it is not, remove the plug from the outlet, wait 10 seconds and plug it in again securely. B) Check for a blown circuit fuse or a tripped ma...
Page 17 - TROUBLESHOOTING & WARRANTY; TROUBLESHOOTING
Page 17 TROUBLESHOOTING & WARRANTY TROUBLE POSSIBLE CAUSE POSSIBLE REMEDY Refrigerator does notwork A. Refrigerator is not switched on B. Unit is not plugged in or is loose C. Fuse has blown or is defective D. Wall power socket is defective A. Turn on the temperature control dial. It may be in t...