Page 2 - PRODUCT REGISTRATION; SAFETY INFORMATION
Page 2 Thank you for purchasing our BLACK+DECKER product. This easy-to-use manual will guide you to get the best use of your air purifier.Remember to record the model and serial numbers. They are on a label on the rear of the unit. Staple your receipt to your manual. You will need it to obtain warra...
Page 3 - Do not let cord touch any hot surface and make sure that it does not; DANGER; WARNING; CAUTION
Page 3 SAFETY INFORMATION 1. READ ALL INSTRUCTIONS BEFORE USE2. Only use the air purifier as described in this manual.3. To avoid fire or shock hazard, plug the appliance directly into a 120V AC electrical outlet. 4. Remove all packaging material, including the plastic wrap over the filter, before u...
Page 4 - To reduce the risk of electric shock, do not remove screws. Do not; READ AND SAVE THESE; HOUSEHOLD USE ONLY
Page 4 11. Close supervision is necessary when any appliance is used by or near children. 12. To reduce the risk of electric shock, do not remove screws. Do not attempt to repair or replace parts except for filters. If the servicing instructions of an air cleaner require access to parts that could r...
Page 5 - ELECTRICAL REQUIREMENTS
Page 5 ELECTRICAL REQUIREMENTS This appliance has a polarized plug (one blade is wider than the other). To reduce the risk of electric shock, this plug is intended to fit into a polarized outlet only one way. If the plug does not fit into the outlet, reverse the plug. If it still does not fit, conta...
Page 6 - POWER CORD SUPPLY; OPERATING CONDITIONS
Page 6 POWER CORD SUPPLY 1. If the power supply cord is too short, do not use an extension cord. Have a qualified electrician or serviceman install an outlet near the appliance. a. The marked electrical rating of the extension cord must be equal to or greater than the electrical rating of the applia...
Page 8 - OPERATING INSTRUCTIONS; CONTROL PANEL; Filter change indicator
Page 8 SET UP & USE OPERATING INSTRUCTIONS Before using the air purifier for the first time, remove all packaging material, including the plastic bag the filter is wrapped in. NOTE: Refer to CLEANING AND MAINTENANCE section of this manual for information on how to access and install the filter. ...
Page 10 - Filter Replacement Light; Air Quality Indicator
Page 10 SET UP & USE Remote Control: Air purifier can be operated using the remote control.1. To turn the unit on, press the ON/OFF Button.2. To operate fan speed low, medium or high on 1 (LOW), 2 (MEDIUM), 3 (HIGH) or 4 (MAX) press the FAN SPEED button. Continue to press until the appropriate s...
Page 11 - BATTERY INFORMATION; BATTERY INSTALLATION
Page 11 SET UP & USE BATTERY INFORMATION WARNING : KEEP OUT OF REACH OF CHILDREN. Swallowing may lead to serious injury or death. Severe burns can occur within 2 hours of ingestion. Immediately see a doctor. Keep in original package until ready to use. Dispose of used batteries immediately. Risk...
Page 12 - CLEANING AND MAINTENANCE; Cleaning the Air Quality Sensor
Page 12 CLEANING AND MAINTENANCE WARNING : Be sure to unplug from the electrical supply source before cleaning appliance or changing the filter. Do not use liquids to clean the air purifier. Do not attempt to disassemble the air purifier for cleaning. • Wipe the exterior of the air purifier with a s...
Page 13 - To Install UV Bulb
Page 13 To Install UV Bulb WARNING: Make sure unit in turned off and unplugged before installing UV bulb. a) Insert the end of UV lamp into the holder a) Loosen the screws b) Fix the UV lamp with the cover b) Remove the UV lamp cover The UV lamp must be replaced after working 10,000 hours. c)Take th...
Page 14 - FILTER INSTALLATION
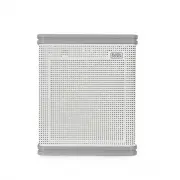
Page 14 SET UP & USE FILTER INSTALLATION Your air purifier comes with an 8 stage (2-Pre-Filters, 2-True HEPA H13 Filters, 2-Activated Carbon Filters, 2-Photocatalyst Filters) Filtration system. To access the filters: 1. Remove the front panel by pulling the top outwards with both hands. 2. If us...
Page 15 - REPLACEMENT FILTER; STORAGE
Page 15 Page 15 REPLACEMENT FILTER NOTE: After replacing the filters, touch and hold the reset button for 5 seconds to reset. The REPLACE FILTER indicator light will turn off and the other control panel lights will illuminate. STORAGE If you are not going to use the air purifier for a long time, mak...
Page 16 - TROUBLESHOOTING & WARRANTY; SPECIFICATIONS
Page 16 TROUBLESHOOTING & WARRANTY SPECIFICATIONS • Voltage: 120V, 60Hz • Unit Dimensions (W x D x H): 18.2” x 10.55’’ x 21.96” • Net Weight: Approx. 28.6 lbs TROUBLE POSSIBLE CAUSE POSSIBLE REMEDY Appliance does not turn on Appliance is not plugged in Check that the appliance is properly plugge...
Page 17 - IMPORTANT; DO NOT RETURN THIS PRODUCT TO THE STORE; If you have a problem with this product, please contact the
TROUBLESHOOTING & WARRANTY BEFORE YOU CALL FOR SERVICE IF THE APPLIANCE FAILS TO OPERATE: A) Check to make sure that the humidifier is plugged in securely. If it is not, remove the plug from the outlet, wait 10 seconds and plug it in again securely. B) Check for a blown circuit fuse or a tripped...
Page 20 - Printed in China
Page 20 Page 20 BLACK & DECKER, BLACK+DECKER, the BLACK & DECKER and BLACK+DECKER logos and product names and the orange and black color scheme are trademarks of The Black & Decker Corporation, used under license. All rights reserved.Product in this box may differ slightly from that pict...