Page 2 - WARNING; smooth out the bottom
2 Put 1 in. to 2 in. water in the pool to cover the floor. Once pool floor is slightly covered, gently smooth out all wrinkles. Start in the center of the pool and work your way clockwise to the outside. WARNING smooth out the bottom
Page 3 - The timber board must meet two conditions:
3 After the installation of the pool's steel frame is completed, ensure that the verticals are perpendicular to the ground. If they aren’t, the verticals could be bent or deformed. 90º 90º Do not assemble with pool legs on soft lawn. If you must assemble the pool on a soft surface, timber boards (no...
Page 4 - Electrocution Risk; Prevent Drowning; No Diving; IMPORTANT SAFETY INSTRUCTIONS
4 WARNING Keep all electrical lines, radios, speakers, and other electrical devices away from pool. Do not place pool near or under overhead electrical lines. Electrocution Risk Stay away from drains & suction fittings WARNING If drain or suction outlet cover is missing or broken, your hair, bod...
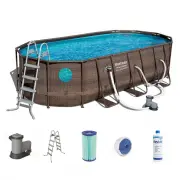
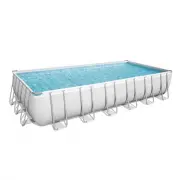
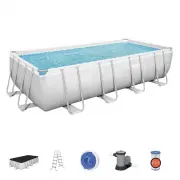
Page 5 - CHOOSE THE CORRECT LOCATION; COMPONENTS LIST; PREVENT; Please read carefully and keep for future
CHOOSE THE CORRECT LOCATION The surface chosen to install the pool must respect the following technical characteristics: 1. Because of the combined weight of the water inside the pool and the pool users, it is extremely important that the surface chosen to install the pool is capable of uniformly su...
Page 6 - STEEL PROTM
CHOOSE THE CORRECT LOCATION The surface chosen to install the pool must respect the following technical characteristics: 1. Because of the combined weight of the water inside the pool and the pool users, it is extremely important that the surface chosen to install the pool is capable of uniformly su...
Page 8 - INSTALLATION; POWER STEELTM
8 INSTALLATION Installation usually takes approximately 20-30 minutes with 2-3 people excluding earthworks and filling. Assembly of the Frame Pool can be completed without tools. To lengthen the life of your pool, it is important to sprinkle the top rail with the Talcum Powder before assembly. Talcu...
Page 9 - POOL MAINTENANCE
9 CONNECTION VALVE ASSEMBLY For pool with connection valve. NOTE: If you want to connect other pool cleaning kits to the pool through the connection valve, disassemble the Debris Screen from the Connector. FILLING POOL WITH WATER ATTENTION: Do not leave pool unattended while filling with water. 1. F...
Page 10 - REPAIR; For support please visit us at:
TEST pH value Cyanuric acid Free chlorine Chlorine compound Algae Calcium hardness IDEAL VALUES 7.4 – 7.6 30 – 50 ppm 2 – 4 ppm 0 None visible 200 – 400 ppm NOTE: Damage resulting from chemical imbalance is not covered by the warranty. Pool chemicals are potentially toxic and should be handled with ...