Page 3 - Table of Contents; Safety when working with electricity . 7; Bookmark not defined.
3 | EN Table of Contents 1 General information 4 Overview ............................................... 4 Technical specifications ....................... 4 2 Important safety instructions 6 General safety ....................................... 6 Intended use ........................................
Page 4 - General information; Overview
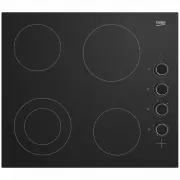
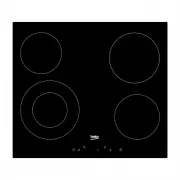
4 | EN 1 General information Overview 1 Induction cooking plate 2 Assembly clamp 3 Vitroceramic surface 4 Base cover Technical specifications Voltage / frequency 220-240 V~/380-415 V 2N ~ 50 Hz Total power consumption max. 7200 W Fuse min. 16 A x 2 / 32 A Cable type / section H05VV-FG 5 x 1,5 mm 2 o...
Page 5 - IMPORTANT
5 | EN Dimension 210 mm Power 2000/2300 W IMPORTANT Technical specifications may be changed without prior notice to improve the quality of the product. IMPORTANT Figures in this manual are schematic and may not exactly match your product. IMPORTANT Values stated on the product labels or in the docum...
Page 6 - Important safety instructions; General safety; Troubleshooting, page 26
6 | EN 2 Important safety instructions This section contains safety instructions that will help you avoid risk of injury and damage. All warranties will become void if you do not follow these instructions. General safety • This product is not intended to be used by persons with physical, sensory or ...
Page 7 - SAVE THESE INSTRUCTIONS
7 | EN • Vapour pressure that build up due to the moisture on the hob surface or at the bottom of the pot can cause the pot to move. Therefore, make sure that the oven surface and bottom of the pots are always dry. • Hotplates of your oven are equipped with "Induction" technology. Your induc...
Page 8 - Installation; Before installation
8 | EN 3 Installation Product must be installed by a qualified person in accordance with the regulations in force. The manufacturer shall not be held responsible for damages arising from procedures carried out by unauthorized persons which may also void the warranty. IMPORTANT Preparation of locatio...
Page 9 - Installation and connection; NOTICE; Electrical connection; DANGER
9 | EN * min. Installation and connection • The product must be installed in accordance with all local gas and electrical regulations. NOTICE Do not install the hob on places with sharp edges or corners. There is the risk of breaking for glass ceramic surface! Electrical connection Connect the produ...
Page 10 - Connecting the power cable; This product must only be; Installing the product
10 | EN • Connection must comply with national regulations. • The mains supply data must correspond to the data specified on the type label of the product. Type label is at the rear housing of the product. • Power cable of your product must comply with the values in "Technical specifications"...
Page 11 - If the oven is below:; at the; If the board is below:; Prepare the surface of the counter
11 | EN 1 min. 30 mm IMPORTANT When installing the hob onto a cabinet, a shelf must be installed in order to separate the cabinet from the hob as illustrated in the above figure. This is not required when installing onto a built-in oven. If the oven is below: It is required to leave a ventilation op...
Page 12 - Final check; Plug in the power cable and switch; Disposal; Disposing of packaging material
12 | EN * min. 40 mm 1 Hob 2 Installation clamp 3 Counter » Rear view (connection holes) IMPORTANT Making connections to different holes is not a good practice in terms of safety since it can damage the gas and electrical system. Final check 1. Plug in the power cable and switch on the product's fus...
Page 14 - Preparation; Tips for saving energy; First cleaning of the appliance
14 | EN 4 Preparation Tips for saving energy The following information will help you to use your appliance in an ecological way, and to save energy: • Defrost frozen dishes before cooking them. • Use pots/pans with cover for cooking. If there is no cover, energy consumption may increase 4 times. • S...
Page 15 - How to use the hob; Saucepan selection
15 | EN 5 How to use the hob General information about cooking DANGER Never fill the pan with oil more than one third of it. Do not leave the hob unattended when heating oil. Overheated oils bring risk of fire. Never attempt to extinguish a possible fire with water! When oil catches fire, cover it w...
Page 17 - Selecting cooking zone suitable to the vessel; Using the hobs; Control panel; Specifications
17 | EN Selecting cooking zone suitable to the vessel Large cooking zone Normal cooking zone Small cooking zone Large cooking zone • Automatically fits to the saucepan. • Distributes the power ideally. • Provides perfect heat distribution. Used to cook dishes such as large crepes or large fishes rar...
Page 18 - Turning on the hob; icon appears on all cooking zone; Turning off the hob; symbol that appears on the; Turning on the cooking zones
18 | EN Rear Left Cooking Zone Selection key Rear Right Cooking Zone Selection key Front Right Cooking Zone Selection key IMPORTANT Graphics and figures are for informational purposes only. Actual displays and functions may vary according to the model of your hob. NOTICE This product is controlled w...
Page 19 - Setting the temperature level
19 | EN 2. Touch the selection key of the cooking zone you want to turn on. "0" symbol appears on the cooking zone display and the related display illuminates more brightly. NOTICE If no operation is performed within 20 seconds, the hob will automatically return to Standby mode. Setting the ...
Page 20 - Keylock will be activated and the dot; Keylock will be de activated and the
20 | EN Keylock You can activate the keylock to avoid changing the functions by mistake when the hob is operating. Activating the keylock 1. Touch " " key to turn on the hob. 2. Touch " " and " " keys simultaneously to activate the keylock. » Keylock will be activated and the...
Page 21 - Deactivating the timer
21 | EN 2. Select the desired cooking zone by touching the cooking zone selection keys. 3. Touch " " or " " keys to set the desired temperature level. 4. Touch " " key to turn the timer on. "00" symbol will illuminate on timer display and decimal point will appear on ...
Page 22 - Operation time constraints; Operation time limits; Overheating protection
22 | EN operates more efficiently and the hob surface does not heat up. Induction hob is equipped with superior safety systems that will provide you maximum usage safety. IMPORTANT Your hob can be equipped with induction cooking zones with a diameter of 145, 180, 210 mm depending on the model. With ...
Page 24 - Maintenance and care; Cleaning the hob; Glass ceramic surfaces
24 | EN 6 Maintenance and care General information Service life of the product will extend and the possibility of problems will decrease if the product is cleaned at regular intervals. DANGER Disconnect the product from mains supply before starting maintenance and cleaning works. There is the risk o...
Page 26 - Troubleshooting
26 | EN 7 Troubleshooting Product does not operate. The mains fuse is defective or has tripped. Check fuses in the fuse box. If necessary, replace or reset them. If the display does not light up when you switch the hob on again. Disconnect the appliance at the circuit breaker. Wait 20 seconds and th...
Page 27 - Envelope IV