Page 2 - Explanation of symbols; Please read this user manual first!
Explanation of symbols Throughout this User Manual the following symbols are used: C Important information or useful hints about usage. A Warning for hazardous situations with regard to life and property. B Warning for electric shock. Packaging materials of the product are manufactured from recyclab...
Page 3 - CONTENTS
CONTENTS 1 INSTRUCTIONS FOR SAFETY AND ENVIRONMENT 4 General safety .......................................4 Intended use ..........................................4 Children’s safety .................................... 5 Disposing of packaging material ........ 5 Transportation of the product .......
Page 4 - Mandatory Warnings
CONTENTS Mandatory Warnings Dishwashers • The appliance is not intended for use by persons (including children) with reduced physical, sensory or mental capabilities, or lack of experience and knowledge, unless they have been given supervised or instruction concerning use of the appliance by a respo...
Page 5 - instructions for safety and environment; General safety
4 / /40 EN instructions for safety and environment 1 This section contains safety instructions that will help to get protected from risk of personal injury or property damage. Failure to follow these instructions shall void all warranties. General safety • Never place the product on a carpet-covered...
Page 6 - Children’s safety
/ 5 / 40 EN instructions for safety and environment to be used in household and similar applications such as: - Staff kitchen areas in shops, offices and other working environments; - Farm houses; - By clients in hotels, motels and other residential type environments; - Bed and breakfast type enviro...
Page 8 - Dishwasher; Overview
/ 7 / 40 EN Dishwasher 2 Overview 1. Upper basket 2. Upper impeller 3. Lower impeller 4. Silverware basket (depends on model) 5. Door 6. Rating Label 7. Control panel 8. Detergent dispenser 9. Lower basket 10. Filters 11. Salt reservoir lid (depends on model) 12. Upper basket rail 13. Upper cutlery ...
Page 9 - Technical specifications; Note for test institutions:; Fan drying system
8 / /40 EN Dishwasher Technical specifications Compliance to standards and test data / EC declaration of conformity This product complies with the following EU directives; Development, production and sales stages of this product comply with the safety rules included in all pertaining European Commun...
Page 10 - Installation; Appropriate installation
/ 9 / 40 EN 3 Installation Refer to the nearest Authorised Service Agent for installation of your product. To make the product ready for use, make sure that the electricity, tap water supply and water drainage systems are appropriate before calling the Authorised Service Agent. If they are not, call...
Page 11 - Permitted water temperature:; Connection to the drain
10 / /40 EN Installation Permitted water temperature: up to 25°C ( 60°C for products equipped with Aquasafe+; please refer toAquasafe+ section ) The dishwasher may not be connected to open warm water devices or flow-through water heaters. • Do not use old or used water inlet hose on the new product....
Page 12 - Electrical connection
/ 11 / 40 EN Installation accordance with the local regulations. • Connection must comply with national regulations. • Power cable plug must be within easy reach after installation. B Unplug the product after the washing programme is over. • The voltage and allowed fuse or breaker protection are spe...
Page 13 - Initial use
12 / /40 EN Installation Initial use Before starting to use the product, make sure that all preparations are made in accordance with the instructions in sections “Important safety instructions” and “Installation”. • To prepare the product to do the dishes, perform first operation in the shortest pro...
Page 14 - Preparation; Tips for energy saving; Adding detergent
/ 13 / 40 EN Preparation 4 Tips for energy saving Following information will help you use the product in an ecological and energy- efficient manner. Wipe away any coarse food remnants on the dishes before putting them in the product. Operate the product after filling it completely. When selecting a ...
Page 15 - When you switch to powder; Tablet detergents
14 / /40 EN Preparation C The best washing performance in dishwashers is obtained by using detergent, rinse aid and water softening salt individually. C Observe the instructions of the detergent manufacturer on the package when using tablet detergents. C Contact the detergent manufacturer if your di...
Page 16 - Items not suitable for
/ 15 / 40 EN Preparation 4. If there are stains on tableware items after washing, level must be increased and if there is a blue trace after wiping them by hand, it must be decreased. This is set to position 3 as factory default. C The rinse aid adjustment is described under "Adjusting the amoun...
Page 17 - Placing the dishes into the
16 / /40 EN Preparation C Decorative prints of chinaware as well as aluminium and silver items may get discoloured or tarnished after washing in the dishwasher just as it happens in handwashing as well. Some delicate glass types and crystals may become dull in time. We strongly recommend you to chec...
Page 19 - Cutlery basket
18 / /40 EN Preparation Cutlery basket (depends on model) Cutlery basket is designed to wash your dishes such as knife, fork, spoon, etc. in an efficient manner. Since the cutlery basket can be moved (A, B), you can create more space while placing your dishes in the lower basket and free up space fo...
Page 20 - Collapsible lower basket
/ 19 / 40 EN Preparation Collapsible lower basket tines (depends on model) There are foldable tines (A) located at the lower basket of the machine are designed for an easier placement of large pieces such as pans, bowls, etc. You can create larger spaces by folding each tines individually or all of ...
Page 21 - function service rack
20 / /40 EN Preparation C Bringing the tines to the horizontal position by holding them from the tips may cause them to bend. Therefore, it will be appropriate to bring the tines in the middle to horizontal or vertical position by holding them from their stems and pushing in the direction of arrow. ...
Page 22 - Lower basket multipurpose
/ 21 / 40 EN Preparation Lower basket multipurpose / height adjustable service rack (depends on model) This accessory located at the lower basket of your machine allows you to easily wash pieces such as extra glasses, long ladles and bread knives. C You may use the racks as required by moving them t...
Page 23 - Upper basket height
22 / /40 EN Preparation You can lift up the upper basket multipurpose service rack to remove it if you do not want to use it. If you want to use the upper basket multipurpose service rack again, you can easily attach it to the side section of your upper basket. Upper basket height adjustable rack (d...
Page 24 - Adjusting the height of the
/ 23 / 40 EN Preparation 1. To raise the basket, hold the wires of the basket and pull the basket upwards with both hands while the basket is at the lowermost position (B) 2. Release the basket when it catches on to the next upper position with a “Click” that may be heard from the right and left mec...
Page 25 - Collapsible upper basket
24 / /40 EN Preparation Pull the basket out completely. Place the basket back into the tracks at the desired height. Push the latches back into the correct position. Collapsible upper basket wires (depends on model) You can use collapsible wires when you need a larger space for your dishes in the up...
Page 26 - Ceiling cutlery basket
/ 25 / 40 EN Preparation Ceiling cutlery basket (depends on model) Ceiling cutlery basket is designed to wash your cutlery items such as forks, spoons and etc. by placing them between the bars on the basket. Ceiling cutlery basket (depends on model) Ceiling cutlery basket is designed to wash your cu...
Page 27 - Operation of the product; b c
26 / /40 EN 5 5 Operation of the product 1. On / Off key2. Display3. Start / Hold / Cancel key 4. Delay key5. Function keys a) b) c) 6. Program Selection key7. Program indicator8. Program Monitoring indicator a) Washing indicator b) Drying indicator c) Program End Indicator 5 SteamGloss Function Hyg...
Page 28 - Keys; Program Selection key; Preparing the machine
/ 27 / 40 EN Operation of the product Keys On / Off key Used to turn the machine on or off. When this key is brought to ON, the machine is started with the economy program and the number of the economy program is displayed on the program indicator. The indicators on the screen go off. Start / Hold /...
Page 30 - Auxiliary functions
/ 29 / 40 EN Operation of the product Auxiliary functions Washing programmes of your dishwasher are designed to obtain the best cleaning effect, considering the type of the soiling, soiling degree and properties of the dishes to be washed. Auxiliary functions are provided in order to enable you to s...
Page 31 - Changing the settings while Time; Starting the programme; Time Delay
30 / /40 EN Operation of the product C To exit time delay mode without activating the Time Delay, press the time delay key until the 3-6-9 hours duration indicators disappear. Time Delay mode will be cancelled and the programme selection mode will be activated. Changing the settings while Time Delay...
Page 32 - Cancelling the programme
/ 31 / 40 EN Operation of the product C Your machine performs water softening depending on the hardness level of the supply water. Due to water softening process the programme duration may change. The programme duration can also change while the programme is running depending on the ambient temperat...
Page 33 - Water cut-off warning
32 / /40 EN Operation of the product Water cut-off warning If mains water is cut or water inlet tap is turned off the machine cannot take water in and P2 icon will flash on the programme indicator. As long as the problem continues, washing programme is paused and the water inlet is checked regularly...
Page 34 - Maintenance and cleaning; Cleaning the outer surface
/ 33 / 40 EN Maintenance and cleaning 6 Service life of the product extends and frequently faced problems decrease if it is cleaned at regular intervals. A Unplug the product and turn off the tap before attempting any cleaning procedures. C Do not use abrasive substances for cleaning. C Clean the fi...
Page 35 - Cleaning the hose filter
34 / /40 EN Maintenance and cleaning 4. Clean all three filters under tap water by means of a brush. 5. Place the metal/plastic filter.6. Place the coarse filter into the micro filter. Make sure that it is properly seated. Turn the coarse filter clockwise until a "click" sound is heard. C Do...
Page 36 - Cleaning the impellers
/ 35 / 40 EN Maintenance and cleaning Cleaning the impellers Clean the impellers at least once a week in order for the machine operates efficiently. Lower impeller Check if the holes on the lower impeller (1) are clogged. If they are clogged, remove and clean the impeller. You can pull the lower imp...
Page 37 - Troubleshooting; Machine does not start.; Dishes are not dry at the end of cycle
36 / /40 EN 7 Troubleshooting Machine does not start. • Power cable is unplugged. >>> Check if the power cable is plugged in.• Fuse is blown. >>> Check the fuses in your house.• Water is cut. >>> Make sure that the water inlet tap is open.• Door of the machine is open. >...
Page 38 - Tea, coffee or lipstick stains remain on dishes.
/ 37 / 40 EN Troubleshooting • Rinse aid is not sufficient. >>> Check the rinse aid indicator and add rinse aid if necessary. Increase the rinse aid setting if there is enough amount of rinse aid in the machine. • Machine is unloaded right after the programme is over. >>> Do not un...
Page 39 - There is a different odour in the machine
38 / /40 EN Troubleshooting the filling process. Run the prewash programme to remove the salt that spilled inside the machine. Since the salt granules that will remain under the lid will dissolve during prewash, causing the lid loosen, check the lid once again at the end of the programme. There is a...
Page 40 - Detergent remains in detergent dispenser.; Decorations and ornaments on kitchen utensils are being erased.
/ 39 / 40 EN Troubleshooting Detergent remains in detergent dispenser. • Detergent dispenser was damp when adding detergent. >>> Make sure that the detergent dispenser is dried well prior to filling it with detergent. • Detergent is added long before the washing process. >>> Pay at...
Page 41 - the glass is pointed to light.; Kitchen utensils are broken.
40 / /40 EN Troubleshooting A smear remains on glasses that resembles milk stain which can not be removed when wiped by hand. A bluish / rainbow appearance occurs when the glass is pointed to light. • Excessive rinse aid is used. >>>Lower rinse aid setting. Clean the spilled rinse aid when ...
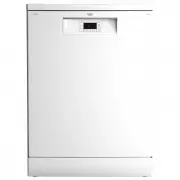


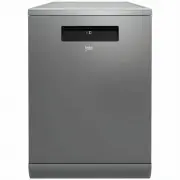
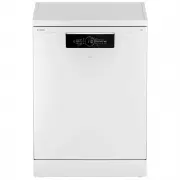
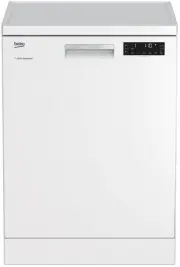
 Beko BDF1410W
User Manual
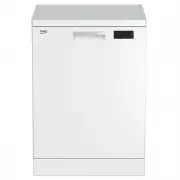
Beko BDF1410W
User Manual
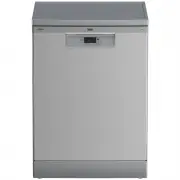
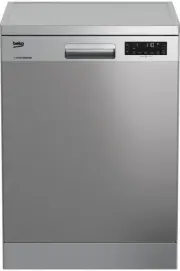
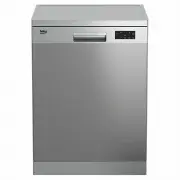 Beko BDF1410X
User Manual
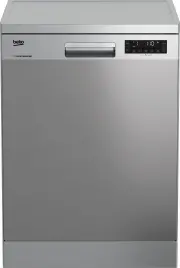
Beko BDF1410X
User Manual
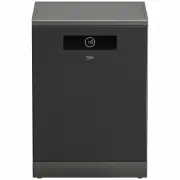
 Beko BDF1620X
User Manual
Beko BDF1620X
User Manual
 Beko BDF1630X
User Manual
Beko BDF1630X
User Manual
 Beko BDF1640AX
User Manual
Beko BDF1640AX
User Manual
 Beko BDF1640DX
User Manual
Beko BDF1640DX
User Manual
 Beko BDFB1410X
User Manual
Beko BDFB1410X
User Manual
 Beko BDFB1630W
User Manual
Beko BDFB1630W
User Manual
 Beko BDFB1630X
User Manual
Beko BDFB1630X
User Manual
 Beko BDI1420
User Manual
Beko BDI1420
User Manual
 Beko DDN38450
User Manual
Beko DDN38450
User Manual
 Beko DFN16420W
User Manual
Beko DFN16420W
User Manual
 Beko DFN16420X
User Manual
Beko DFN16420X
User Manual
 Beko DFN28430W
User Manual
Beko DFN28430W
User Manual
 Beko DFN28430X
User Manual
Beko DFN28430X
User Manual