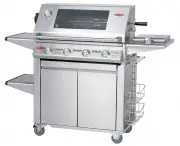
Beefeater BS31560 - Manuals
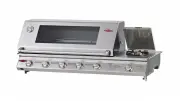
User Manual Beefeater BS31560


Summary
2 CONTENTS Important safety instructions ��������������������������������������������������������3For built-in units only ��������������������������������������������������������������������4Assembly of main barbecue ����������������������������������������������������������5Assembly of optional rot...
3 SAFETY WARNING WARNING We want you to enjoy your barbecuing experience - Failure to follow the instructions and observe the warnings provided in this operating manual could result in serious bodily injury or damage to property. NOTE TO INSTALLER: This manual must remain with the owner for future r...
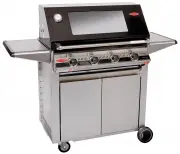
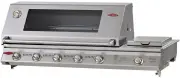
4 FOR BUILT-IN UNITS ONLY FOR BUILT-IN UNITS ONLY The SL4000 comes in both trolley-mounted and built-in models. These two pages contain information relating to setting up built-in model only.This appliance is designed to be used with a gas cylinder not exceeding 9KG (20lbs) capacity. About The Cylin...
Beefeater BBQs Manuals
-
 Beefeater 12850
User Manual
Beefeater 12850
User Manual
-
 Beefeater 16232
User Manual
Beefeater 16232
User Manual
-
 Beefeater 16242
User Manual
Beefeater 16242
User Manual
-
 Beefeater 16252
User Manual
Beefeater 16252
User Manual
-
 Beefeater 16340
User Manual
Beefeater 16340
User Manual
-
 Beefeater 16350
User Manual
Beefeater 16350
User Manual
-
 Beefeater 17640
User Manual
Beefeater 17640
User Manual
-
 Beefeater 18224
User Manual
Beefeater 18224
User Manual
-
 Beefeater 18226
User Manual
Beefeater 18226
User Manual
-
 Beefeater 19242
User Manual
Beefeater 19242
User Manual
-
 Beefeater 19252
User Manual
Beefeater 19252
User Manual
-
 Beefeater 19340
User Manual
Beefeater 19340
User Manual
-
 Beefeater 19350
User Manual
Beefeater 19350
User Manual
-
 Beefeater 19440
User Manual
Beefeater 19440
User Manual
-
 Beefeater 19640
User Manual
Beefeater 19640
User Manual
-
 Beefeater 19650
User Manual
Beefeater 19650
User Manual
-
 Beefeater 19750
User Manual
Beefeater 19750
User Manual
-
 Beefeater 26010
User Manual
Beefeater 26010
User Manual
-
 Beefeater 30060
User Manual
Beefeater 30060
User Manual
-
 Beefeater 31560
User Manual
Beefeater 31560
User Manual