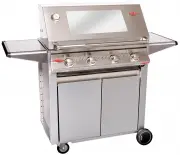
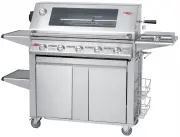
Page 2 - WARNING; WARNING; CAUTION; ENVIRONMENTAL TIPS; ENVIRONMENT; Record model and serial number here:; CONTENTS
2 CONTENTS Important safety instructions ��������������������������������������������������������3Locating your barbecue�����������������������������������������������������������������4Installation options ������������������������������������������������������������������������5For built-in units o...
Page 3 - SAFETY; Please read the user manual carefully and store in a handy; IMPORTANT; NOTE: This manual must remain with the owner for; IMPORTANT SAFETY INSTRUCTIONS
3 SAFETY Please read the user manual carefully and store in a handy place for later reference� TIPS & INFORMATION IMPORTANT Important – check for any damages or marks If you find the barbecue is damaged or marked, you must report it within 7 days if you wish to claim for damage/ marks under the ...
Page 4 - Clearance From Combustibles:; LOCATING YOUR BARBECUE
4 Most importantly, this is an outdoor appliance. Ensure your barbecue is positioned safely away from anything that can catch fire. Indoor Use Only: Under no circumstances is this barbecue to be used indoors� This includes garages or anyother enclosed area� Clearance From Combustibles: Ensure your b...
Page 5 - INSTALLATION OPTIONS; Natural Gas Conversion:
5 INSTALLATION OPTIONS INSTALLATION OPTIONS Before proceeding, you need to establish the gas type which your barbecue will run on, and the style of installation you need. Natural Gas or LPG/Propane Before beginning installation or assembly, check that the gas type which the barbecue is designed for ...
Page 6 - FOR BUILT-IN UNITS ONLY
6 FOR BUILT-IN UNITS ONLY FOR BUILT-IN UNITS ONLY The Discovery series of barbecues comes in both trolley- mounted and built-in models. These two pages contain information relating to setting up the built-in model only. General Requirements We recommend that th is installation be done in a masonry s...
Page 7 - The Cylinder Compartment; Keep cylinder upright:
7 FOR BUILT-IN UNITS ONLY FOR BUILT-IN UNITS ONLY The Cylinder Compartment If the gas for your barbecue is to be supplied by a portable LPG/propane cylinder, you will need to ensure that adequate provision is made to house the cylinder safely� The following must be adhered to: Keep out of heat: The ...
Page 8 - ASSEMBLY INSTRUCTIONS; Before You Start; Fit The Cooking Plates And Grills
8 ASSEMBLY INSTRUCTIONS ASSEMBLY INSTRUCTIONS Before You Start Note the tools you will need before you begin�Remove any packaging material or protective plastic from components�Check for damaged or missing parts, and consult your retailer if necessary�Mobile carts and trolleys are optional� You shou...
Page 9 - Set Up The Grease Tray; Assemble the grease tray as shown in the diagram below�
9 ASSEMBLY INSTRUCTIONS ASSEMBLY INSTRUCTIONS Set Up The Grease Tray Assemble the grease tray as shown in the diagram below� Attach the waste tray brackets to the grease tray using the screws, nuts and washers provided� Slide the smaller waste tray into place�You may line the grease tray with a shee...
Page 10 - CABINET TROLLEY ASSEMBLY
10 1 2 3 10 4 7 12 11 13 8 9 5 6 CABINET TROLLEY ASSEMBLY CABINET TROLLEY ASSEMBLY Content: INDEX PART QUANTITY 1 Top Panel 1 2 Shelf 1 3 Side Burner 1 4 RHS Panel and legs 1 5 LHS Panel and legs 1 6 Rear Panel 1 7 Base Panel 1 8 RHS Door 1 9 LHS Door 1 10 Cylinder Hook 1 11 Castors 2 12 Wheels 2 13...
Page 11 - ASSEMBLY PROCEDURE
11 ASSEMBLY PROCEDURE ASSEMBLY PROCEDURE Step 1 Remove all loose parts from inside the BBQ, close the hood, and turn it upside-down on a padded surface (BBQ packaging can be used for this purpose)� Step 2 Use: 4 x ‘A’, 4 x ‘B’, 4 x ‘C’Attach the Sides of the trolley (Parts 4, 5) to the BBQ body� Not...
Page 12 - ASSEMBLY INSTRUCTIONS FOR TROLLEY
12 ASSEMBLY INSTRUCTIONS FOR TROLLEY ASSEMBLY INSTRUCTIONS FOR TROLLEY Step 3 Use: 4 x ‘A’, 4 x ‘B’Attach the Top panel (Part 1) to the sides: Step 4 Use: 3 x ‘D’, 3 x ‘B’Attach the Back panel (Part 6) to the Top panel:
Page 14 - secure with the screws�
14 ASSEMBLY INSTRUCTIONS FOR TROLLEY ASSEMBLY INSTRUCTIONS FOR TROLLEY Step 7 Carefully turn the trolley and Barbecue upright Carefully turn the trolley and Barbecue upright Step 8 Use: 2 x ‘A’, 2 x ‘B’To the Left Hand Side, install the shelf (Part 2)� Insert over the two legs and between the barbec...
Page 15 - Ensure all screws are now tightened (but do not over-tighten)
15 ASSEMBLY INSTRUCTIONS FOR TROLLEY ASSEMBLY INSTRUCTIONS FOR TROLLEY Step 10 Ensure all screws are now tightened (but do not over-tighten) Step 11 Assemble both doors (Parts 8, 9) over the hinge brackets: Note: ensure that in each door, both hinge pins are inserted into the brackets simultaneously...
Page 17 - SIDE BURNER ASSEMBLY; Check Gas Type
17 SIDE BURNER ASSEMBLY SIDE BURNER ASSEMBLY Check Gas Type Check that the gas type is correct for your type of gas,�You will find the gas type label on the underside of your side burner� If your side burner is of the incorrect gas type, or if you are unsure, consult your dealer before going any fur...
Page 18 - OPERATING INSTRUCTIONS; Operating Instructions
18 OPERATING INSTRUCTIONS OPERATING INSTRUCTIONS Operating Instructions 1� Raise the lid� 2� Press and turn the control knob slowly (3-4 seconds) anti clockwise to HIGH until a click is heard� 3� If the burner fails to ignite, turn the knob to OFF repeat the process� A low flame or simmer condition ...
Page 19 - Installation warnings; CONNECTION TO BARBECUE & GAS SUPPLY; Before You Begin; When installing a portable LPG cylinder, the following must
19 CONNECTION TO BARBECUE & GAS SUPPLY Installation warnings CONNECTION TO BARBECUE & GAS SUPPLY Before You Begin Check the gas type label as described in the section titled “The Gas Supply”� Ensure all considerations such as clearances from combustibles listed in the “Locating Your Barbecue...
Page 20 - Gas connection; Leak Test; The gas leak testing procedure should be conducted every; Disconnecting The Gas Supply
20 CONNECTION TO BARBECUE & GAS SUPPLY Gas connection : Connect the hose to the gas inlet on the right hand side of the barbecue� Tighten with a spanner (wrench) but do not over-tighten� Connect the regulator end of the hose to the gas cylinder as shown� Ensure the hose does not twist or kink� R...
Page 21 - USING YOUR BARBECUE
21 USING YOUR BARBECUE USING YOUR BARBECUE Before You Light The Barbecue Perform the following checks • Make sure all gas connections are tight and leak tested� Gas regulators that are fitted with a hand- tightening wheel should be checked to ensure that the connection is secure� • Check the control...
Page 23 - GETTING THE MOST FROM YOUR BARBECUE; Preheating Your Barbecue; Do not exceed the temperature warning on the temperature; MODEL; TYPE OF MEAT
23 GETTING THE MOST FROM YOUR BARBECUE GETTING THE MOST FROM YOUR BARBECUE You may find it useful to purchase a meat thermometer to help take the guess work out of cooking� Meats such as beef, lamb, veal and pork should be about 70ºC / 160ºF when medium� Chicken and Turkey should be 85-90ºC / 185-19...
Page 24 - CLEANING AND STORING YOUR BARBECUE; Note: For storage and cylinder exchange, disconnect hose
24 CLEANING AND STORING YOUR BARBECUE CLEANING AND STORING YOUR BARBECUE Cleaning Vitreous Enamel Surfaces and Barbecue Control Panel Although porcelain enamel will keep its lustrous finish even under adverse conditions, it still needs regular cleaning� After the appliance has been used, wash down t...
Page 25 - SERVICE AND MAINTENANCE
25 SERVICE AND MAINTENANCE SERVICE AND MAINTENANCE This appliance should be checked and serviced by an authorised service person every 2 years to ensure the appliance remains in a safe operating condition� (These services are not covered by warranty)� Replacement parts are available from your author...
Page 26 - Gas Consumption
26 SERVICE AND MAINTENANCE SERVICE AND MAINTENANCE PROBLEM CAUSE CHECK Barbecue will not light Ignition system not working Check to see visible spark at starter probe - if no spark is present when control knob is turned then the unit may need to be serviced or replaced� Contact your BeefEater dealer...
Page 27 - BARBECUE DIMENSIONS; DIMENSION A
27 BARBECUE DIMENSIONS BARBECUE DIMENSIONS 1.30 cm 245mm (9.65”) A 22mm (.9”) 5mm (0.2”) below bottom rail 820mm / 32.28" 2.50 cm 450mm / 18.00" Gas connection point 45 mm from front of barbecue fascia DIMENSION A x 2 19 3/8” 493mm x 3 26” 660mm x 4 32 1/8” 816mm x 5 38 1/4” 973mm
Page 28 - NOTES
Page 31 - WARRANTY; Warranty; Important Notice
31 WARRANTY This document sets out the terms and conditions of the product warranties for Electrolux Appliances. It is an important document. Please keep it with your proof of purchase documents in a safe place for future reference should there be a manufacturing defect in your Appliance. This warra...
Page 32 - Beefeater. We are part of the Electrolux Family.
AUSTRALIAphone: 1300 307 939 fax: 1800 356 669 email: customercare @ electrolux.com.au web: beefeaterbbq.com NEW ZEALANDphone: 0800 436 245 fax: 0800 225 088 email: customercare @ electrolux.co.nz web: beefeaterbbq.com For more information on all Beefeater products, or for dimension and installation...