Page 2 - WARNING; WARNING; CAUTION; ENVIRONMENTAL TIPS; ENVIRONMENT; CONTENTS
2 CONTENTS Important safety instructions .......................................................3Product description ......................................................................4Dimensions .................................................................................. 5Product descripti...
Page 3 - Please read the user manual carefully and store in a handy; IMPORTANT; NOTE: This manual must remain with the owner for future; IMPORTANT SAFETY INSTRUCTIONS
3 SAFETY Please read the user manual carefully and store in a handy place for later reference. TIPS & INFORMATION IMPORTANT Important – check for any damages or marks If you find the barbecue is damaged or marked, you must report it within 7 days if you wish to claim for damage/ marks under the ...
Page 4 - PRODUCT DESCRIPTION
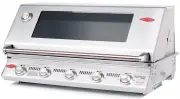
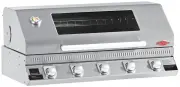
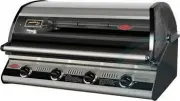
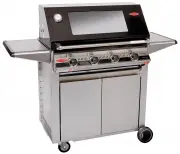
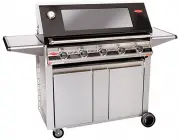
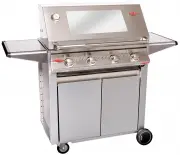
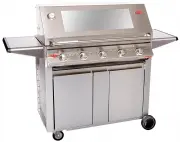
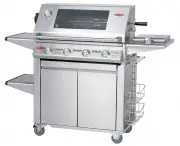
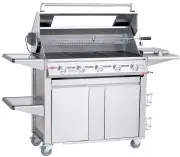
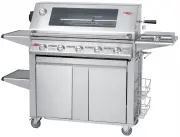
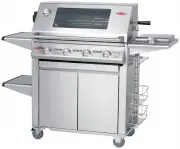
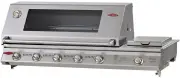
4 1 Barbecue body 2 Hood 3 Operating Knobs R + L 4 Stand * 5 Locking U Bolt 6 Cylinder Hook 7 Utility Hook 8 Cylinder Shield* 9 Shelves 10 Grill and Plate 11 Burner 12 Hood Handle 13 Body handle 14 Thermometer ** 15 Grease Tray PRODUCT DESCRIPTION PRODUCT DESCRIPTION 1 5 13 15 14 8 7 12 10 10 3 2 11...
Page 5 - DIMENSIONS; Any deviation from factory settings could result
5 DIMENSIONS DIMENSIONS WARNING CAUTION Note: Do not modify this appliance. Any deviation from factory settings could result in a safety hazard. * Stand is sold separately** May not be included with all models 554 (22”) 580 (23”) 1035 (41”) 190 (7 1 /2 ”) 592 ( 23 1/4 ”) 1088 (43”) Barbecue manifold...
Page 6 - PRODUCT DESCRIPTION FOR STAND
6 PRODUCT DESCRIPTION FOR STAND PRODUCT DESCRIPTION FOR STAND 2 5 4 7 4 6 6 9 9 8 8 10 11 3 1 1 INDEX DESCRIPTION QUANTITY 1 Leg 2 2 Top Connecting Panel 1 3 Front Shelf Brackets 1R + 1L 4 Wheel Bracket 1R + 1L 5 Cylinder Hook 1 6 Silicone Feet 4 7 Wire Shelf 1 8 Wheel 2 9 Shaft 2 10 Hub Caps 2 11 C...
Page 7 - ASSEMBLING THE BARBECUE
7 ASSEMBLING THE BARBECUE ASSEMBLING THE BARBECUE 1. Assemble Front leg: [ 4 x A, 4 x B ] Place the Leg (1) on a padded flat, level surface and assemble the two Front Shelf Brackets (3). Insert two Silicone Feet (6) to the bottom hole, and pull until rest against bottom of leg. 2. Assemble Back leg:...
Page 8 - Assemble the wheels
8 ASSEMBLING THE BARBECUE ASSEMBLING THE BARBECUE 3. Assemble Stand [ 8 x A, 8 x B ] Attach the Top Connecting Panel (2) with four screws to the Front Leg and four more screws to the Back leg: 4. Assemble the wheels [2 x D] Wheels (8) are placed on the inside of brackets. Insert the shaft (9) from t...
Page 9 - Fit the Wire Shelf
9 ASSEMBLING THE BARBECUE ASSEMBLING THE BARBECUE 5. Fit the Wire Shelf [ 4 x A1, 4 x B] The Wire Shelf (7) has two plates, and two hooks. The hooks are facing forward, and will engage into the Front Shelf Brackets (3) assembled in step 1. The plates have two holes each through which screws go into ...
Page 10 - Position the Barbecue into Stand, and lock
10 ASSEMBLING THE BARBECUE ASSEMBLING THE BARBECUE 7. Position the Barbecue into Stand, and lock With the stand standing on a stable, flat surface, remove the Locking U Bolt from the rear of the Barbecue, and place the Barbecue onto the stand, ensuring each leg is fully engaged into the correspondin...
Page 11 - Gas bottle safety information; In North America, the installation must conform with local; Gas bottle installation
11 GAS SPECIFICATIONS GAS SPECIFICATIONS GAS TYPE UNIVERSAL LPG NATURAL GAS Maximum gas consumption 20 MJ/h 20 MJ/h Injector office diameter 0.9 mm AU/NZ 0.95mm (North America)” 1.83 mm Number of injectors 2 2 Regulator pressure 2.75 kPa 1.00 kPa NOTES: • This appliance MUST be serviced only by a qu...
Page 12 - Natural gas installation
12 GAS SPECIFICATIONS GAS SPECIFICATIONS Natural gas installation NOTE: Conversion of this unit to natural gas must be carried out by a qualified licensed pers on and a Certificate of Compliance must be issued to the owner on completion of the installation and conversion. Converting the unit to natu...
Page 13 - Turn down adjustment
13 GAS SPECIFICATIONS GAS SPECIFICATIONS Turn down adjustment • When converting to natural gas the turndown setting will need to be adjusted to give a satisfactory flame on low setting. • Remove knobs from valve shafts. • Using a flat bladed screwdriver, turndown adjustment screw should be fully ins...
Page 14 - INSTALLATION WARNINGS
14 WARNING WARNING • This appliance shall only be used in an above ground, open air situation with natural ventilation without stagnant areas, where gas leakage and products of combustion are rapidly dispersed by wind or natural convection. This barbecue has been designed for outdoor use only. Refer...
Page 15 - CONFIGURATION OPTIONS; Plate and grill can be positioned either on the left or right; The use of two hotplates is not recommended. This; Control functions; OPERATING INSTRUCTIONS; INCORRECT
15 CONFIGURATION OPTIONS CONFIGURATION OPTIONS TIPS & INFORMATION IMPORTANT Plate and grill can be positioned either on the left or right side as shown. Optional planchar plate (sold separately) 2 x Grill (sold separately) WARNING WARNING The use of two hotplates is not recommended. This configu...
Page 16 - Preheating
16 OPERATING INSTRUCTIONS Preheating • This barbecue is fitted with high power burners. In most conditions it will only be necessary to preheat the barbecue for only a few minutes before cooking can commence. • As with most things, experience will familiarise you with the time required, to achieve t...
Page 17 - CLEANING AND CARE
17 CLEANING AND CARE CLEANING AND CARE WARNING WARNING Please ensure that your barbecue is switched off and has cooled down before following the instructions below.Do not use a high pressure cleaner to clean this appliance.If cleaning the appliance without the stand attached ensure the base is stabl...
Page 19 - Warranty
19 This document sets out the terms and conditions of the product warranties for BeefEater Appliances. It is an important document. Please keep it with your proof of purchase documents in a safe place for future reference should there be a manufacturing defect in your Appliance. This warranty is in ...
Page 20 - Beefeater. We are part of the Electrolux Family.
AUSTRALIAphone: 1300 307 939 fax: 1800 356 669 email: customercare @ electrolux.com.au web: beefeaterbbq.com NEW ZEALANDphone: 0800 436 245 fax: 0800 225 088 email: customercare @ electrolux.co.nz web: beefeaterbbq.com For more information on all Beefeater products, or for dimension and installation...