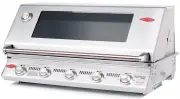
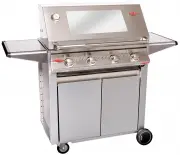
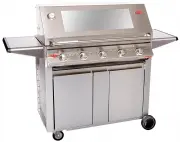
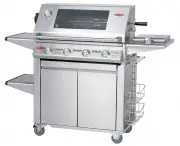
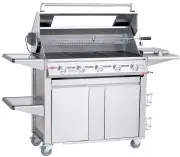
Page 2 - Safety Warnings
2 • Some foods produce flammable fats and juices. Regular cleaning is essential. • Attend an operating barbecue at all times. Damage caused by fat & grease fires is not covered by warranty. • When not in use keep barbecue and side burner dry and covered. Warning: If you smell gas, shut off gas s...
Page 4 - About The Cylinder Enclosure; The Barbecue Housing; For Built-In Units Only
4 About The Cylinder Enclosure If the gas for your barbecue is to be supplied by a portable gas cylinder, you will need to ensure that adequate provision is made to house the cylinder safely. The following must be adhered to: Keep out of heat: The cylinder and hose must be sheltered from the sun’s d...
Page 5 - The Cavity; Putting The Barbecue Into Place
5 The Cavity Your barbecue has been designed to sit into a cavity or cutout rather than be placed directly onto a flat surface. It is important that the dimensions of the cavity conform exactly to those listed on page 21. This will ensure the barbecue sits correctly in the cavity, and that the barbe...
Page 6 - Assembly Of Main Barbecue; Before You Start
6 Assembly Of Main Barbecue Before You Start Note the tools you will need before you begin.Remove any protective plastic from stainless steel components.Check for damaged or missing parts, and consult your retailer if necessary. Attach The Side Shelves (Trolley-Mount Models Only) Attach the two top ...
Page 9 - Assembly Of Optional Rotisserie; Assemble The Main Shaft; Fit The Motor
9 Assembly Of Optional Rotisserie Assemble The Main Shaft Assemble the shaft in the order shown. The knurled nut, counterbalance and handle go on the threaded end. Slide the collar down towards the handle end. Slide the prongs onto the shaft so they face each other. Fit The Motor First attach the mo...
Page 10 - Fit The Towel Rack; Assembly Of Accessories; Fit The Baskets
10 Fit The Towel Rack First, unscrew and remove the plastic end caps from the towel rack. Then, using 2 flathead screws, washers and nuts, attach the towel rack to the side panel. You may need to slide the towel rails out of the way to access the screw holes. Assembly Of Accessories Fit The Baskets ...
Page 11 - Installation
11 Any enclosure with walls on all sides, but at least one permanent opening at ground level, and no overhead cover.A common example is an enclosed back yard. Typically, the walls are less than 3m high. If they are higher, there is a danger of gas build up. Within a partial enclosure that includes a...
Page 12 - Fixed Installation - Portable LP Gas/Propane
12 Mobile Installation - Portable LP Gas/ Propane Recommended minimum LPG/propane cylinder capacity for use with this appliance is 4kg. Maximum LPG/propane cylinder capacity for use with this appliance is 10kg. In the USA, only a 20lb cylinder may be used.Fit the regulator to the LPG/propane cylinde...
Page 13 - Fixed Installation - Natural Gas; Secure All Joints And Leak Test
13 Fixed Installation - Natural Gas (Natural Gas installation should be carried out by a qualified gas fitter) BeefEater Natural Gas barbecues are designed as low-pressure appliances (4.0” WC, 1.00KPa).Fit the natural gas regulator supplied directly to the barbecue inlet located on the right side of...
Page 14 - Using Your Barbecue; Before You Light The Barbecue; Lighting The Barbecue; Grease Tray
14 Using Your Barbecue Before You Light The Barbecue Perform the following checks• Make sure all gas connections are tight and leak tested.• Ensure the cooking surfaces are clean and hygienic.• Check the control knobs are in the off position.• Check that the gas supply is turned on.• Ensure the hood...
Page 16 - Getting The Most From Your Barbecue; Maintaining The Right Cooking Temperature
16 Getting The Most From Your Barbecue Most importantly, do not allow your barbecue to overheat. Your hood is designed to keep the heat in, and so requires constant monitoring. Do not use more than 2 burners on high at any one time. As a guide, for a 4 burner barbecue in moderate weather: Two burner...
Page 17 - Using The Side Burner
17 Direct Cooking Method Commonly used for traditional barbecuing. Place food directly over the lit grill section. Excess flaring may occur and so care must be taken while cooking. Check inside the roasting hood regularly. We do not recommended this method for roasts unless you place a baking dish u...
Page 18 - Cleaning Your Barbecue
18 Stainless Steel Grills Many food acids, marinades, juices and sauces contain highly acidic elements that will slowly attack the surface of the stainless steel if not removed immediately after cooking. • After use, remove all solid material from the cooking surfaces using a brass bristle brush or ...
Page 21 - Technical Specifications; Built-In Model Dimensions
21 Gas Injector size Input/burner Gas Pressure LPG/Propane 1.27 mm 19 MJ/hr 2.75 kPa / 11” WC Natural Gas 2.1 mm 19 MJ/hr 1 kPa / 4”WC 920 1808/1964 856/1013 1212/1372 585 503 1226 87 165.50 Gasconnectionpoint X Technical Specifications All dimensions are in millimetres. Width dimensions are shown f...
Page 22 - SL4000 Spare Parts - Barbecue; Trolley-Mounted Model
22 SL4000 Spare Parts - Barbecue 20 22 23 24 21 1 8 9 3 4 5 6 15 2 12 13 14 10 11 7 27 28 29 25 26 16 30 33 31 32 Built-In Model Trolley-Mounted Model sl4000_0805.indd 22 14/12/2006 10:18:35 AM
Page 24 - SL4000 Spare Parts - Roasting Hood
24 10 4 5 3 4 1 2 17 17 18 19 20 7 9 8 3 17 17 6 6A 6 6A 16 12 14 15 14 16 12 15 With Viewing Glass Without Viewing Glass 4B 5B 4B 5B 29640 29650 29440 29450 Description Part Part Part Part Code 1 Hood Body Top 340114 350114 340109 350111 1 2 Hood Body Base 340110 350115 340110 350115 1 3 Insulating...
Page 25 - Not Shown
25 1 2 3 4 6 7 8 9 5 10 11 12 13 14 15 Ref # Description 5 burner 6 burner Code QTY Code QTY 1 SL4000s Cart frame n/a 1 n/a 1 2 Side shelves Sig 180217 3 180217 3 3 Side shelf handle 224801 3 224801 3 4 SL4000s Gas bottle drawer 180455 1 180457 1 5 SL4000s trolley drawer 180456 2 180458 2 6 SL4000s ...
Page 26 - BeefEater Barbecues Warranty Terms; Warranty; SERVICE ASSISTANCE
26 Model number Serial number Retailer purchased from Date of purchase Gas type LPG/Propane NG Barbecue Barbecue Frame Limited Lifetime Stainless Steel burners Limited Lifetime Valves 5 Years ‘Quartz Start’ Ignition System 2 Years Vaporizer Grids and Reflectors 2 Years All Other Parts 2 Years Cookto...
Page 27 - Beefeater Barbecues Warranty Conditions
27 Should any part fail due to defective workmanship or faulty materials within the specified period from the date of purchase, BeefEater or its distributor will repair or, (at distributors option), replace the defective part free of charge.• LP / Propane Gas Cylinder The cylinder manufacturer is re...
Page 28 - Accessories Available
BeefEater Sales International P.O. Box 236, Chester Hill, NSW, Australia 2162PH: +61 2 9724 8888 FAX: +61 2 9724 8899E-mail: [email protected] Website: www.beefeaterbbq.com Your retailer can advise on the range of BeefEater accessories available to help you take full advantage of the barbecue cookin...