Page 2 - TABLE OF CONTENTS
2 TABLE OF CONTENTS Range Safety 3 Important Safe guides 4 The Anti-tip Bracket 5 Help Us Help You … 6 Parts and Features 7 - 8 Before Using Your Gas Range 9 - 10 Important Precautions and Recommendations 11 - 13 How to use the top burners 14 How to use the Gas oven 15 Care and Maintenance 20 - 22 T...
Page 3 - RANGE SAFETY; IN THE COMMONWEALTH OF MASSACHUSETTS; BEFORE INSTALLATION
3 RANGE SAFETY Your safety and the safety of others are very important. We have provided many important safety messages in this manual and on your appliance. Always read and obey all safety messages. This is the Safety Alert Symbol. This symbol alerts you to potential hazards that can kill or injure...
Page 4 - IMPORTANT SAFE GUIDES
4 IMPORTANT SAFE GUIDES Before the appliance is used, it must be properly positioned and installed as described in this manual, so read the manual carefully. To reduce the risk of fire, electrical shock or injury when using the appliance, follow basic precaution, including the following: • • It is r...
Page 5 - THE ANTI-TIP BRACKET; WARNING; ALL RANGES CAN TIP; Slide range forward.
5 THE ANTI-TIP BRACKET The range will not tip during normal use. However, the range can tip if you apply too much force or weight to the open door without the anti-tip bracket fastened down properly. To reduce the risk of tipping the appliance, the appliance must be secured by properly installed ant...
Page 6 - IF YOU NEED SERVICE
6 HELP US HELP YOU... Read this guide carefully. It is intended to help you operate and maintain your new Gas Range properly. Keep it handy to answer your questions. If you don't understand something or you need more assistance, please call: Avanti Customer Service 800-220-5570 Keep proof of origina...
Page 7 - PARTS & FEATURES; Backsplash
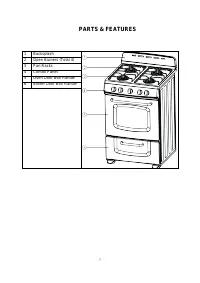
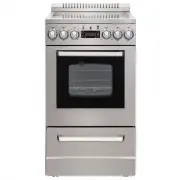
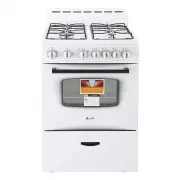
7 PARTS & FEATURES 1 Backsplash 2 Open Burners (Total 4) 3 Pan Racks 4 Control Panel 5 Oven Door with Handle 6 Broiler Door with Handle
Page 8 - COOKTOP; Open Flame; CONTROL PANEL
8 COOKTOP BTU/hr Ratings 20” 24” 4 Open Flame Burners 9000 Each 9000 Each CONTROL PANEL 1 Front Left Burner Control Knob 2 Rear Left Burner Control Knob 3 Oven Temperature Control Knob 4 Front Right Burner Control Knob 5 Rear Right Burner Control Knob Note: -The electric gas-lighting device is inc...
Page 9 - BEFORE USING YOUR GAS RANGE; Before Using Your Gas Range
9 BEFORE USING YOUR GAS RANGE WARNING!! HAVE THIS RANGE INSTALLED BY A QUALIFIED INSTALLER. Improper installation, adjustment, alteration, services, or maintenance can cause injury or property damage. Consult a qualified installer, service agency, or the gas supplier. Before Using Your Gas Range ...
Page 10 - YOUR PRODUCT IS PRE-INSTALLED WITH NATURAL
10 Important: This appliance is designed and manufactured solely for the cooking of domestic (household) food and is not suitable for any non-domestic application and therefore CANNOT be used in a commercial environment. The appliance guarantee will be void if the appliance is used within a non-do...
Page 11 - IMPORTANT PRECAUTIONS AND RECOMMENDATIONS
11 IMPORTANT PRECAUTIONS AND RECOMMENDATIONS After having unpacked the appliance, check to ensure that it is not damaged and that the oven door closes correctly. In case of doubt, do not use it and consult your supplier or a professionally qualified technician. Packing elements (i.e. plastic bag...
Page 12 - GENERAL INFORMATION; Do not obstruct the flow of combustion and ventilation air.; CAUTION; Do not try to light any appliance.
12 IMPORTANT PRECAUTIONS AND RECOMMENDATIONS FOR USE OF ELECTRICAL APPLIANCES Use of any electrical appliance implies the necessity to follow a series of fundamental rules. In particular: Never touch the appliance with wet hands or feet; Do not operate the appliance barefooted; Do not allow ...
Page 13 - ELECTRICAL GROUNDING INSTRUCTIONS; FOR PERSONAL SAFETY, THIS APPLIANCE MUST BE PROPERLY GROUNDED.; remove the grounding prong from the plug.; REPLACEMENT PARTS; nearest AVANTI parts distributor in your area.; CARBON MONOXIDE WARNING
13 WARNING!! ELECTRICAL GROUNDING INSTRUCTIONS FOR PERSONAL SAFETY, THIS APPLIANCE MUST BE PROPERLY GROUNDED. This appliance is equipped with a three-prong grounding plug for your protection against shock hazard and should be plugged directly into a properly grounded socket. Do not cut or remove t...
Page 14 - HOW TO USE THE TOP BURNERS; GAS BURNERS; LIGHTING GAS BURNERS
14 HOW TO USE THE TOP BURNERS GAS BURNERS Gas flow to the burners is adjusted by turning the knobs which control the valves. Turning the knob so that the indicator line points to the symbols printed on the panel achieves the following functions: When knob is rotated to the maximum position it will...
Page 15 - HOW TO USE THE GAS OVEN; GENERAL FEATURES
15 The symbols printed on the panel above the control knobs indicate the correspondence between the knob and the burner. It is important that the diameter of the pots or pans suitably match the heating potential of the burners in order not to jeopardize the efficiency of the burners, bringing about ...
Page 16 - OVEN BURNER; OVEN THERMOSTAT; GAS OVEN SETTING
16 OVEN BURNER Carries out normal “oven cooking”. The gas flow to the burner is regulated by a thermostat which allows to maintain the desired oven temperature. The control of the temperature is assured by a thermostatic probe positioned inside the oven. The probe must be always kept in its housing,...
Page 17 - IGNITION OF THE OVEN BURNER
17 IGNITION OF THE OVEN BURNER The thermostat allows the automatic control of the temperature. The gas delivery to the oven burner is controlled by a two way thermostatic tap (oven and broil burner) with flame-failure device. To light the oven burner operate as follows: 1) Open the oven door to its ...
Page 18 - OVEN COOKING; IGNITION OF THE BROIL BURNER
18 OVEN COOKING Before introducing the food, preheat the oven to the desired temperature For a correct preheating operation, it is advisable to remove the tray from the oven and introduce it together with the food, when the oven has reached the desired temperature. Check the cooking time and turn of...
Page 19 - BROILING; Never obstruct the oven vent slots on the backsplash.
19 BROILING Very important: the broil burner must always be used with the oven door and broiler drawer closed. -Turn on the broil burner, as explained in the preceding paragraphs and let the broil burner preheat for about 5 minutes with the door closed. -Place the food to be cooked above the broilin...
Page 20 - GAS VALVES
20 CARE & MAINTENANCE GENERAL RECOMMENDATION Important: Before any operation of cleaning and maintenance disconnect the appliance from the electrical supply. It is advisable to clean when the appliance is cold and especially for cleaning the enameled parts. 、 Avoid leaving alkaline or acidic sub...
Page 21 - OVEN RACK INSTALLATION AND REMOVAL; REMOVING THE OVEN DOOR; hook
21 OVEN RACK INSTALLATION AND REMOVAL REMOVING THE OVEN DOOR To facilitate oven cleaning, it is possible to remove the door. Please follow the instructions carefully: REMOVING THE OVEN DOOR – The oven door can easily be removed as follows: – Open the door to the full extends. – Lift the left and rig...
Page 23 - PROBLEMS WITH YOUR GAS RANGE?; TROUBLESHOOTING GUIDE
23 PROBLEMS WITH YOUR GAS RANGE? You can solve many common appliance problems easily, saving you the cost of a possible service call. Try the suggestions below to see if you can solve the problem before calling the servicer. TROUBLESHOOTING GUIDE FIND YOUR PROBLEM HERE POSSIBLE CAUSE HOW TO FIX IT S...
Page 24 - SERVICE FOR YOUR GAS RANGE
24 Range is not level. Poor installation. Place oven rack in center of oven. Place a level on the rack. Adjust leveling legs. Weak or unstable floor. Be sure floor is level and can adequately support range. Contact carpenter to correct sagging or sloping floor. Kitchen cabinet misalignment may make ...
Page 25 - YOUR AVANTI PRODUCTS WARRANTY; WARRANTY – GAS RANGE; LENGTH OF WARRANTY
25 YOUR AVANTI PRODUCTS WARRANTY WARRANTY – GAS RANGE LENGTH OF WARRANTY WE WILL PAY FOR FULL ONE YEAR WARRANTY FROM DATE OF PURCHASE ON ALL PARTS EXCEPT GLASS PARTS. IN RENTAL OR COMMERCIAL USE, THE WARRANTY PERIOD IS 90 DAYS. REPLACEMENT PARTS AND REPAIR LABOR TO CORRECT DEFECTS IN MATERIALS OR WO...
Page 26 - MEDIDAS DE SEGURIDAD IMPORTANTES; EN EL ESTADO DE MASSACHUSETTS
26 MEDIDAS DE SEGURIDAD IMPORTANTES Su seguridad y la seguridad de los demás son muy importantes. Hemos incluido muchos mensajes importantes de seguridad en este manual y en su electrodoméstico. Siempre lea y obedezca todos los mensajes de seguridad . Éste es el símbolo de alerta de seguridad. Este ...
Page 28 - EL ELEMENTO ANTI-VOLTEO; ADVERTENCIA; LA PERSONA PUEDE SUFRIR DAÑOS; Deslice la cocina hacia adelante.
28 • Piezas de repuesto – Solo debe utilizar piezas de reemplazo autorizadas por Avanti para darle mantenimiento a la cocina. Piezas de repuesto están disponibles en los Distribuidores de Fabrica autorizados. Contáctese con el Centro de Servicio de Avanti más cercano a ud. EL ELEMENTO ANTI-VOLTEO La...
Page 29 - PIEZAS Y CARACTERISTICAS; Panel Anti-Salpicaduras
29 PIEZAS Y CARACTERISTICAS 1 Panel Anti-Salpicaduras 2 Hornillas (4) 3 Rejillas 4 Panel de controles 5 Puerta del horno con manija 6 Puerta del asador con manija
Page 30 - PERILLAS PARA LAS HORNILLAS
30 COCINA PANEL DE CONTROLES DESCRIPCION DE LOS CONTROLES PERILLAS PARA LAS HORNILLAS 1 Hornilla delantera izquierda 2 Hornilla posterior izquierda 3 Control del temperatura del horno 4 Hornilla delantera derecha 5 Hornilla posterior derecha (4) Hornillas de alta potencia (9000 btu cada una) N...
Page 31 - Antes de usar su Cocina a gas
31 ANTES DE USAR SU COCINA A GAS ADVERTENCIA!! ASEGURESE QUE ESTA COCINA SEA INSTALADA POR UN TECNICO CALIFICADO. Instalación, ajustes, alteraciones, servicio o mantenimiento inapropiados pueden causar daños personales o a la propiedad. Consulte con un instalador calificado, agencia de servicios o...
Page 32 - PRECAUCIONES & RECOMENDACIONES; PRECAUCIONES Y RECOMENDACIONES IMPORTANTES
32 PRECAUCIONES & RECOMENDACIONES PRECAUCIONES Y RECOMENDACIONES IMPORTANTES Después de desempacar su electrodoméstico, verifique que no esté dañado y que la puerta del horno cierre correctamente. En caso de duda, no use la cocina hasta que consulte con su proveedor o técnico profesional calif...
Page 34 - INFORMACION GENERAL; basada en consideración a la seguridad.; INSTRUCCIONES DE CONEXION ELECTRICA A TIERRA
34 INFORMACION GENERAL ADVERTENCIA!! 1. Este electrodoméstico no se debe usar para calentar la habitación. Esta información está basada en consideración a la seguridad. 2. La pared detrás de este electrodoméstico y el piso bajo este electrodoméstico deben estar sellados y no tener aperturas. 3. Ma...
Page 35 - PIEZAS DE REEMPLAZO; ADVERTENCIA: MONOXIDO DE CARBONO
35 PIEZAS DE REEMPLAZO Solo debe utilizar piezas de reemplazo autorizadas por Avanti para darle mantenimiento a la cocina. Piezas de repuesto están disponibles en los Distribuidores de Fabrica autorizados. Contáctese con el Centro de Servicio de Avanti más cercano a ud. QUÉ HACER SI HUELE A GAS • NO...
Page 36 - COMO USAR LAS HORNILLAS; HORNILLAS A GAS; ENCENDIENDO LAS HORNILLAS DE GAS
36 COMO USAR LAS HORNILLAS HORNILLAS A GAS El flujo de gas a las hornillas se ajusta al girar las perillas que controlan las válvulas. Girando la perilla para que la línea indicadora apunte a los símbolos marcados en el panel logra las siguientes funciones: La posición de rotación máxima permite q...
Page 37 - COMO USAR EL HORNO DE GAS; CARACTERISTICAS GENERALES
37 Asegúrese que las agarraderas de las ollas o cacerolas no sobrepasen el borde de la cocina, para evitar que se volteen por accidente. Esto también hace más difícil que los niños alcancen las agarraderas de las ollas o cacerolas. COMO USAR EL HORNO DE GAS CARACTERISTICAS GENERALES El horno viene...
Page 38 - TEMPERATURAS DEL HORNO A GAS
38 CALENTADOR DEL HORNO Permite cocción normal del horno. El flujo de gas al CALENTADOR se regula con un termostato que permite que la temperatura del horno se mantenga constante. El control de la temperatura se asegura con un termostato localizado en el interior del horno. El termostato se debe m...
Page 39 - ENCENDIDO DEL CALENTADOR DEL HORNO
39 ENCENDIDO DEL CALENTADOR DEL HORNO El termostato permite el control automático de la temperatura. El suministro de gas al calentador del horno se controla con una llave termostática de dos lados (calentador del horno y de la parrilla) con un elemento de llama-falla. Para encender el calentador ...
Page 41 - Mantenga los niños fuera de alcance.
41 USANDO LA PARRILLA (BROILING) Muy importante: el calentador de la parrilla se debe usar siempre con la puerta del horno cerrada. Posicione la rejilla en el segundo nivel de arriba hacia abajo. -Encienda el calentador de la parrilla, tal como explicado en los párrafos anteriores. -Coloque los alim...
Page 42 - CUIDADO Y MANTENIMIENTO; RECOMENDACIONES GENERALES; Receptáculo polarizado de 3 puntas conectado a tierra.; PARTES ESMALTADAS
42 CUIDADO Y MANTENIMIENTO RECOMENDACIONES GENERALES Receptáculo polarizado de 3 puntas conectado a tierra. ADVERTENCIA: Riesgo de choque eléctrico Enchufe a un receptáculo de 3 puntas conectado a tierra. No remueva la tercera punta del enchufe. No use un adaptador. Fuego, choque eléctrico o muert...
Page 43 - HORNILLAS Y REJILLAS
43 DENTRO DEL HORNO Esto se debe limpiar regularmente, Con el horno tibio, limpie las paredes internas con un trapito mojado en agua jabonosa muy caliente u otro producto similar. VALVULAS DE GAS En el caso que haya fallas en las válvulas de gas, llame al Departamento de Servicio. NOTA : El bomb...
Page 44 - SACANDO LA PUERTA DEL HORNO; NIVELANDO LA COCINA
44 SACANDO LA PUERTA DEL HORNO – Para facilitar la limpieza del horno se puede remover la puerta. Por favor siga estas instrucciones cuidadosamente: – La puerta del horno se puede sacar muy fácilmente siguiendo estas instrucciones: – Abra la puerta completamente. (Figura 1) – Levante los ganchos d...
Page 45 - INSTALACION DEL ELEMENTO ANTI-VOLTEO
45 INSTALACION DEL ELEMENTO ANTI-VOLTEO Para reducir el riesgo que la cocina se voltee debido a uso indebido de esta o de la puerta del horno, la cocina debe ser asegurada a su sitio instalando correctamente el elemento anti-volteo empacado con el electrodoméstico. • Coloque el elemento anti-volte...
Page 46 - SÉCURITÉ RANGE; DANS LE COMMONWEALTH DU MASSACHUSETTS
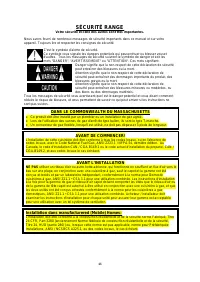
46 SÉCURITÉ RANGE Votre sécurité et celle des autres sont très importantes. Nous avons fourni de nombreux messages de sécurité importants dans ce manuel et sur votre appareil. Toujours lire et respecter les consignes de sécurité . C'est le symbole d'alerte de sécurité. Ce symbole vous signale les da...
Page 47 - SÉCURITÉ IMPORTANTS
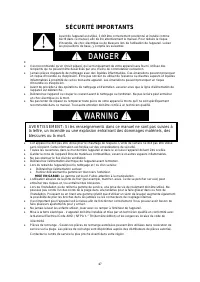
47 SÉCURITÉ IMPORTANTS Avant de l'appareil est utilisé, il doit être correctement positionné et installé comme décrit dans ce manuel, afin de lire attentivement le manuel. Pour réduire le risque d'incendie, de choc électrique ou de blessure lors de l'utilisation de l'appareil, suivez les précautions...
Page 48 - LE SUPPORT ANTI-BASCULEMENT; AVERTISSEMENT; TOUS les cuisinières peuvent basculer
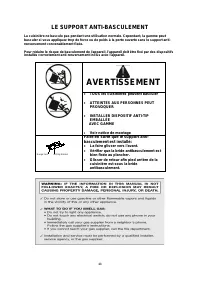
48 LE SUPPORT ANTI-BASCULEMENT La cuisinière ne bascule pas pendant une utilisation normale. Cependant, la gamme peut basculer si vous appliquez trop de force ou de poids à la porte ouverte sans le support anti-renversement convenablement fixée. Pour réduire le risque de basculement de l'appareil, l...
Page 49 - SI VOUS AVEZ BESOIN DE SERVICE
49 AIDEZ-NOUS VOUS AIDER ... Lisez attentivement ce guide. Il est destiné à vous aider à utiliser et entretenir votre nouveau Range gaz correctement. Gardez à portée de main pour répondre à vos questions. Si vous ne comprenez pas quelque chose ou vous besoin de plus d'aide, s'il vous plaît appelez: ...
Page 50 - PIÈCES ET CARACTÉRISTIQUES; Dosseret
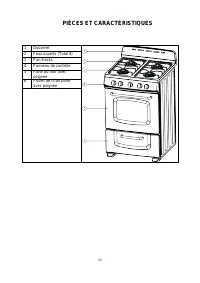
50 PIÈCES ET CARACTÉRISTIQUES 1 Dosseret 2 Feux ouverts (Total 4) 3 Pan Racks 4 Panneau de contrôle 5 Porte du four avec poignée 6 Poulet de chair porte avec poignée
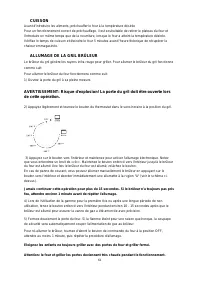
Page 51 - CUISSON; Ouvrez brûleur à; PANNEAU DE CONTRÔLE
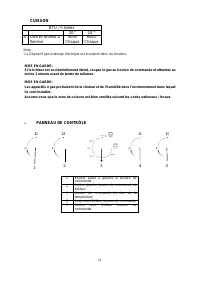
51 CUISSON BTU / h Notes 20 " 24 " 4 Ouvrez brûleur à flamme 9000 Chaque 9000 Chaque PANNEAU DE CONTRÔLE 1 Brûleur avant à gauche le bouton de commande 2 Arrière gauche bouton de commande du brûleur 3 Bouton de commande du four de la température 4 Avant droit Brûleur bouton de commande 5 A...
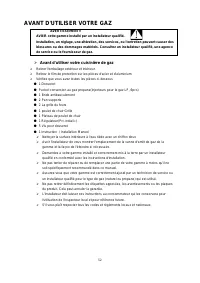
Page 52 - AVANT D'UTILISER VOTRE GAZ; Avant d'utiliser votre cuisinière de gaz
52 AVANT D'UTILISER VOTRE GAZ AVERTISSEMENT!! AVOIR cette gamme installé par un installateur qualifié. Installation, un réglage, une altération, des services, ou l'entretien peuvent causer des blessures ou des dommages matériels. Consultez un installateur qualifié, une agence de service ou le fourni...
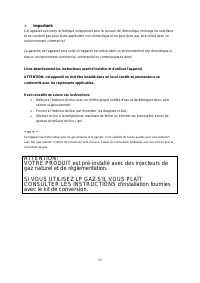
Page 53 - VOTRE PRODUIT est pré-installé avec des injecteurs de
53 Important: Cet appareil est conçu et fabriqué uniquement pour la cuisson de domestique (ménage) la nourriture et ne convient pas pour toute application non-domestique et ne peut donc pas être utilisé dans un environnement commercial. La garantie de l'appareil sera nulle si l'appareil est utilis...
Page 54 - PRÉCAUTIONS IMPORTANTES ET RECOMMANDATIONS
54 PRÉCAUTIONS IMPORTANTES ET RECOMMANDATIONS Après avoir déballé l'appareil, vérifiez qu'il ne soit pas endommagé et que la porte du four ferme correctement. En cas de doute, ne pas l'utiliser et de consulter votre fournisseur ou un technicien professionnel qualifié. Éléments d'emballage (par e...
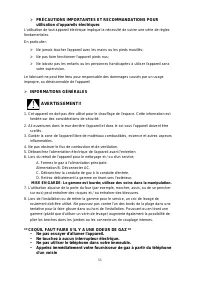
Page 55 - INFORMATIONS GÉNÉRALES; MISE EN GARDE; Ne touchez à aucun interrupteur électrique.
55 PRÉCAUTIONS IMPORTANTES ET RECOMMANDATIONS POUR utilisation d'appareils électriques L'utilisation de tout appareil électrique implique la nécessité de suivre une série de règles fondamentales. En particulier: Ne jamais toucher l'appareil avec les mains ou les pieds mouillés; Ne pas faire fo...
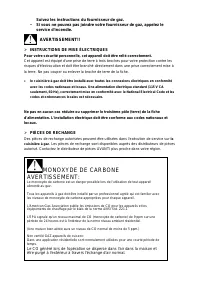
Page 56 - la terre. Ne pas couper ou enlever la broche de terre de la fiche.; PIÈCES DE RECHANGE; MONOXYDE DE CARBONE
56 Suivez les instructions du fournisseur de gaz. • Si vous ne pouvez pas joindre votre fournisseur de gaz, appelez le service d'incendie. AVERTISSEMENT!! INSTRUCTIONS DE MISE ÉLECTRIQUES Pour votre sécurité personnelle, cet appareil doit être relié correctement. Cet appareil est équipé d'une pris...
Page 57 - COMMENT UTILISER LES FEUX TOP; BRÛLEURS À GAZ; FEUX DE GAZ D'ÉCLAIRAGE
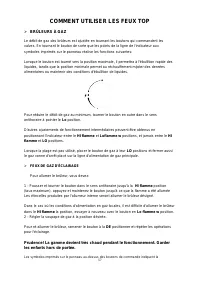
57 COMMENT UTILISER LES FEUX TOP BRÛLEURS À GAZ Le débit de gaz des brûleurs est ajustée en tournant les boutons qui commandent les valves. En tournant le bouton de sorte que les points de la ligne de l'indicateur aux symboles imprimés sur le panneau réalise les fonctions suivantes: Lorsque le bou...
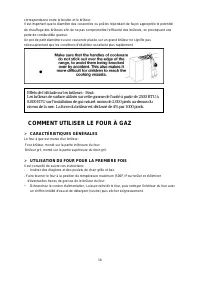
Page 58 - COMMENT UTILISER LE FOUR À GAZ; CARACTÉRISTIQUES GÉNÉRALES; UTILISATION DU FOUR POUR LA PREMIÈRE FOIS
58 correspondance entre le bouton et le brûleur. Il est important que le diamètre des casseroles ou poêles répondant de façon appropriée le potentiel de chauffage des brûleurs afin de ne pas compromettre l'efficacité des brûleurs, en provoquant une perte de combustible gazeux. Un pot de petit diamèt...
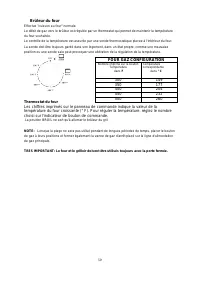
Page 59 - Brûleur du four; Thermostat du four; FOUR GAZ CONFIGURATION
59 Brûleur du four Effectue "cuisson au four" normale. Le débit de gaz vers le brûleur est régulée par un thermostat qui permet de maintenir la température du four souhaitée. Le contrôle de la température est assurée par une sonde thermostatique placée à l'intérieur du four. La sonde doit êt...
Page 60 - Allumage du brûleur du four
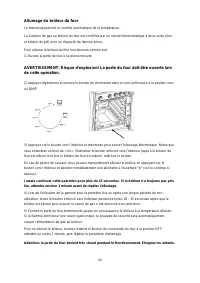
60 Allumage du brûleur du four Le thermostat permet le contrôle automatique de la température. La livraison de gaz au brûleur du four est contrôlée par un robinet thermostatique à deux voies (four et brûleur du gril) avec un dispositif de flamme échec. Pour allumer le brûleur du four fonctionnera co...
Page 62 - Brûleur; Ne jamais obstruer les fentes d'aération du four sur le dosseret.
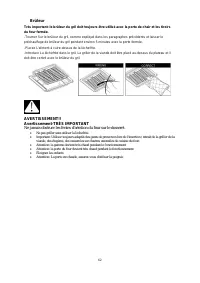
62 Brûleur Très important: le brûleur du gril doit toujours être utilisé avec la porte de chair et les tiroirs du four fermée. -Tourner Sur le brûleur du gril, comme expliqué dans les paragraphes précédents et laisser le préchauffage de brûleur du gril pendant environ 5 minutes avec la porte fermée....
Page 63 - ENTRETIEN; RECOMMANDATION GÉNÉRALE
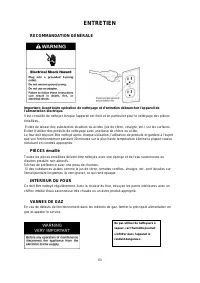
63 ENTRETIEN RECOMMANDATION GÉNÉRALE Important: Avant toute opération de nettoyage et d'entretien débrancher l'appareil de l'alimentation électrique. Il est conseillé de nettoyer lorsque l'appareil est froid et en particulier pour le nettoyage des pièces émaillées., Évitez de laisser des substances ...
Page 64 - FOUR GRILLE Installation et l'enlèvement; RETRAIT DE LA PORTE DU FOUR; croc
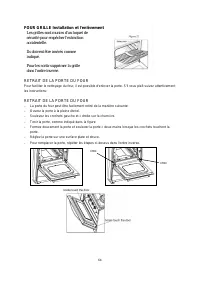
64 FOUR GRILLE Installation et l'enlèvement RETRAIT DE LA PORTE DU FOUR Pour faciliter le nettoyage du four, il est possible d'enlever la porte. S'il vous plaît suivez attentivement les instructions: RETRAIT DE LA PORTE DU FOUR – La porte du four peut être facilement retiré de la manière suivante: –...
Page 66 - PROBLÈMES AVEC VOTRE GAZ?; GUIDE DE DÉPANNAGE
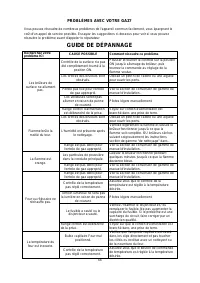
66 PROBLÈMES AVEC VOTRE GAZ? Vous pouvez résoudre de nombreux problèmes de l'appareil commun facilement, vous épargnant le coût d'un appel de service possible. Essayez les suggestions ci-dessous pour voir si vous pouvez résoudre le problème avant d'appeler le réparateur. GUIDE DE DÉPANNAGE Recherche...
Page 67 - SERVICE POUR VOTRE GAZ
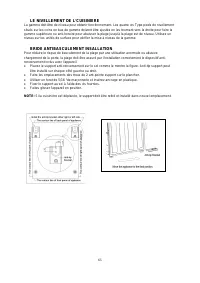
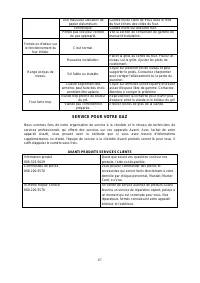
67 Une mauvaise utilisation de papier d'aluminium. Gardez feuille claire de trous dans le fond du four et hors des côtés du four. Vent bloqué. Gardez évent sur dosseret clair. Portée pas fixé pour l'entrée de gaz approprié. Voir la section de conversion de gamme de manuel d'installation. Fumée ou d'...
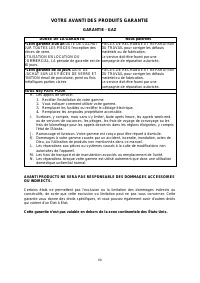
Page 68 - VOTRE AVANTI DES PRODUITS GARANTIE; DURÉE DE LA GARANTIE
68 VOTRE AVANTI DES PRODUITS GARANTIE GARANTIE - GAZ DURÉE DE LA GARANTIE Nous paierons PLEIN garantie d'un an DATE DE L'ACHAT SUR TOUTES LES PIÈCES l'exception des pièces de verre. UTILISATION EN LOCATION OU COMMERCIAL, LA période de garantie est de 90 jours. PIÈCES DE RECHANGE ET REPARATION DU TRA...
Page 69 - Registration Information; Avanti Registration Card
69 Registration Information Thank you for purchasing this fine Avanti product. Please fill out this form and return it to the following address within 100 days from the date of purchase and receive these important benefits: Avanti Products, LLC. P.O.Box 520604 – Miami, Florida 33152 Protect your p...
Page 70 - PRINTED IN CHINA


 Avanti DER20P3S
User Manual
Avanti DER20P3S
User Manual
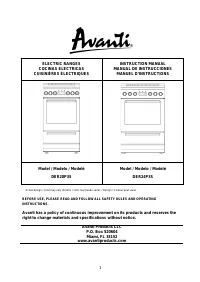 Avanti DER24P3S
User Manual
Avanti DER24P3S
User Manual
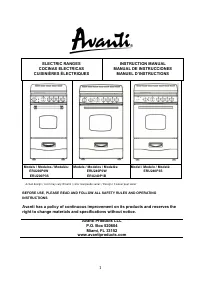
 Avanti DGR20P3S
User Manual
Avanti DGR20P3S
User Manual
 Avanti DGR24P3S
User Manual
Avanti DGR24P3S
User Manual
 Avanti ERU200P3S
User Manual
Avanti ERU200P3S
User Manual
 Avanti GR2011CW
User Manual
Avanti GR2011CW
User Manual
 Avanti GR2414CW
User Manual
Avanti GR2414CW
User Manual